How to unlock Section X, complete all Daily and Weekly Missions, what is the recommended order, and all rewards from the missions, vendors and achievements!
Table of contents
How to unlock the Section X Daily Area
Section X is an area on the planet Belsavis that holds many secrets that the Republic, Empire, and Dread Guard seek to gain control of. These secrets are found in the form of ancient Rakata technology found throughout the various underground sites.
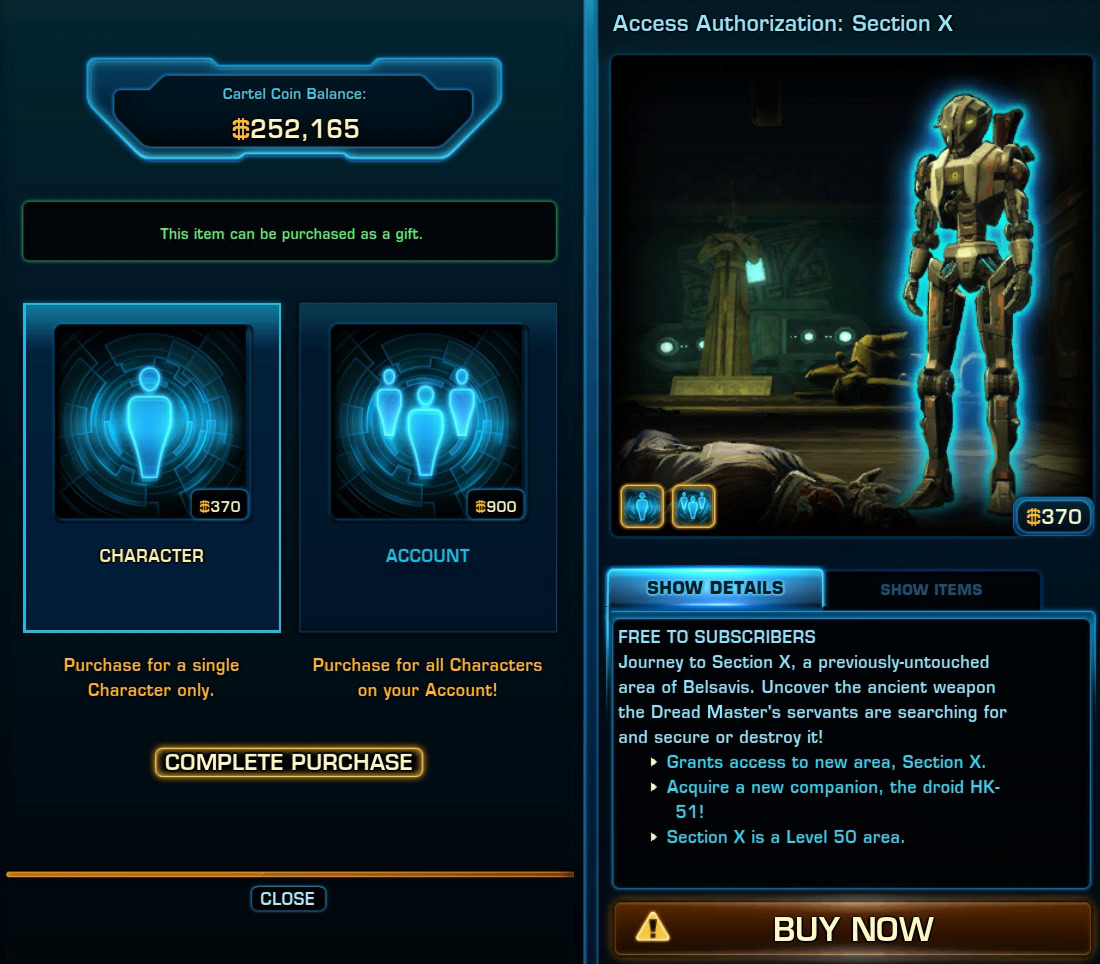
In order to access Section X, you will need to be a subscriber of SWTOR or use the Access Authorization: Section X item from the Cartel Market. The authorization from the Cartel Market will cost you 370 Cartel Coins.
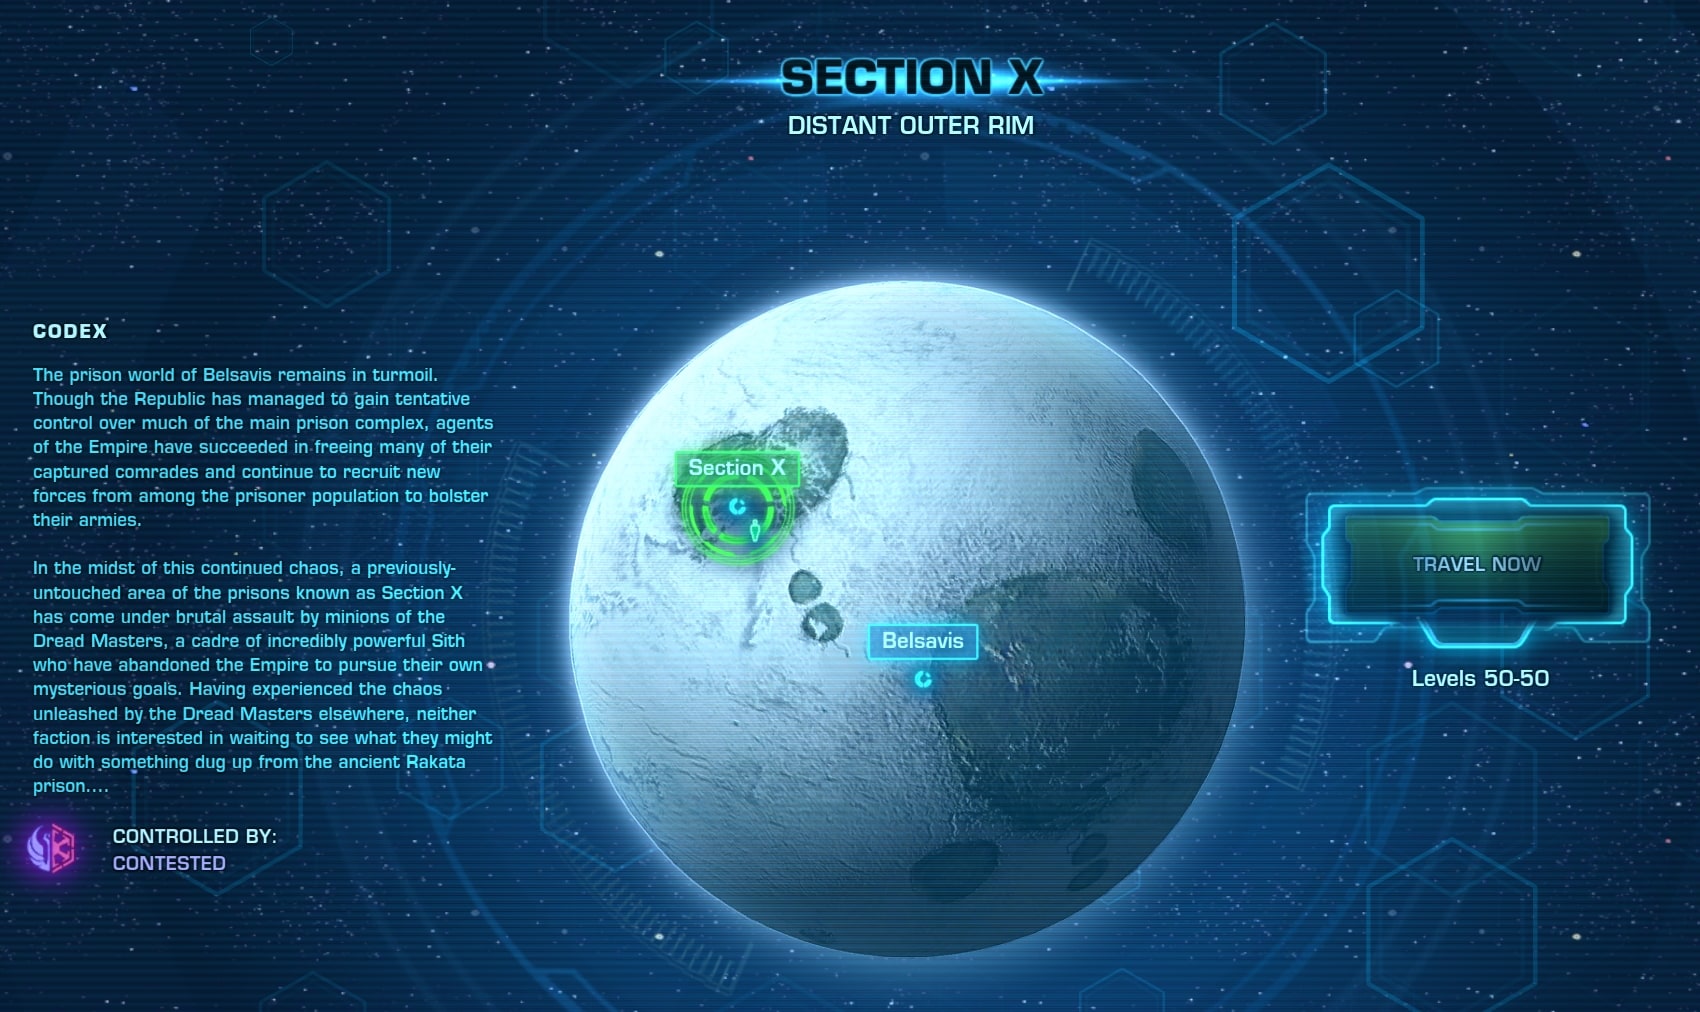
There is no story or level requirement to travel to the Section X area on Belsavis. The area is for level 50 characters. You can travel there at a lower level, but the quests would not be accessible.
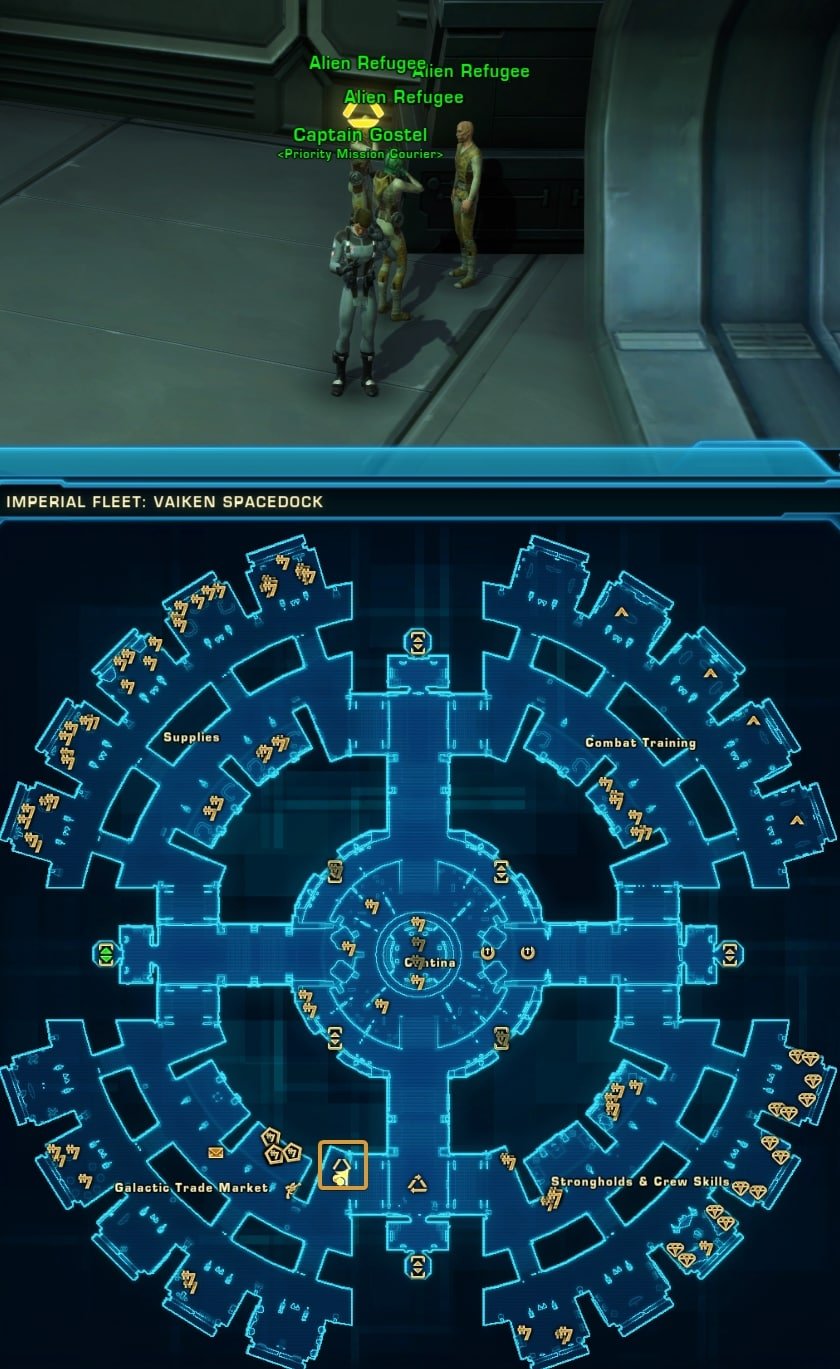
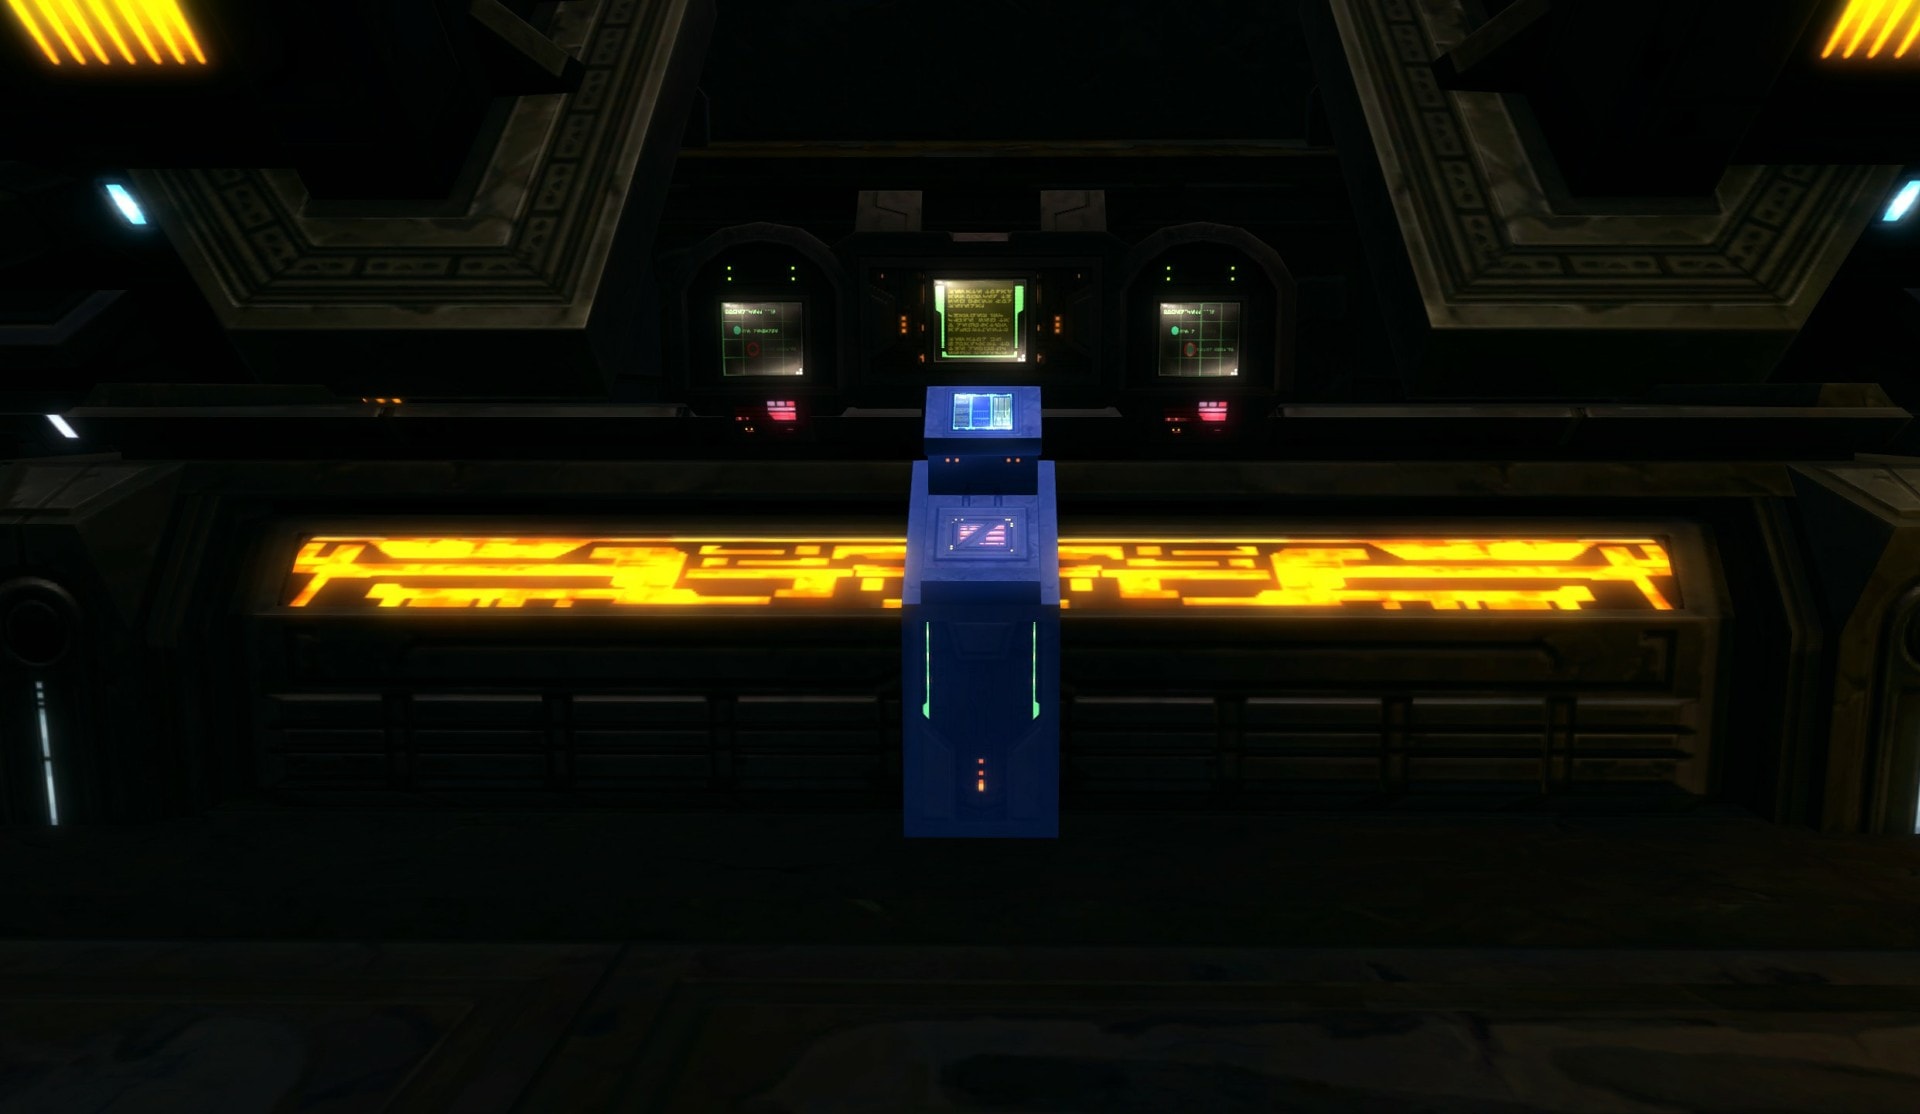
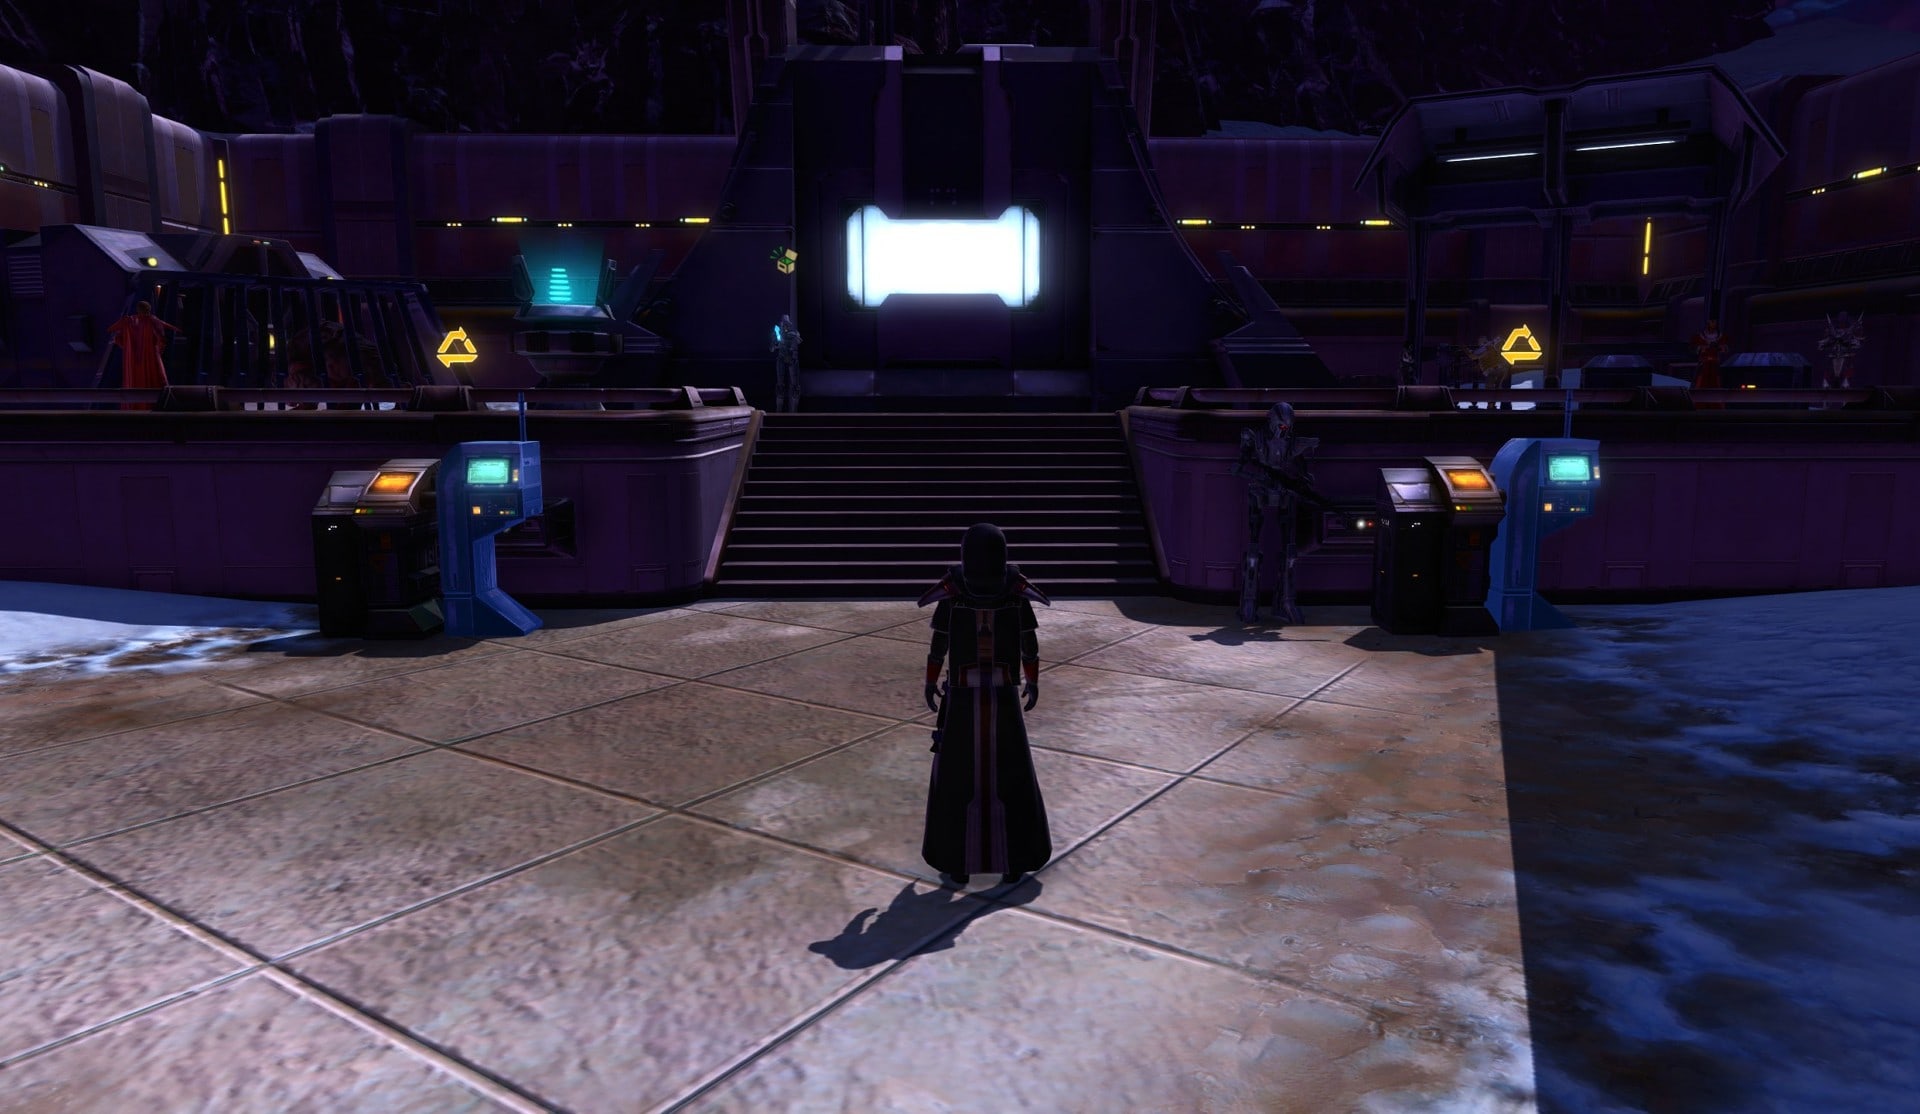
To start the quest chain, go to the Galactic Trade Market area on the Fleet and talk to Captain Gostel (Empire) or General Conlath (Republic).
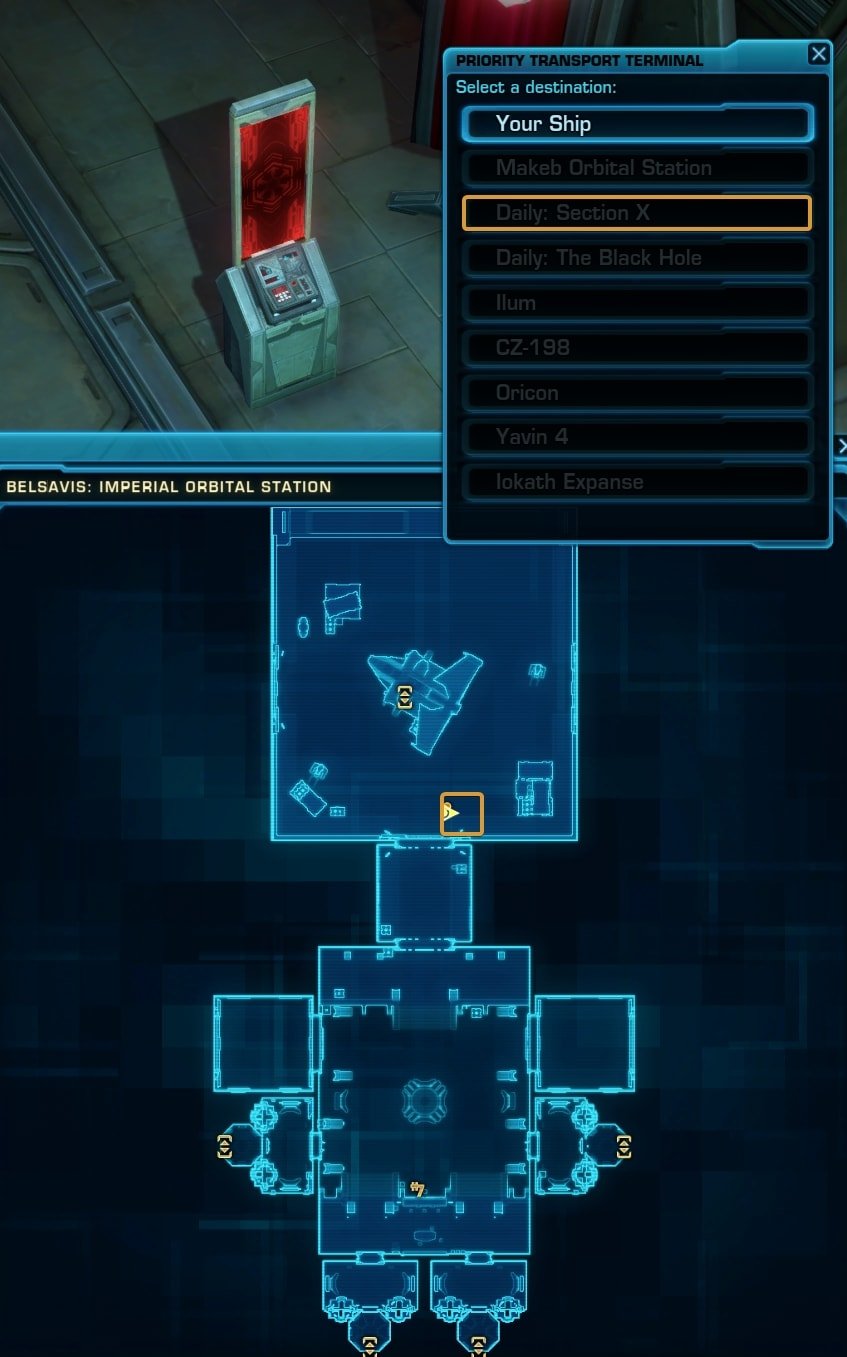
To start the story on Section X and unlock the Daily Quests, you need to be level 50 or higher. They are located on the same spot on the Empire and Republic Fleets. The image below shows the Empire version.
When you open the Galactic Map, find Belsavis in the Distant Outer Rim (bottom of the map) and click on it. Then select the Section X dot to travel to the Daily Area.
Alternatively, you can use a Priority Transport Terminal.
In your time here, you’ll primarily be combatting Dread Guard forces but will occasionally combat opposing factions be it Republic or Empire.
Republic Missions
The following missions are available to players within the Republic.
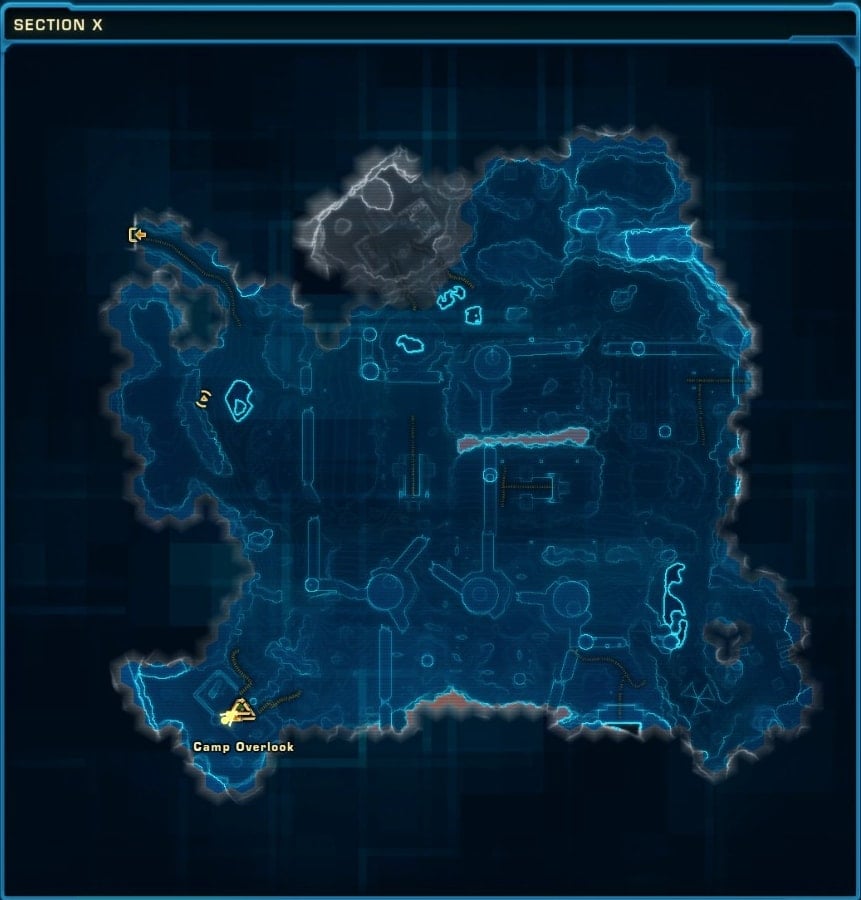
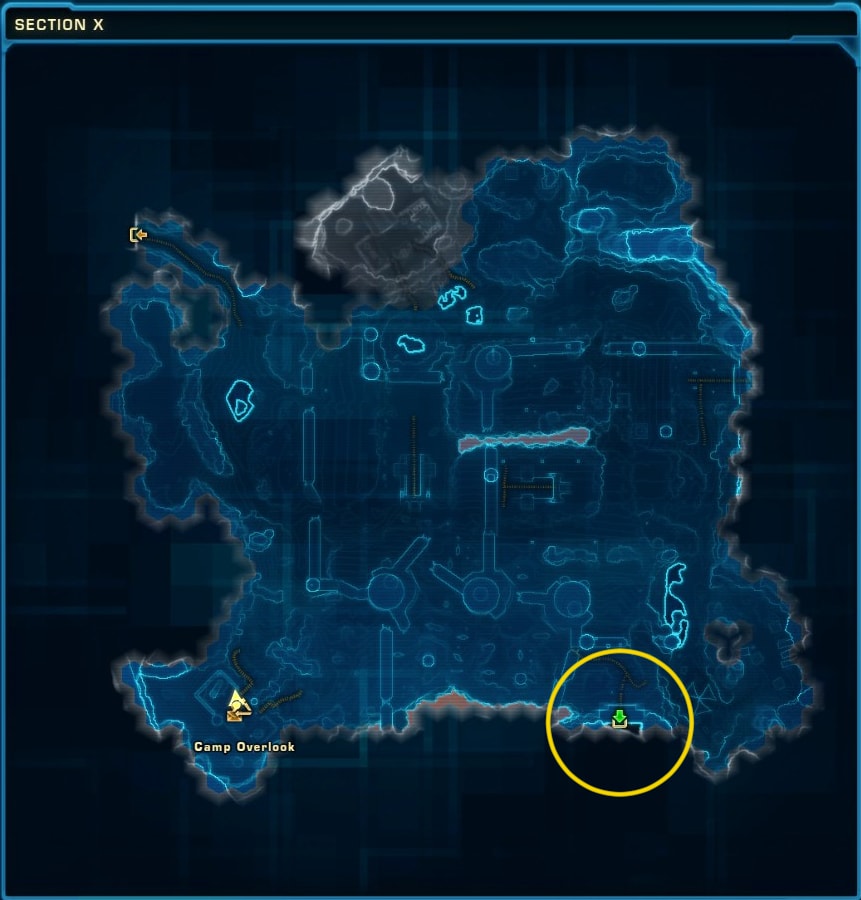
Mission Terminal Location
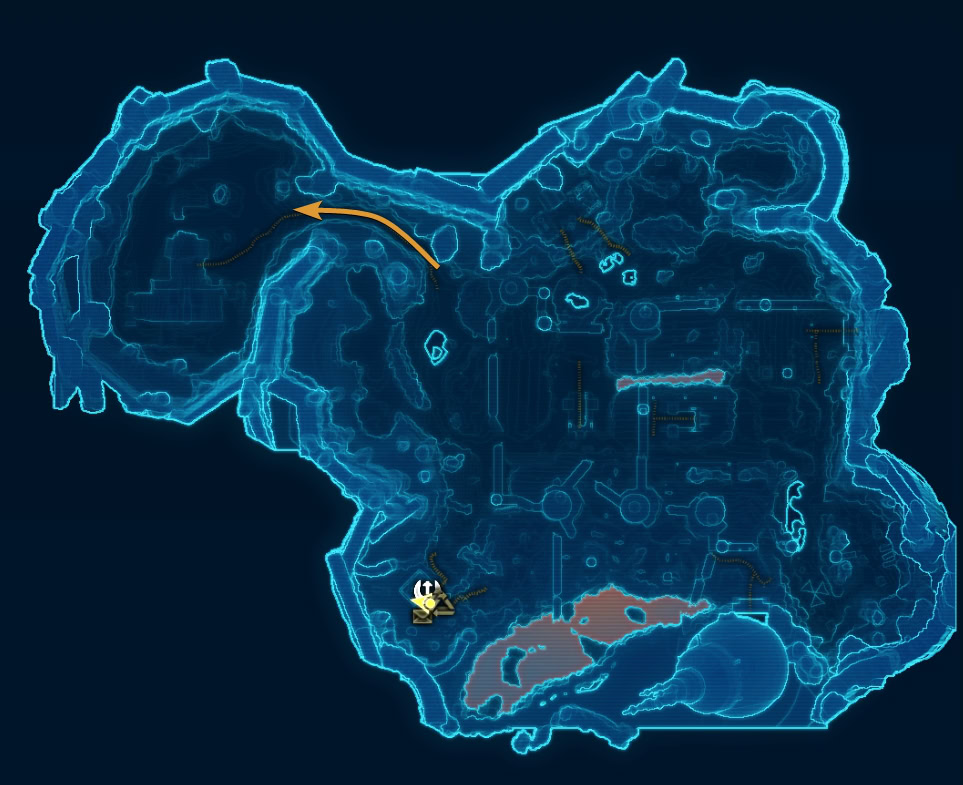
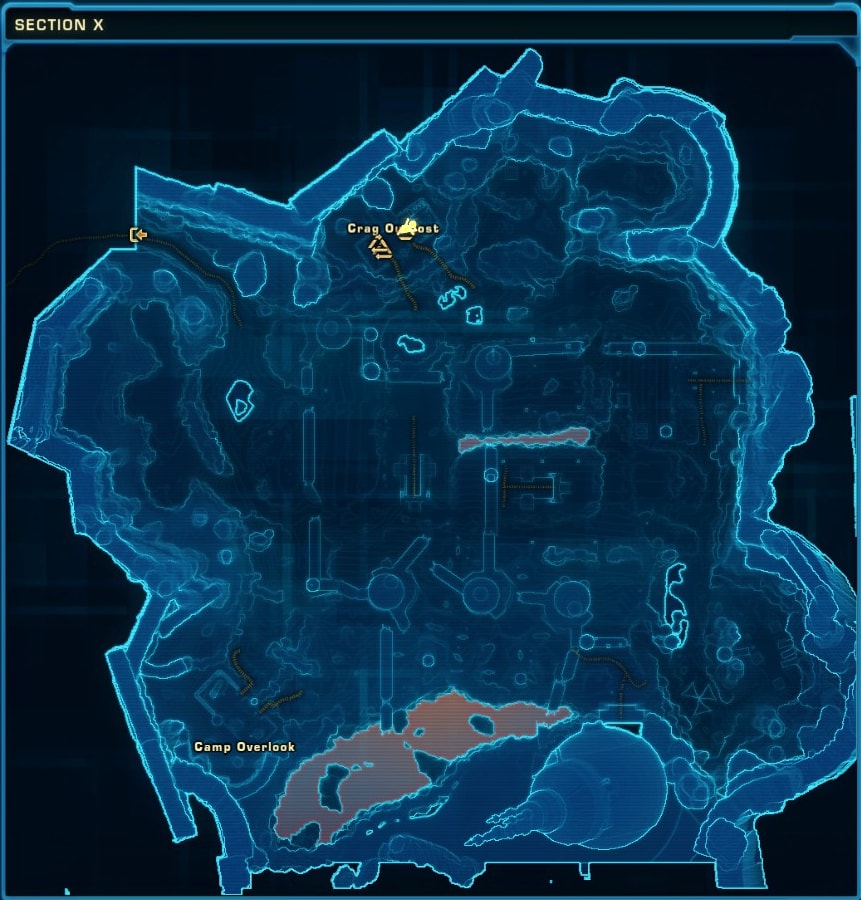
The terminal to retrieve your Weekly and Daily missions are very close to where you’re dropped off at the shuttle pad at Camp Overlook as seen in the map above. The one on the left will give the Weekly and Daily missions while the one on the right will give you the Heroic mission.

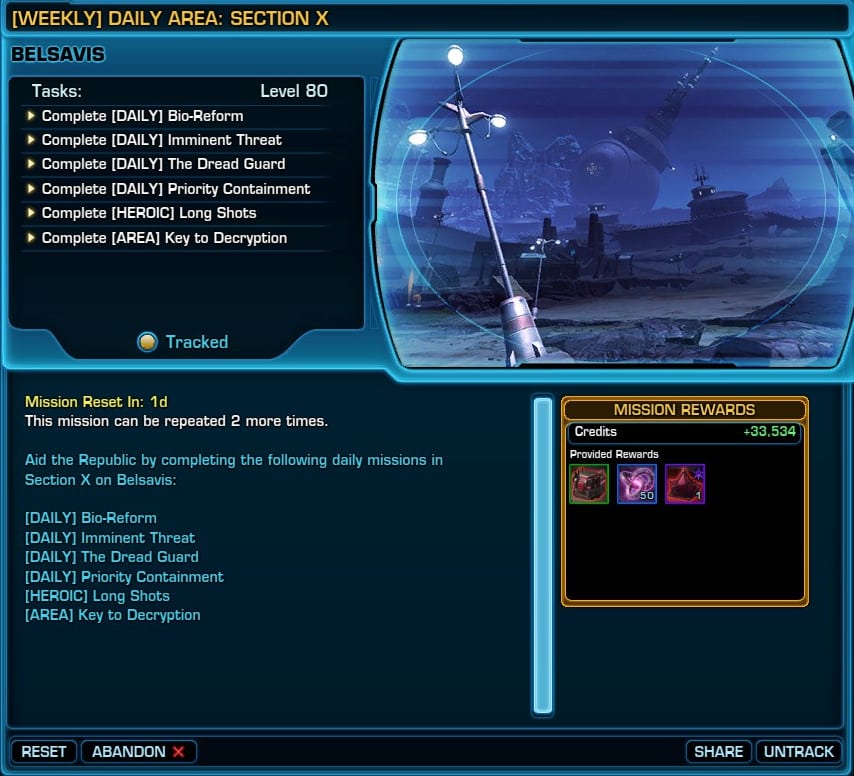
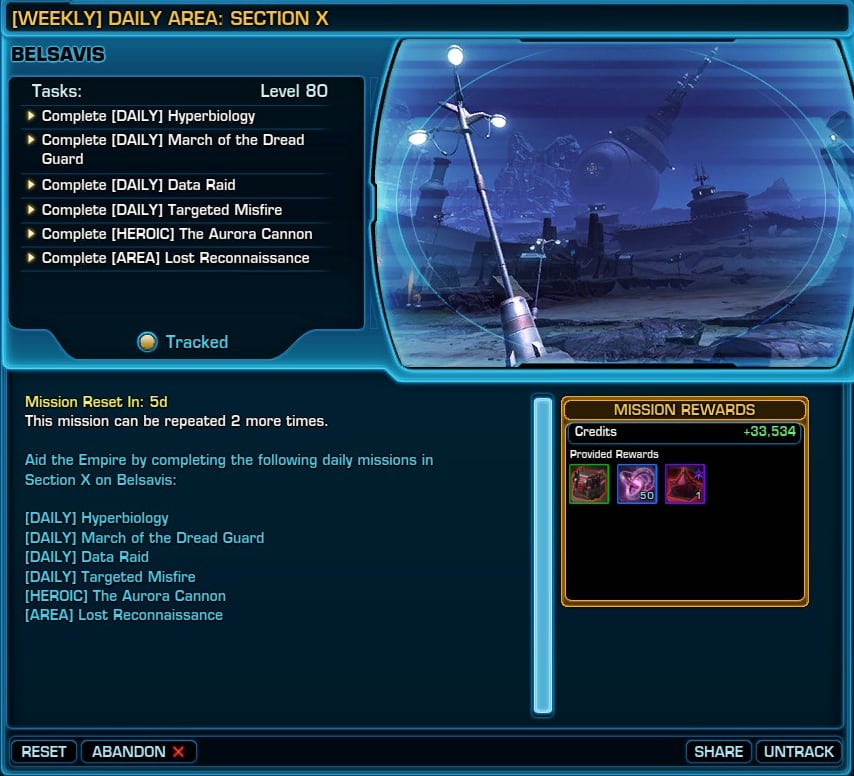
[WEEKLY] DAILY AREA: Section X
Pick up this mission to receive credits, a Noble Decurion Chest, 50 Daily Resource Matrices, and a Dread Guard Holocron reputation item upon completion of the 6 daily missions in Section X.
This quest can be completed 3 times a week, after which you’ll need to wait for the weekly quest reset. Once you complete the quests, return to the terminal to turn them in and complete the weekly.
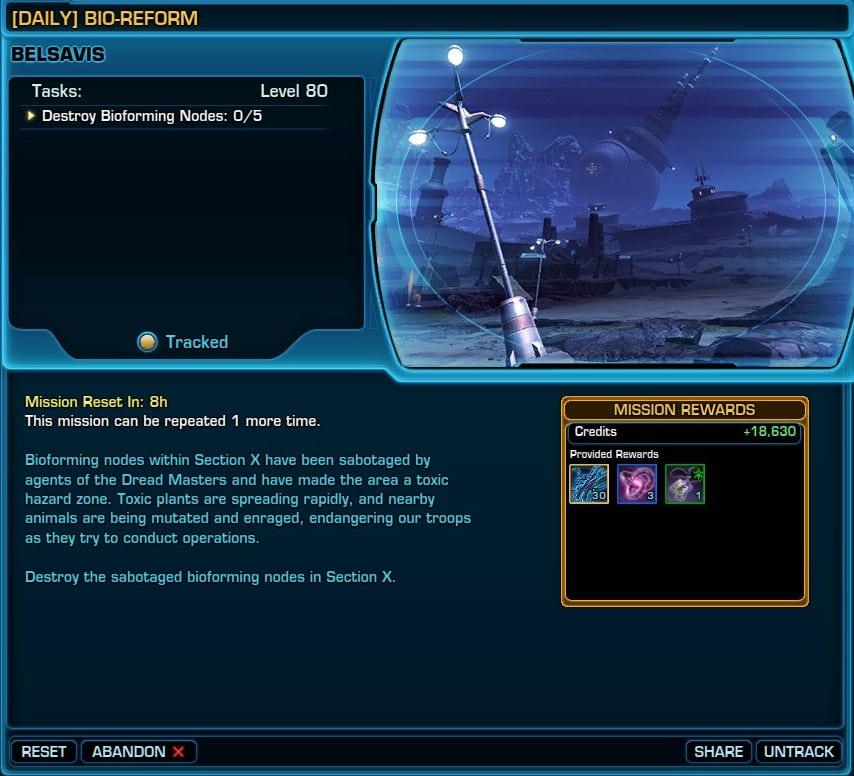
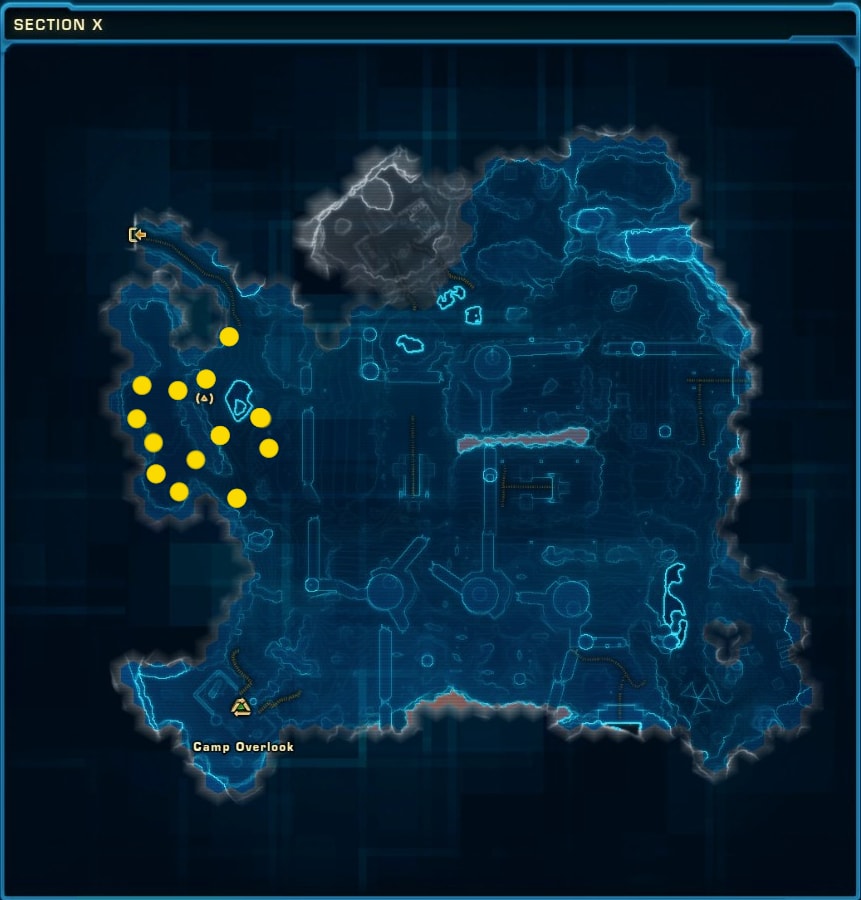
[DAILY] Bio-Reform
For Bio-Reform, you’ll need to head to the Toxic Hazard Zone in the North-West part of the map and destroy 5 Bioforming Nodes. Their locations are in the map above indicated by the yellow circles. Once you destroy 5 of these nodes, you’ll complete the mission.
Bonus Mission: Defeat 25 Bioformed Beasts
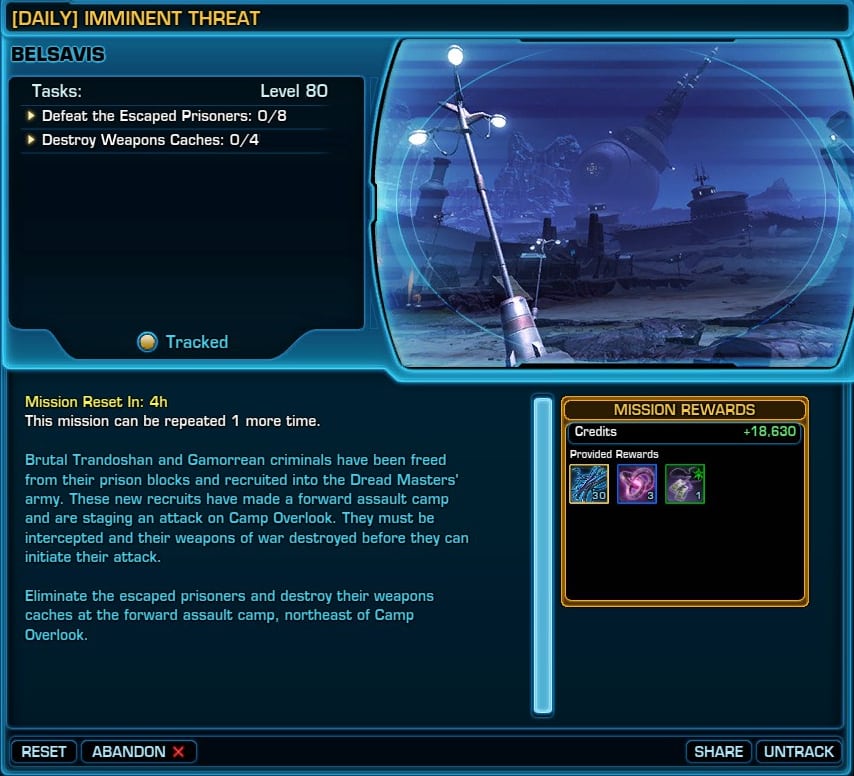
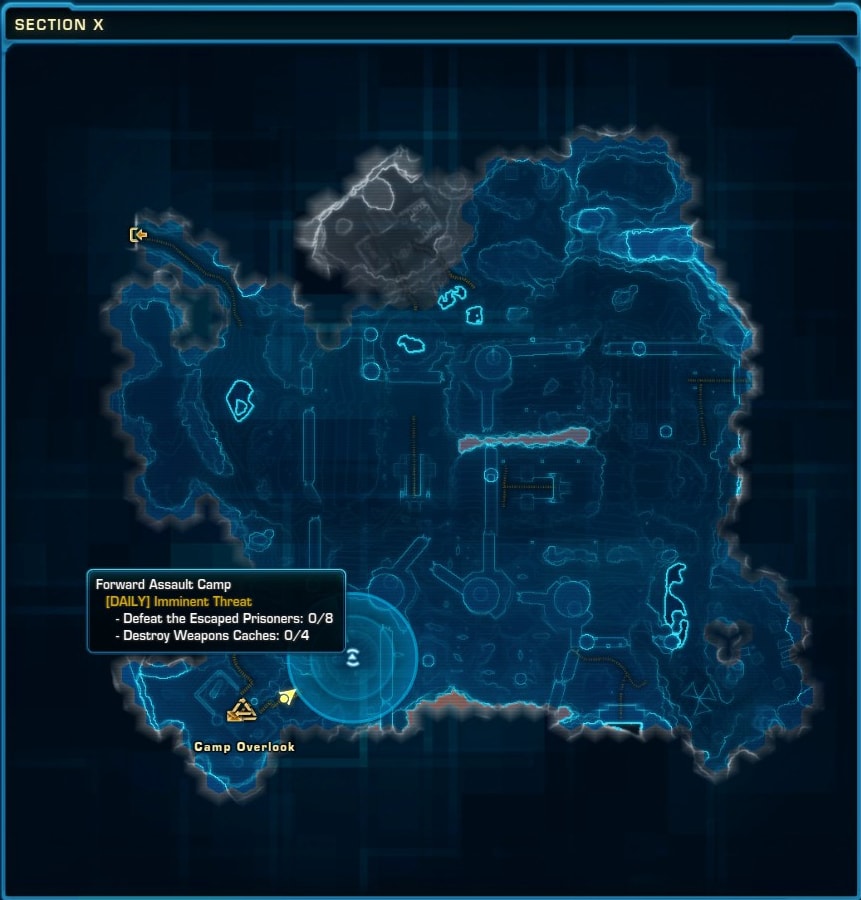
[DAILY] Imminent Threat
This is a very simple quest that’s very close to the Republic Spawn Zone. You’ll just be looking to destroy 4 Weapons Caches and defeat 8 Escaped Prisoners. Everything is very close together so you’ll have no issue finding these and ending the mission quickly and efficiently.
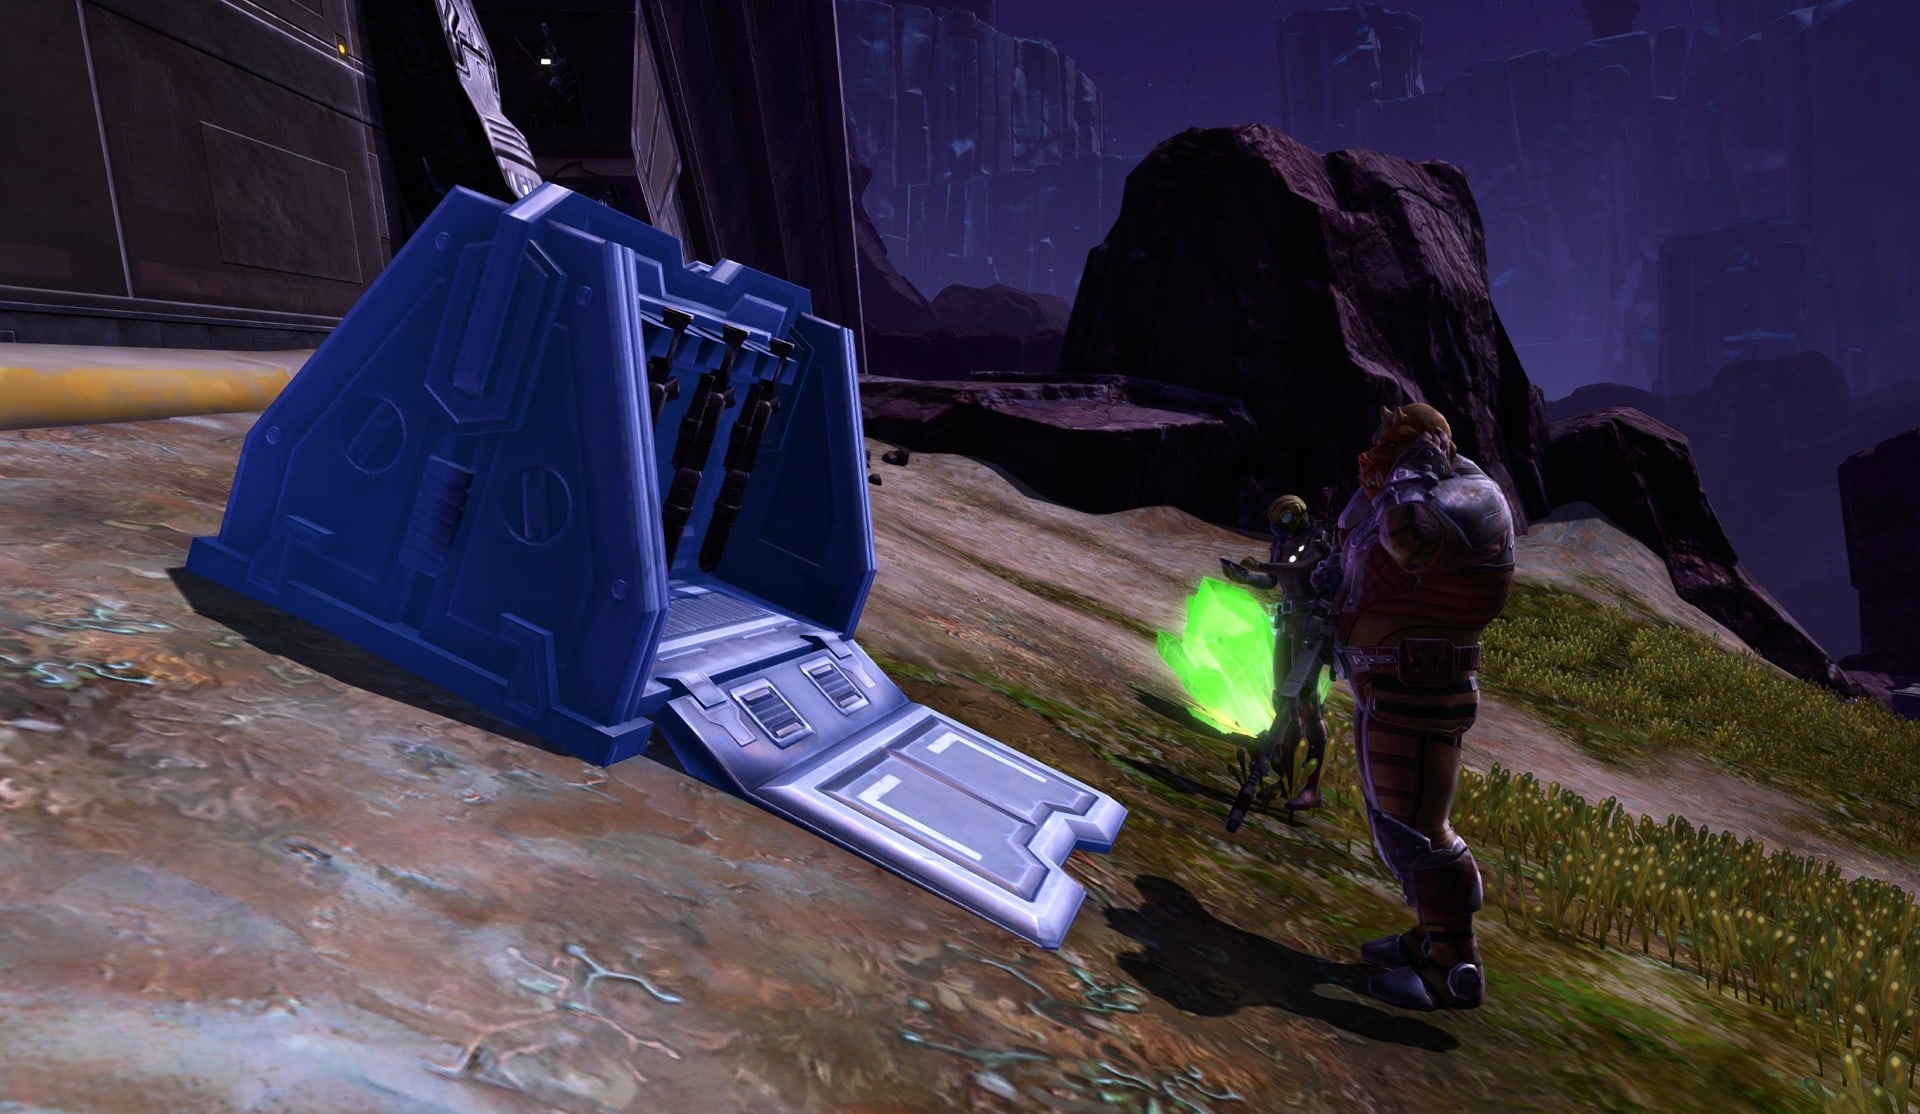
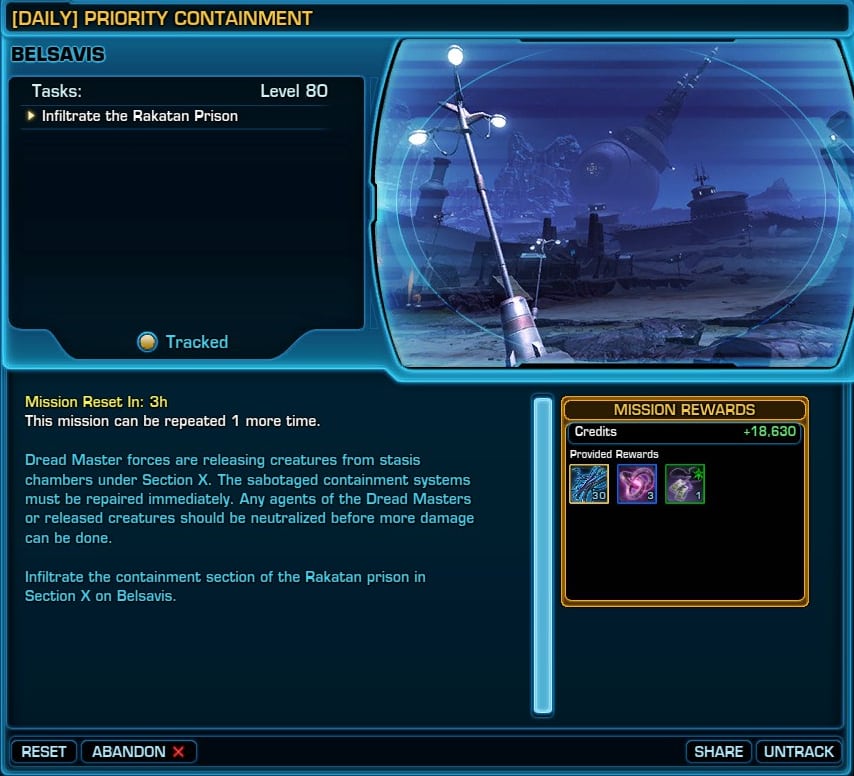
[DAILY] Priority Containment
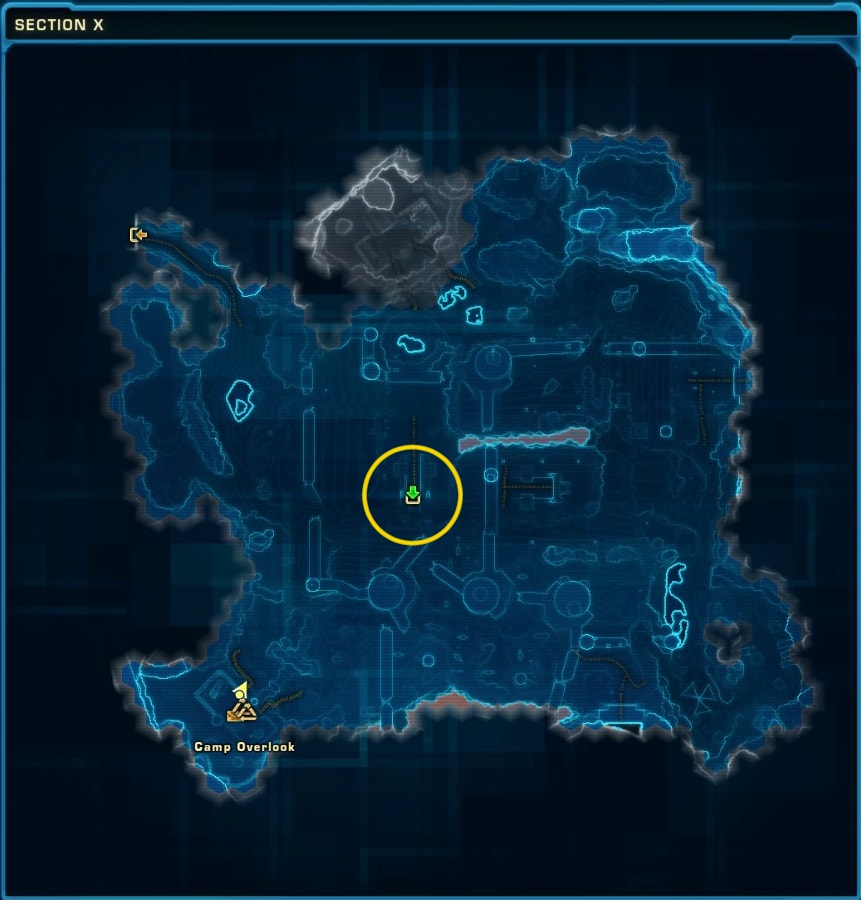
For this quest, head to the Rakatan Prison towards the middle of the map and go inside to initiate the first phase of the mission.
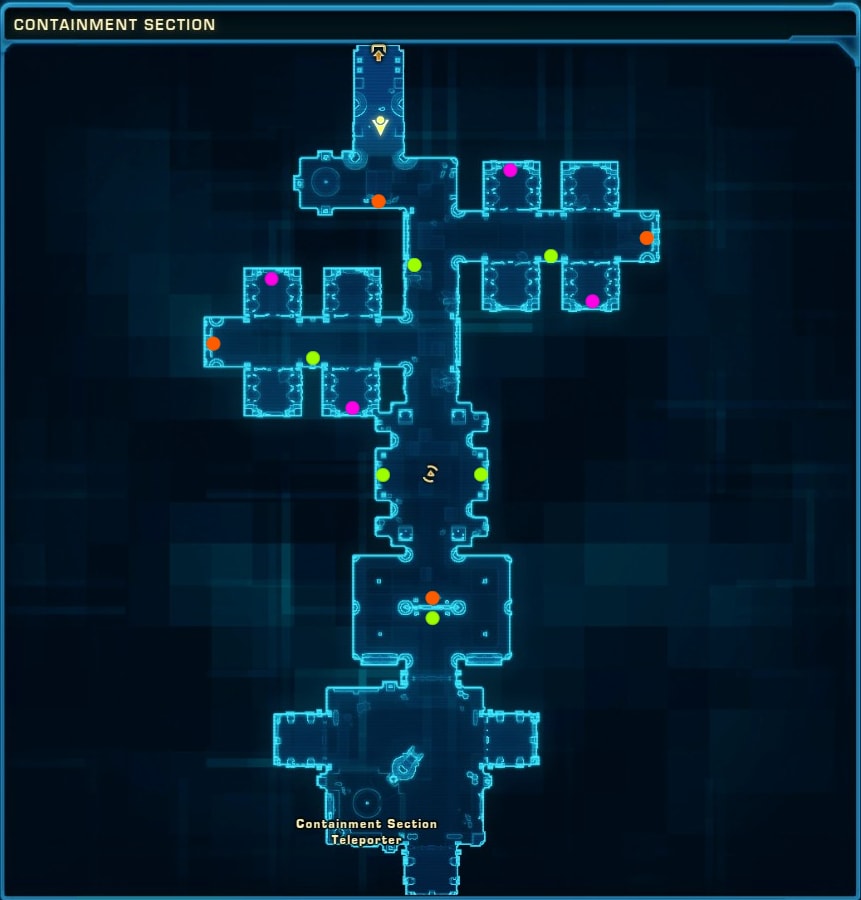
Sentry Turret controls are Orange dots, Security Camera controls are Green dots, and Stasis Chamber controls are Pink dots.
Once inside, you’ll need to secure 4 Stasis Chambers, repair 6 Security Cameras, and reactivate 4 Sentry Turrets. The locations of these objectives are in the map above. Below are images of the various objectives you’ll be looking for.
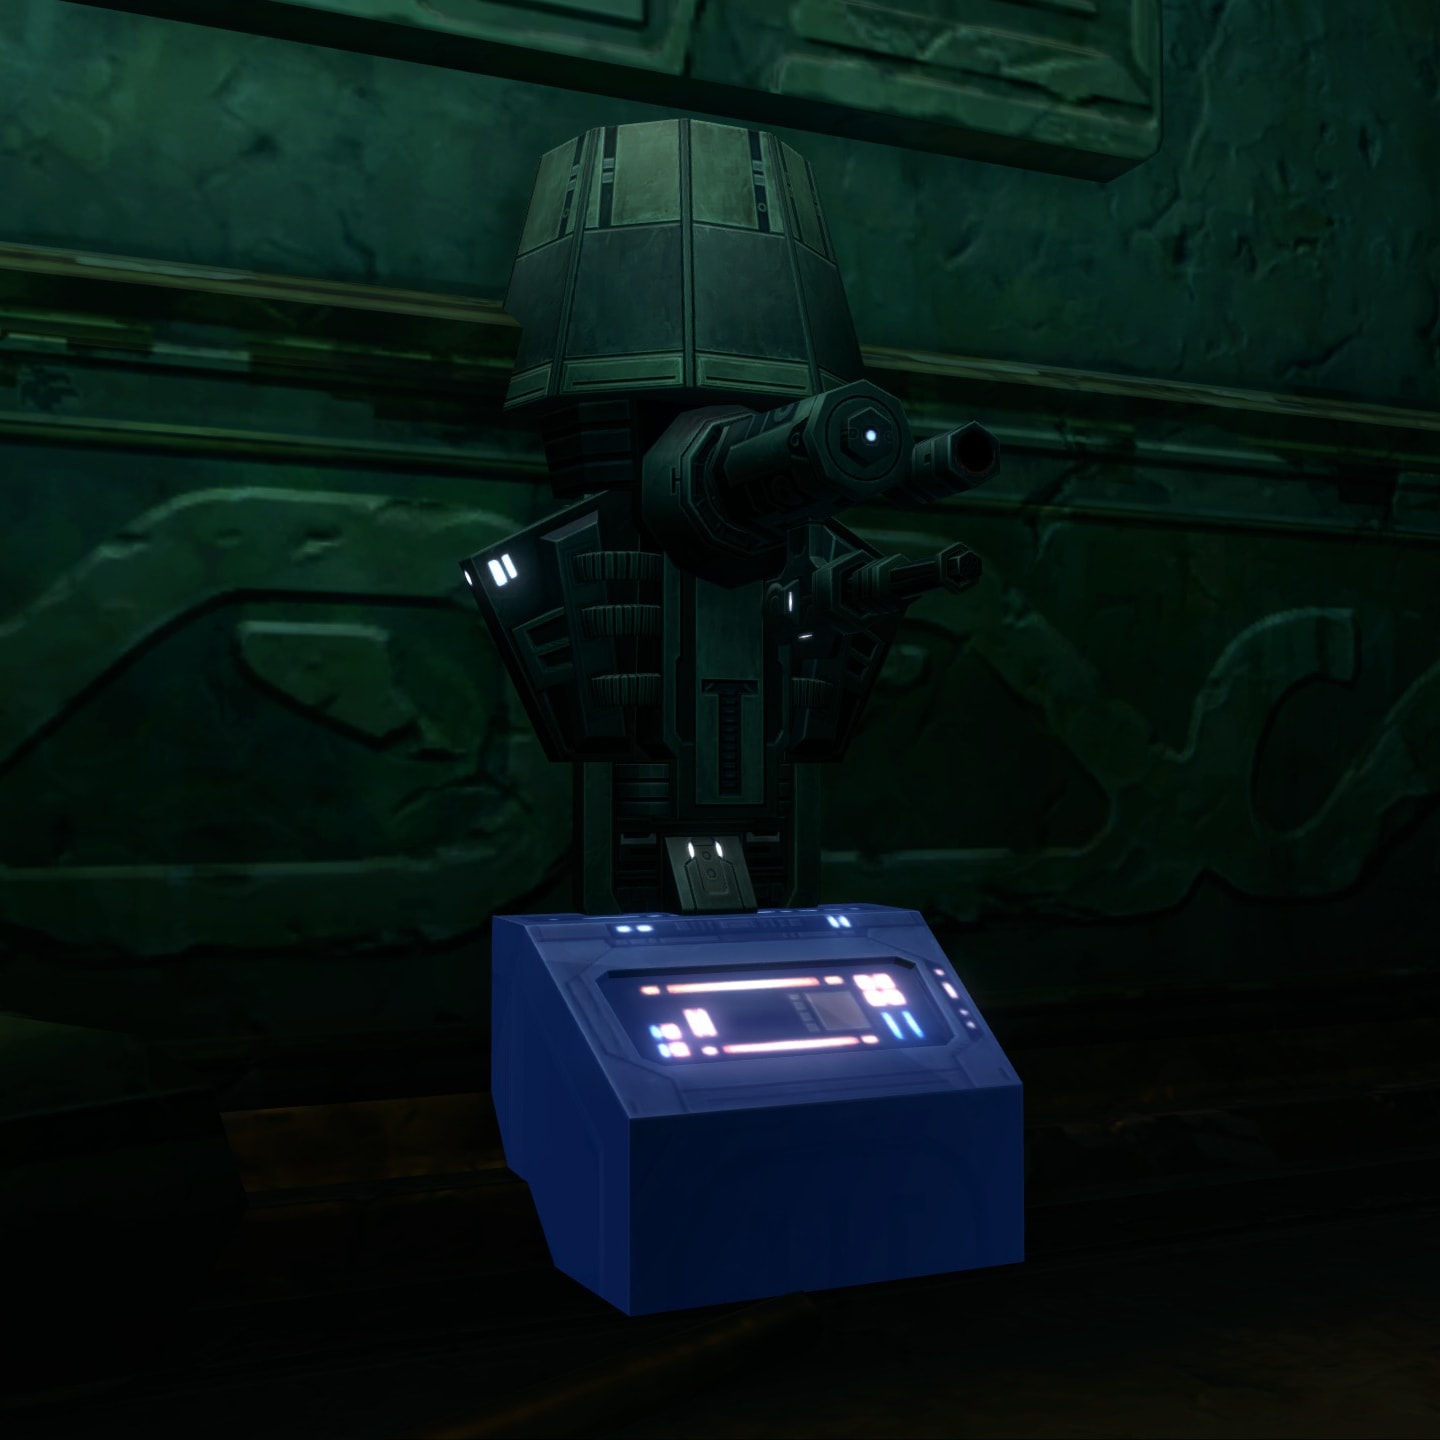
These are the controls for the Sentry Turrets. Sentry Turrets will attack Dread Guard Forces when activated.
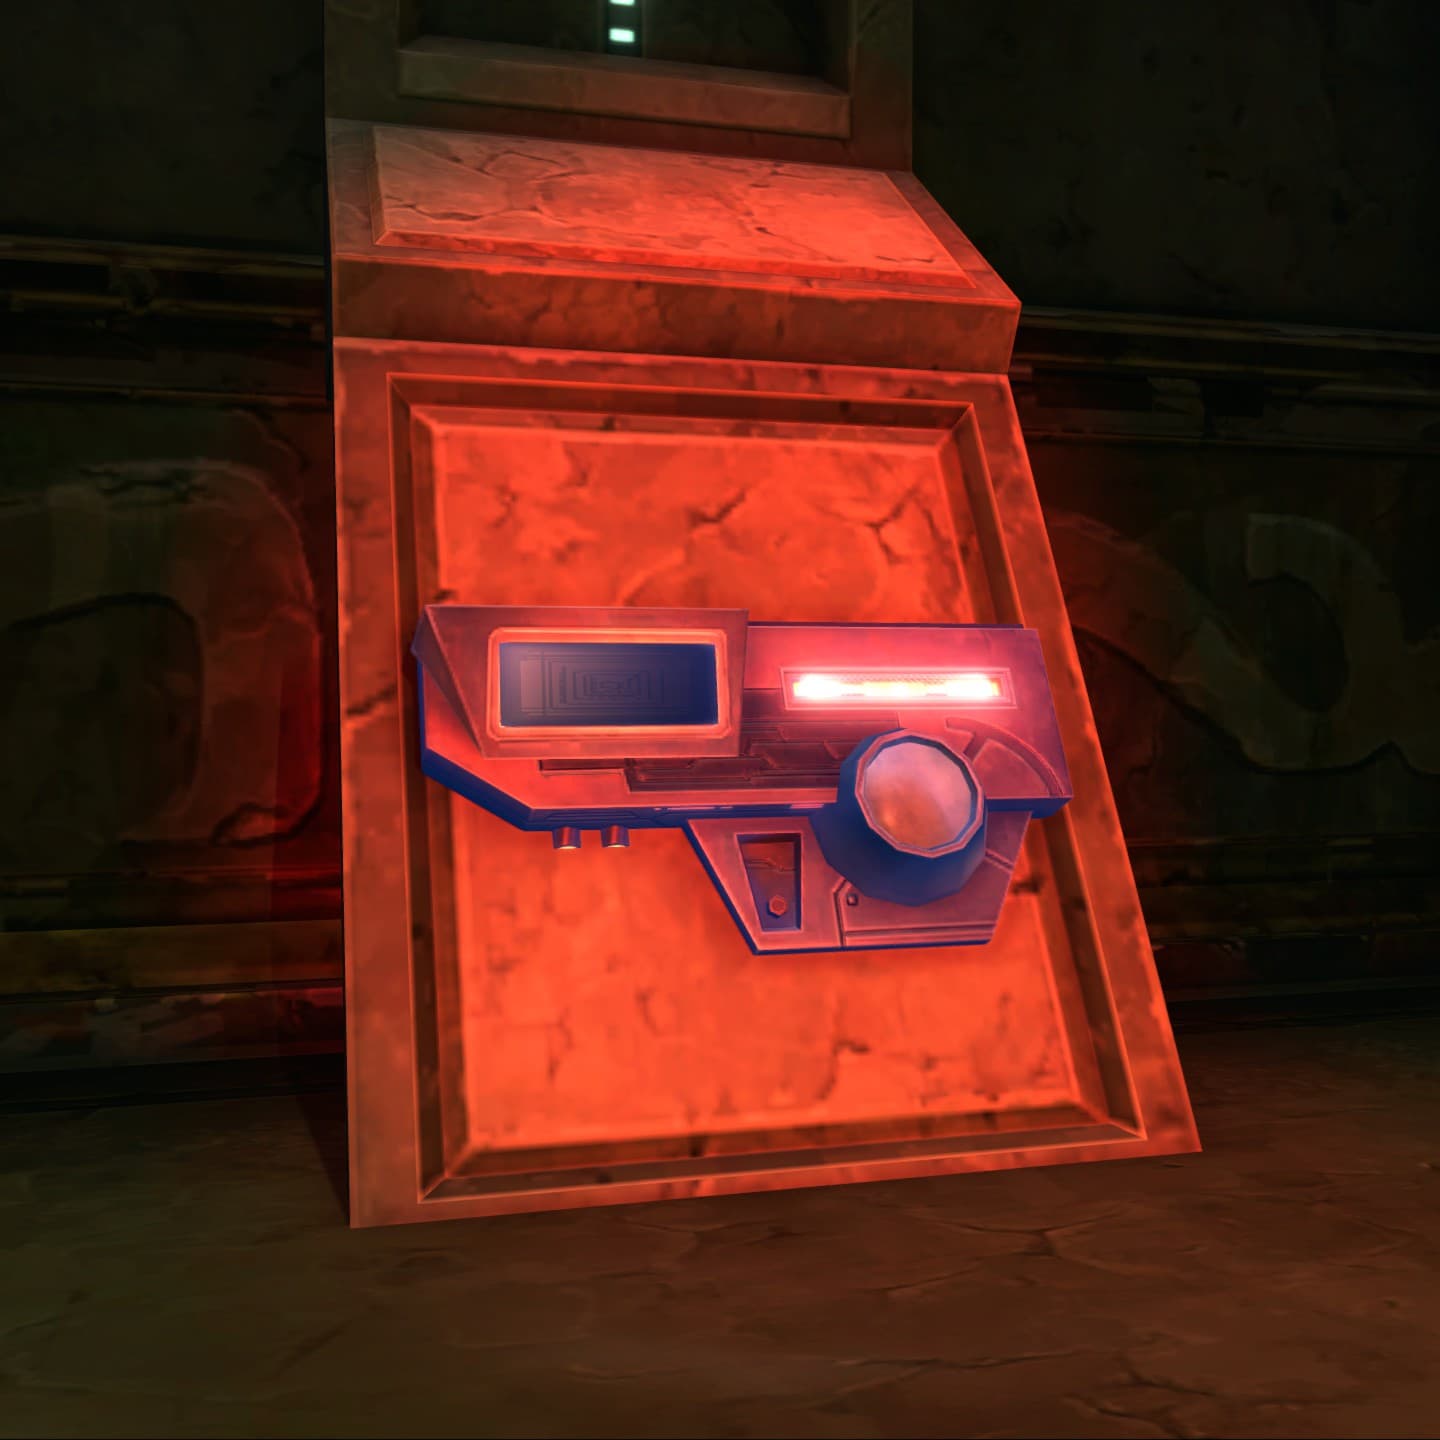
The Security Camera controls are easy to find as they’ll be accompanied by a flashing red light.
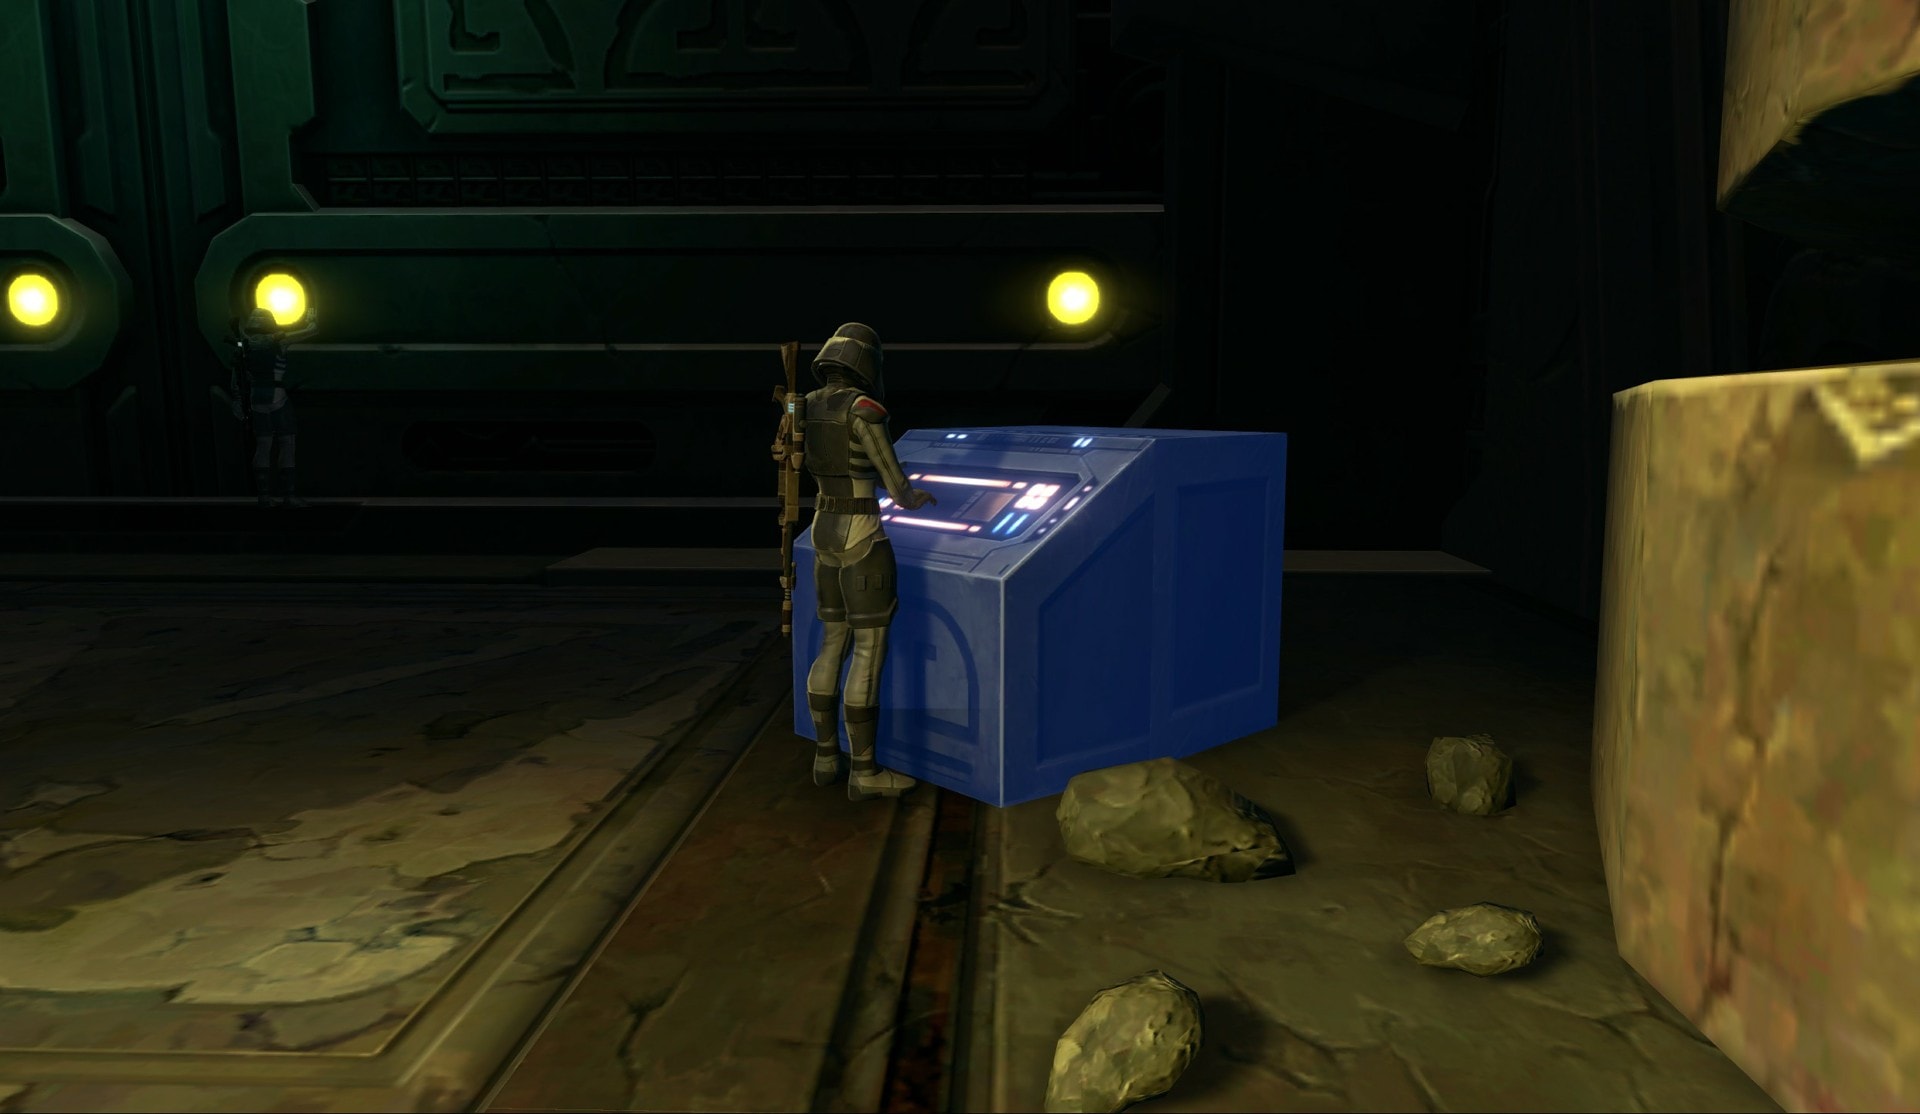
Stasis Controls are within rooms in the East and West wings of the prison. Avoid the rooms with the Released Kintans to save time as you don’t need to fight two Champion rank NPCs at the same time. Once you interact with all the objects above, you’ll begin Phase 2 of the mission.
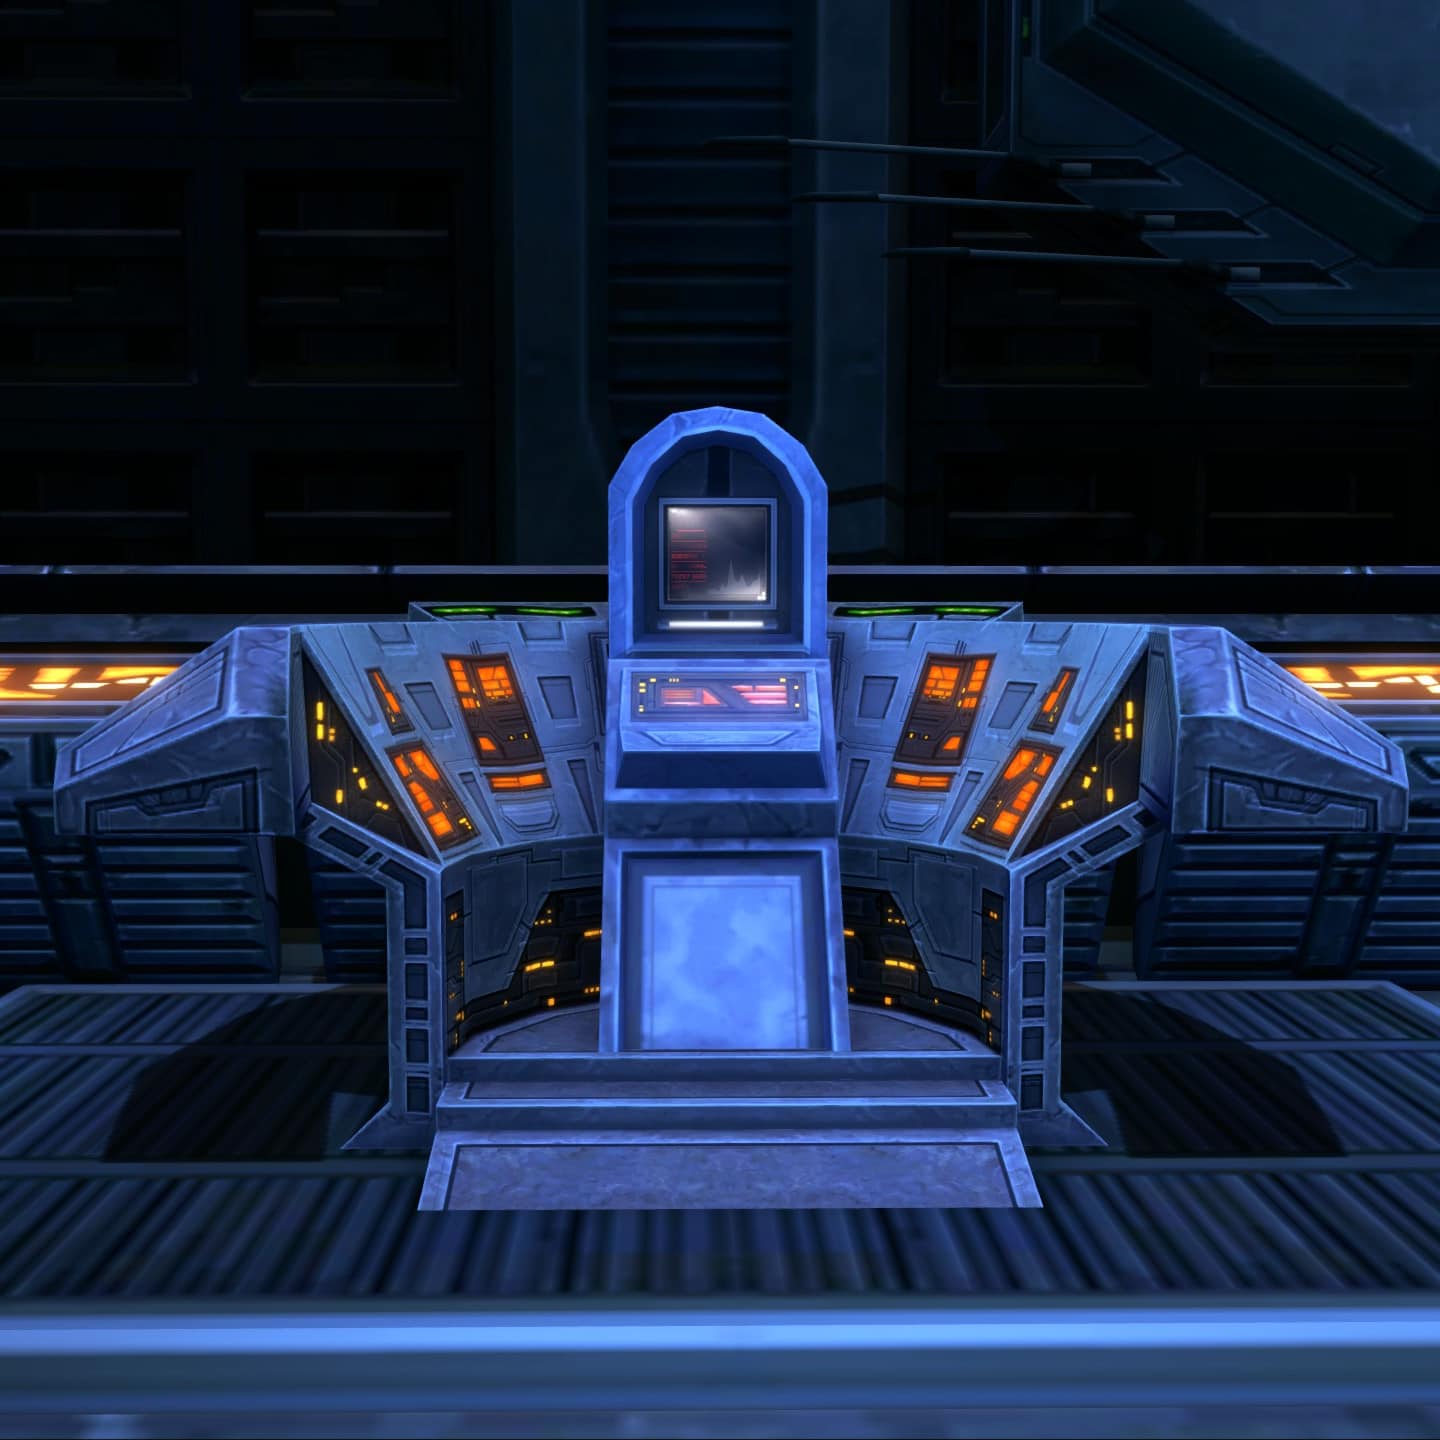
After completing Phase 1, you’ll want to head south and interact with this console to access the Maximum Security Wing.
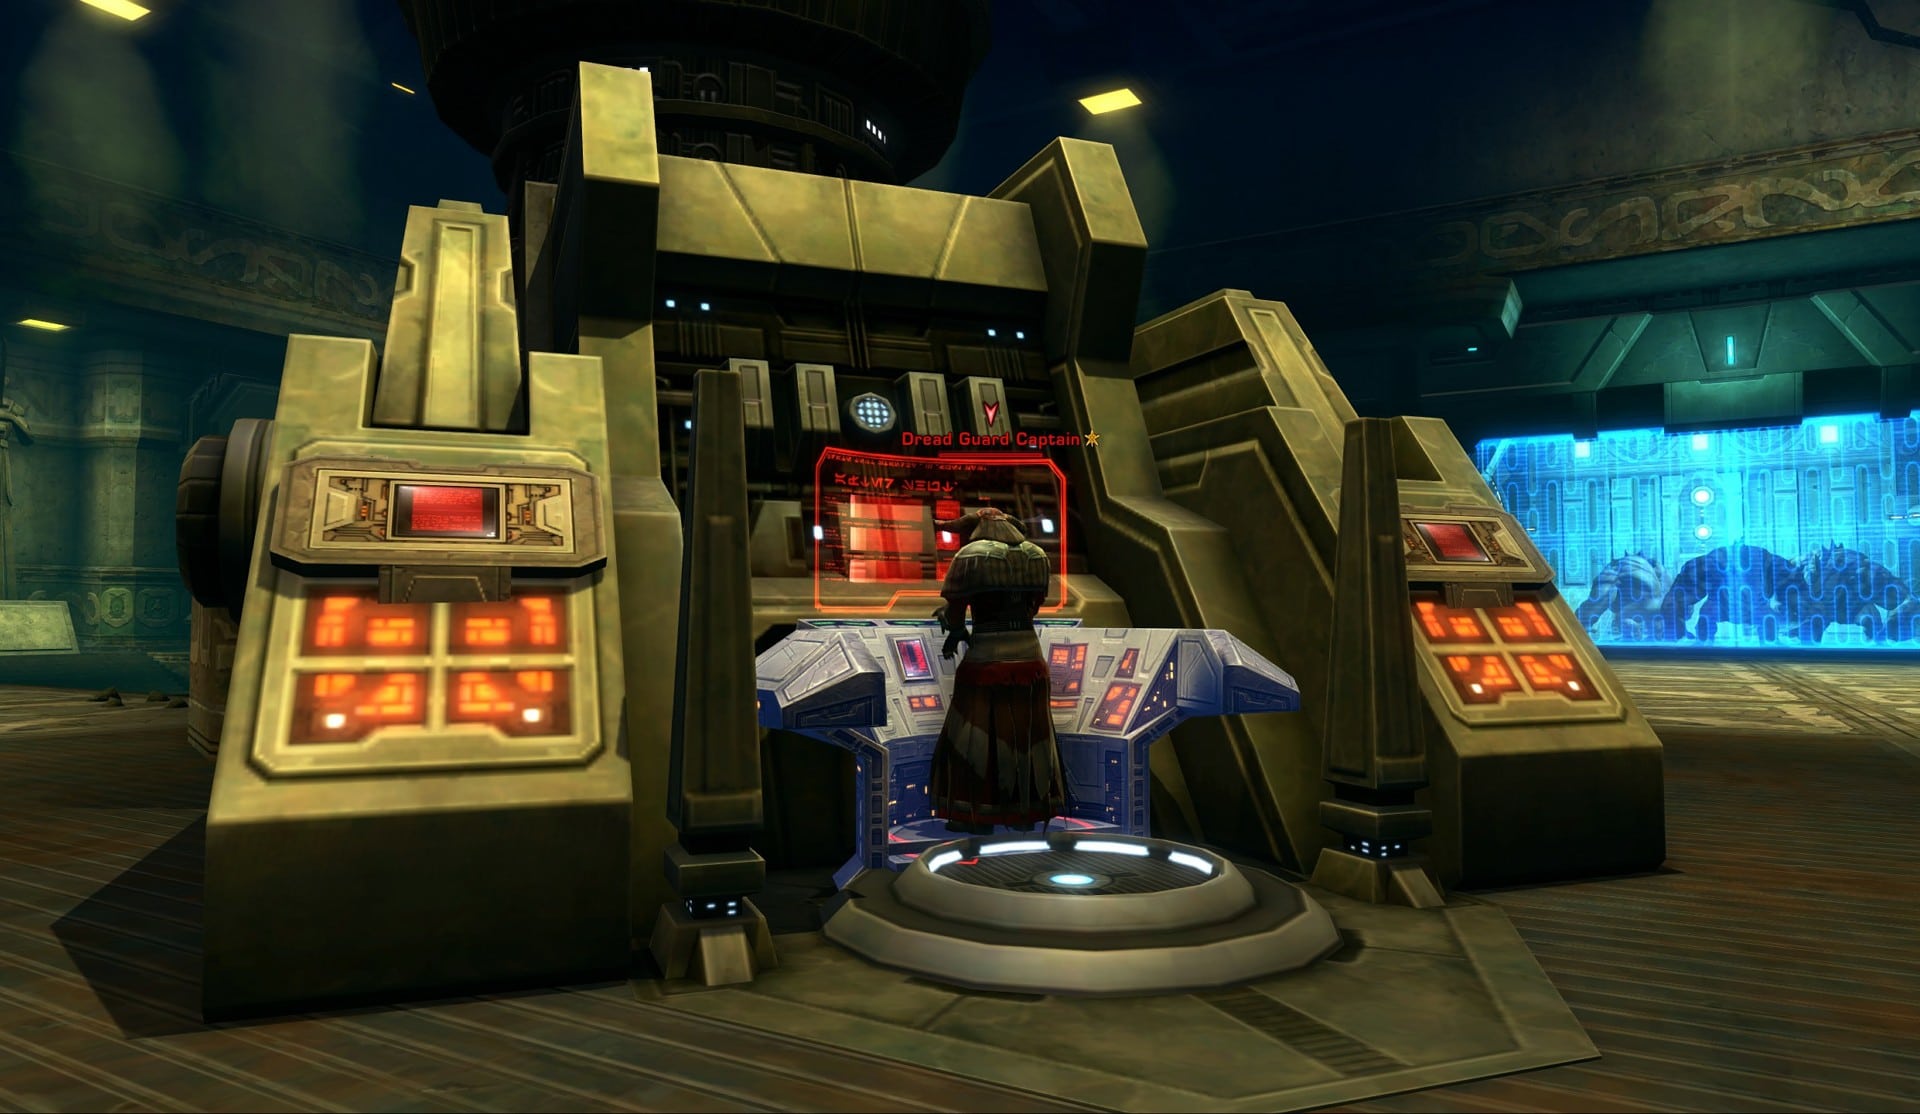
Inside the Maximum Security Wing, you’ll find the Dread Guard Captain you’ll have to defeat and the Primary Stasis Chamber controls that you’ll need to secure. Once you do those two things, the quest will end. Behind the console there’s a teleportation device you can take to teleport you back to the entrance of the prison.
Bonus Mission: Defeat 20 Dread Guard Forces
[DAILY] The Dread Guard
This is one of the longer quests in Section X but it’s very simple if somewhat monotonous.
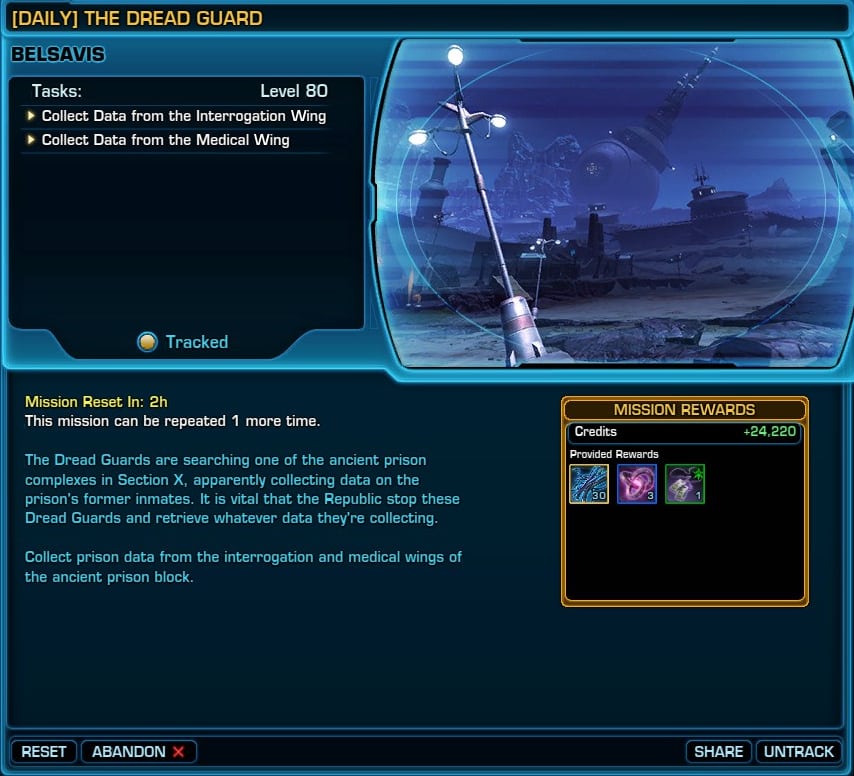
Head to the Ancient Prison Block shown on the map and head down the elevator. It’s a long trip so you may have to wait for the elevator to come back up.
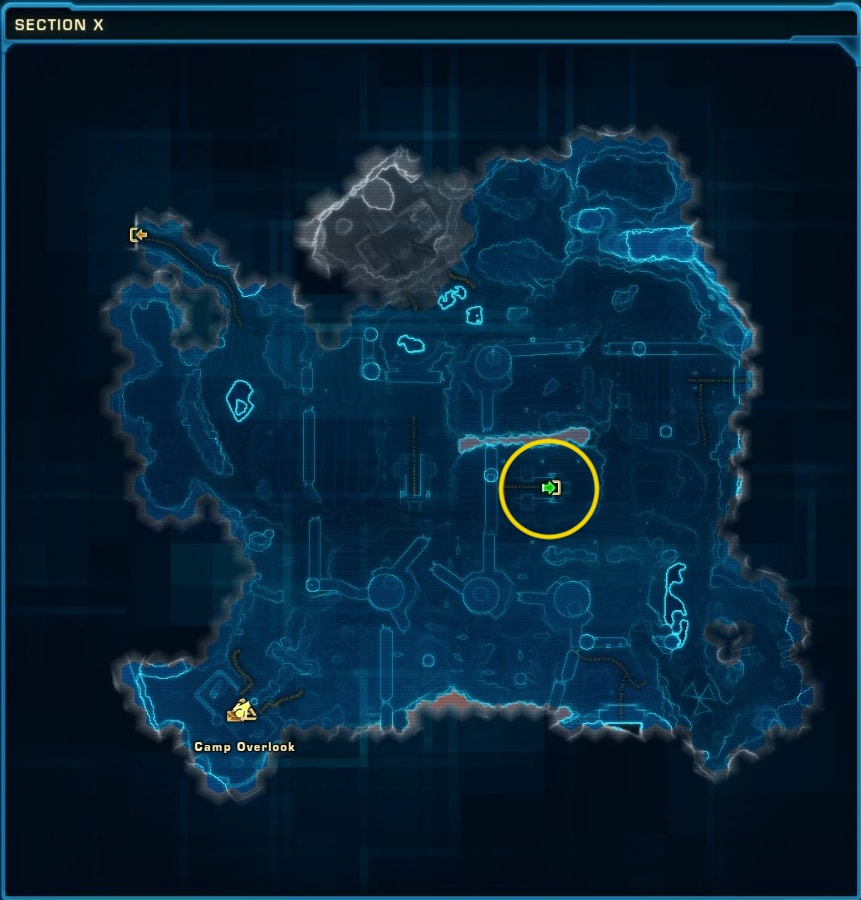
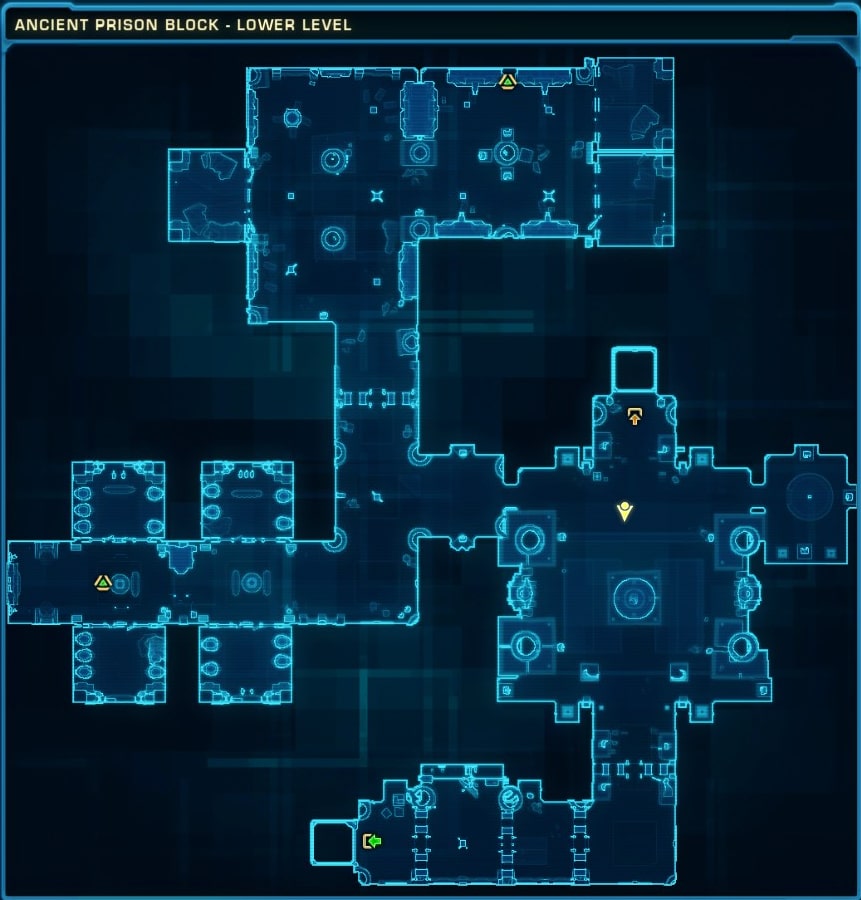
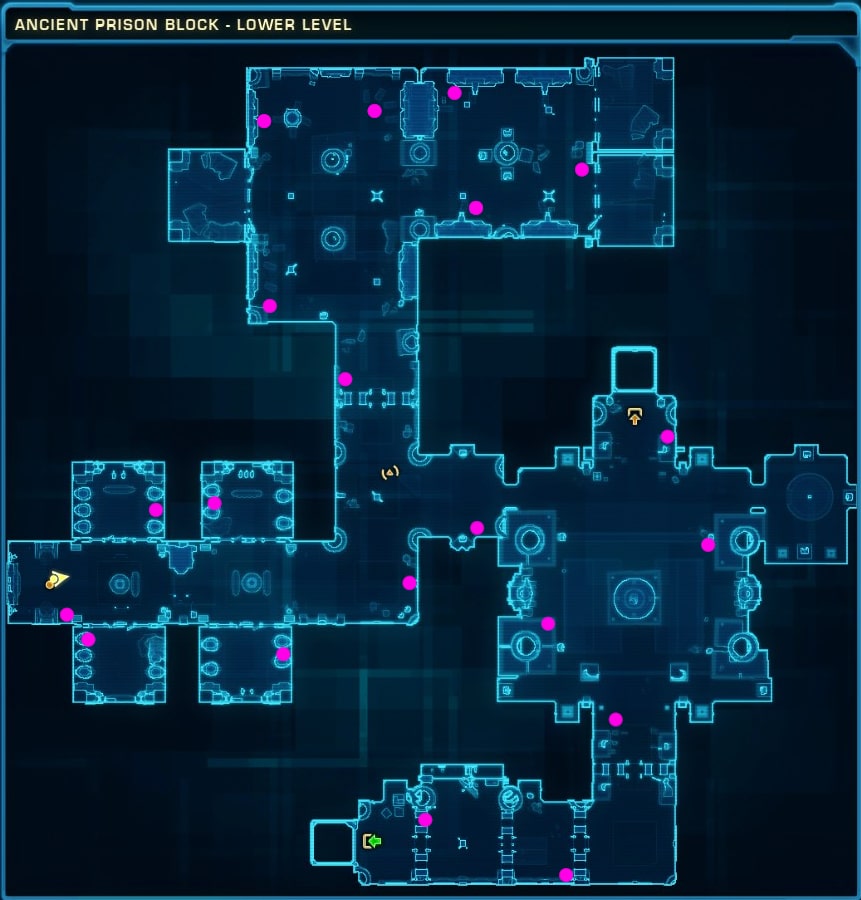
Once you’re inside the Ancient Prison Block, you’ll need to collect data from terminals located in the Interrogation Wing (West) and the Medical Wing (North). Once you do that, head to the south to take an elevator to the Upper Level to reach the Prison Workshop.
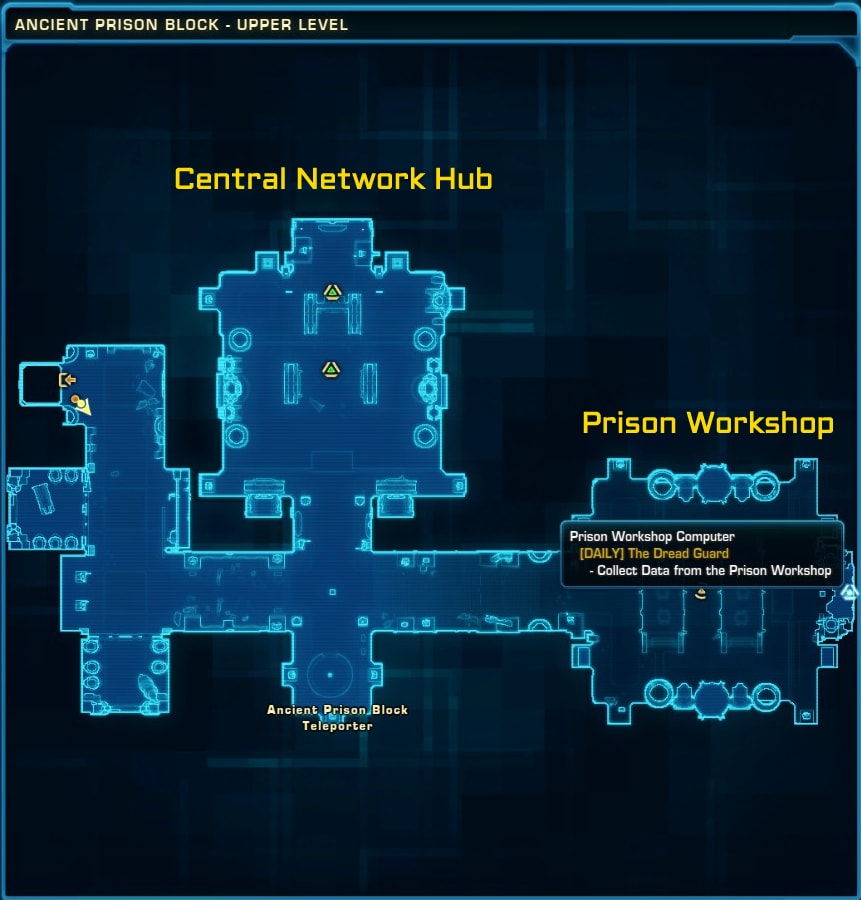
Collect the Data from the Prison Workshop and head toward the Central Hub Network. Use the 4 Lockdown Override Switches and collect data from the Master Computer. When you interact with the Master Computer, the Central Network Guardian will spawn so you’ll need to defeat it to proceed. Once defeated, interact with the Master Computer to end the mission.
The Bonus Mission for The Dread Guard is in 4 stages and is only worth completing if you get conquest points for completing Section X bonus missions. It will be as follows…
Bonus Mission Stage 1: Collect Ancient Prison Datapads from hostile mobs in the area.
Bonus Mission Stage 2: Destroy 10 Data Collection Droids.
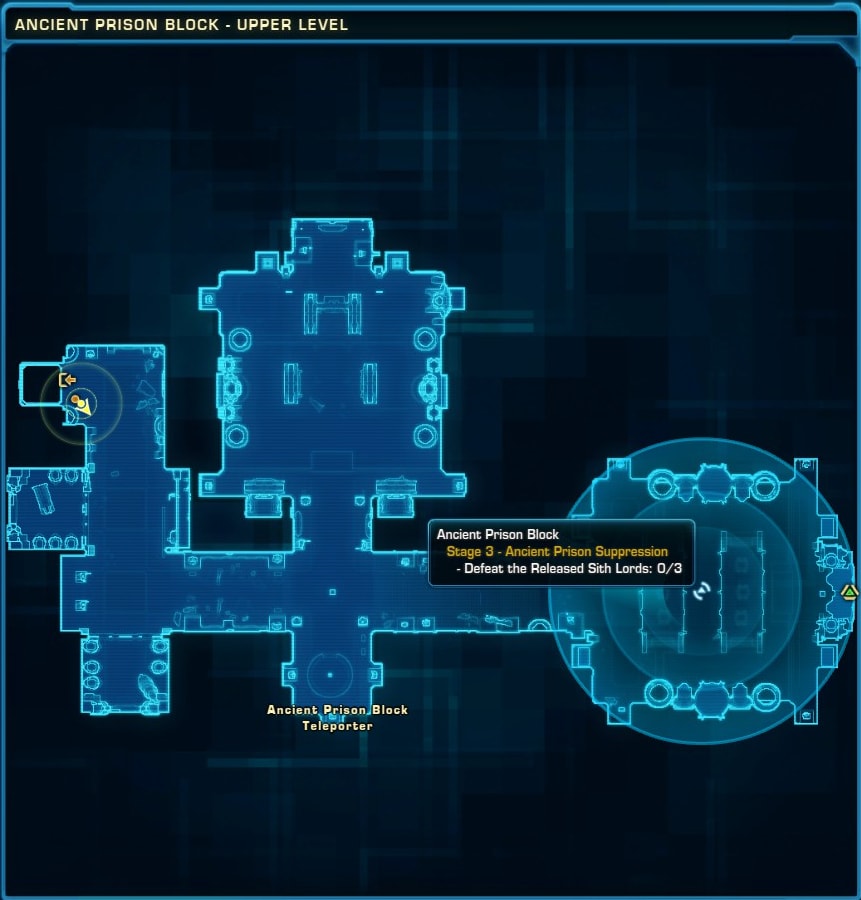
Bonus Mission Stage 3: Defeat 3 Released Sith Lords in the Prison Workshop.
Bonus Mission Final Stage: Locate the Infected computer and recover the Prison Schematics from the Prison Workshop Enforcer.
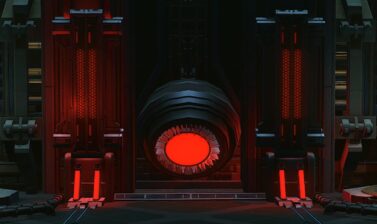
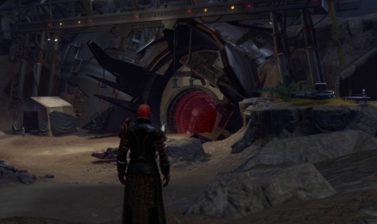
[HEROIC 4] Long Shots
For Long Shots, head to the Aurora Cannon Facility towards the south of the map and head inside.
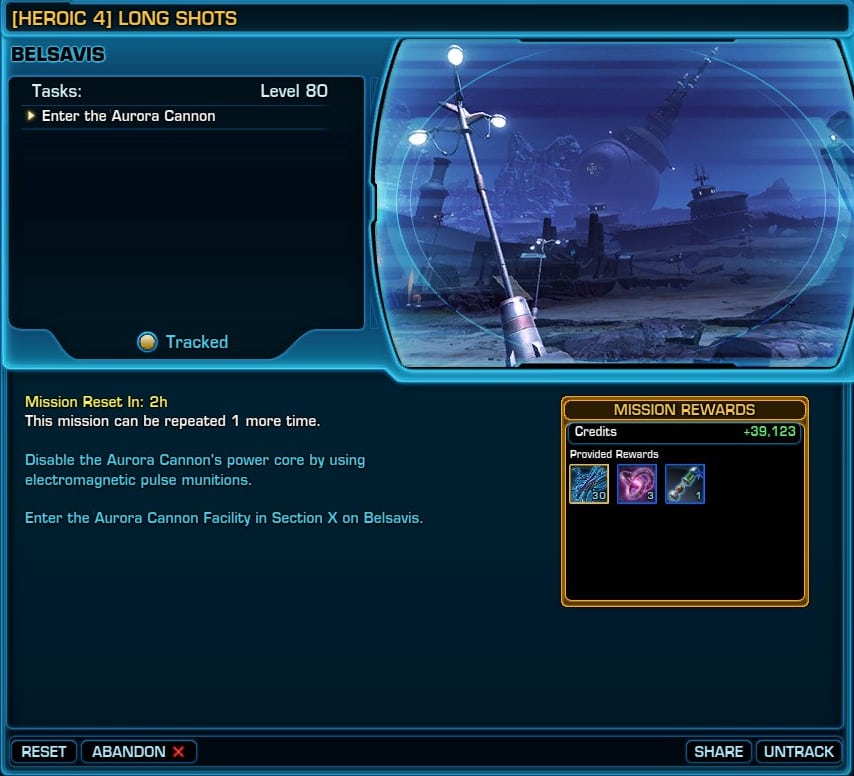
Once inside, you’ll have to fight (or sneak) your way through the facility to reach the Core.
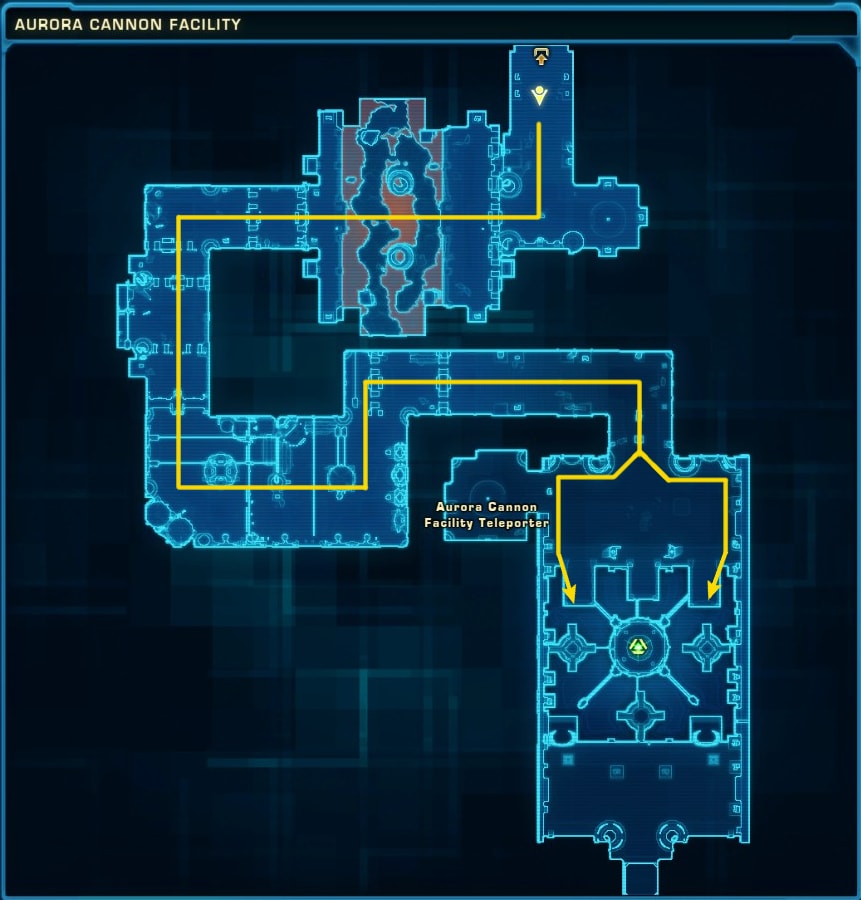

Beware of the Dread Guard Legion Commander at the console as they have a very wide aggro range WITH stealth detection. To avoid fighting them, hug the walls and head to the platforms on the East or West part of the Core room.

From there, throw your EMP grenade at the Core by right-clicking it and the quest will be complete! This is a very easy mission if you have stealth but it may take time to complete without it as there are numerous strong hostiles to fight on this map.
[AREA 2+] Key to Decryption
To start this mission, you’ll need to step into the Frozen Lake heroic area accessible from the path in the North-West part of Section X. From there all you need to do is destroy 15 Haywire Droids and collect Cores from those same droids.
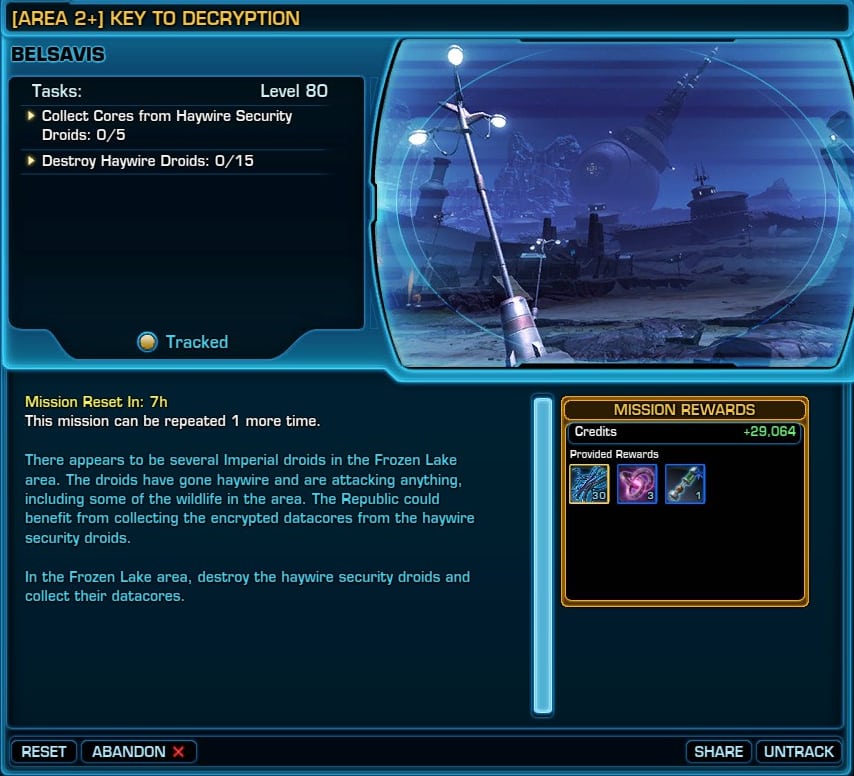
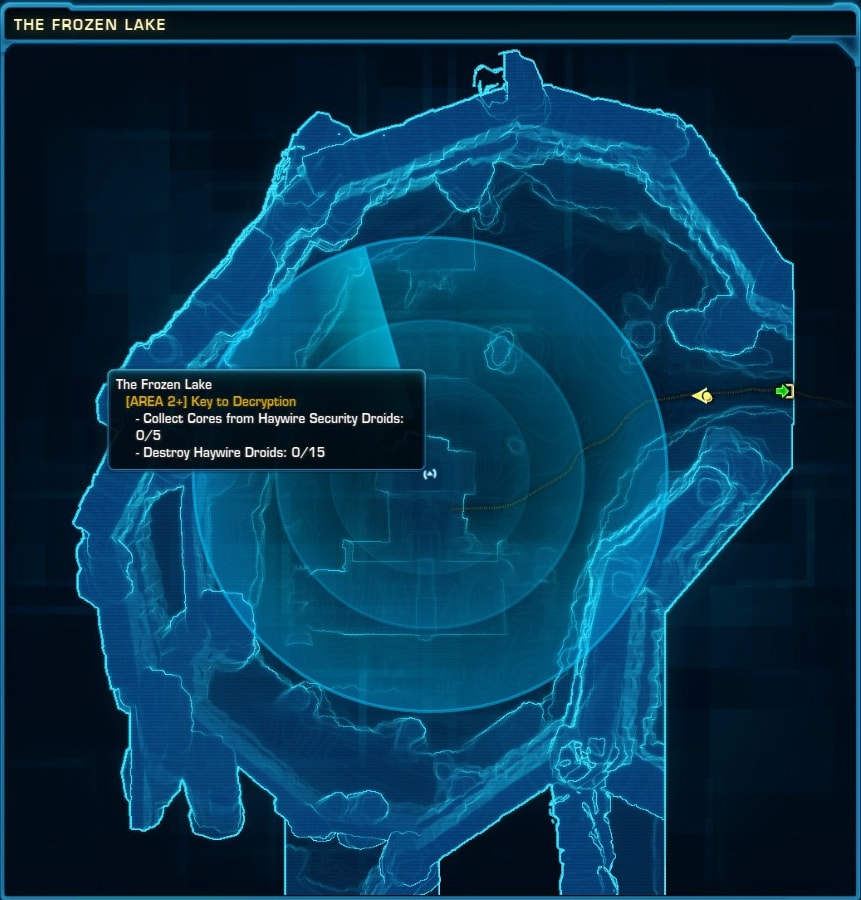
Once you complete that, head to a terminal in the north part of the map to locate and recover the Decryption Key.
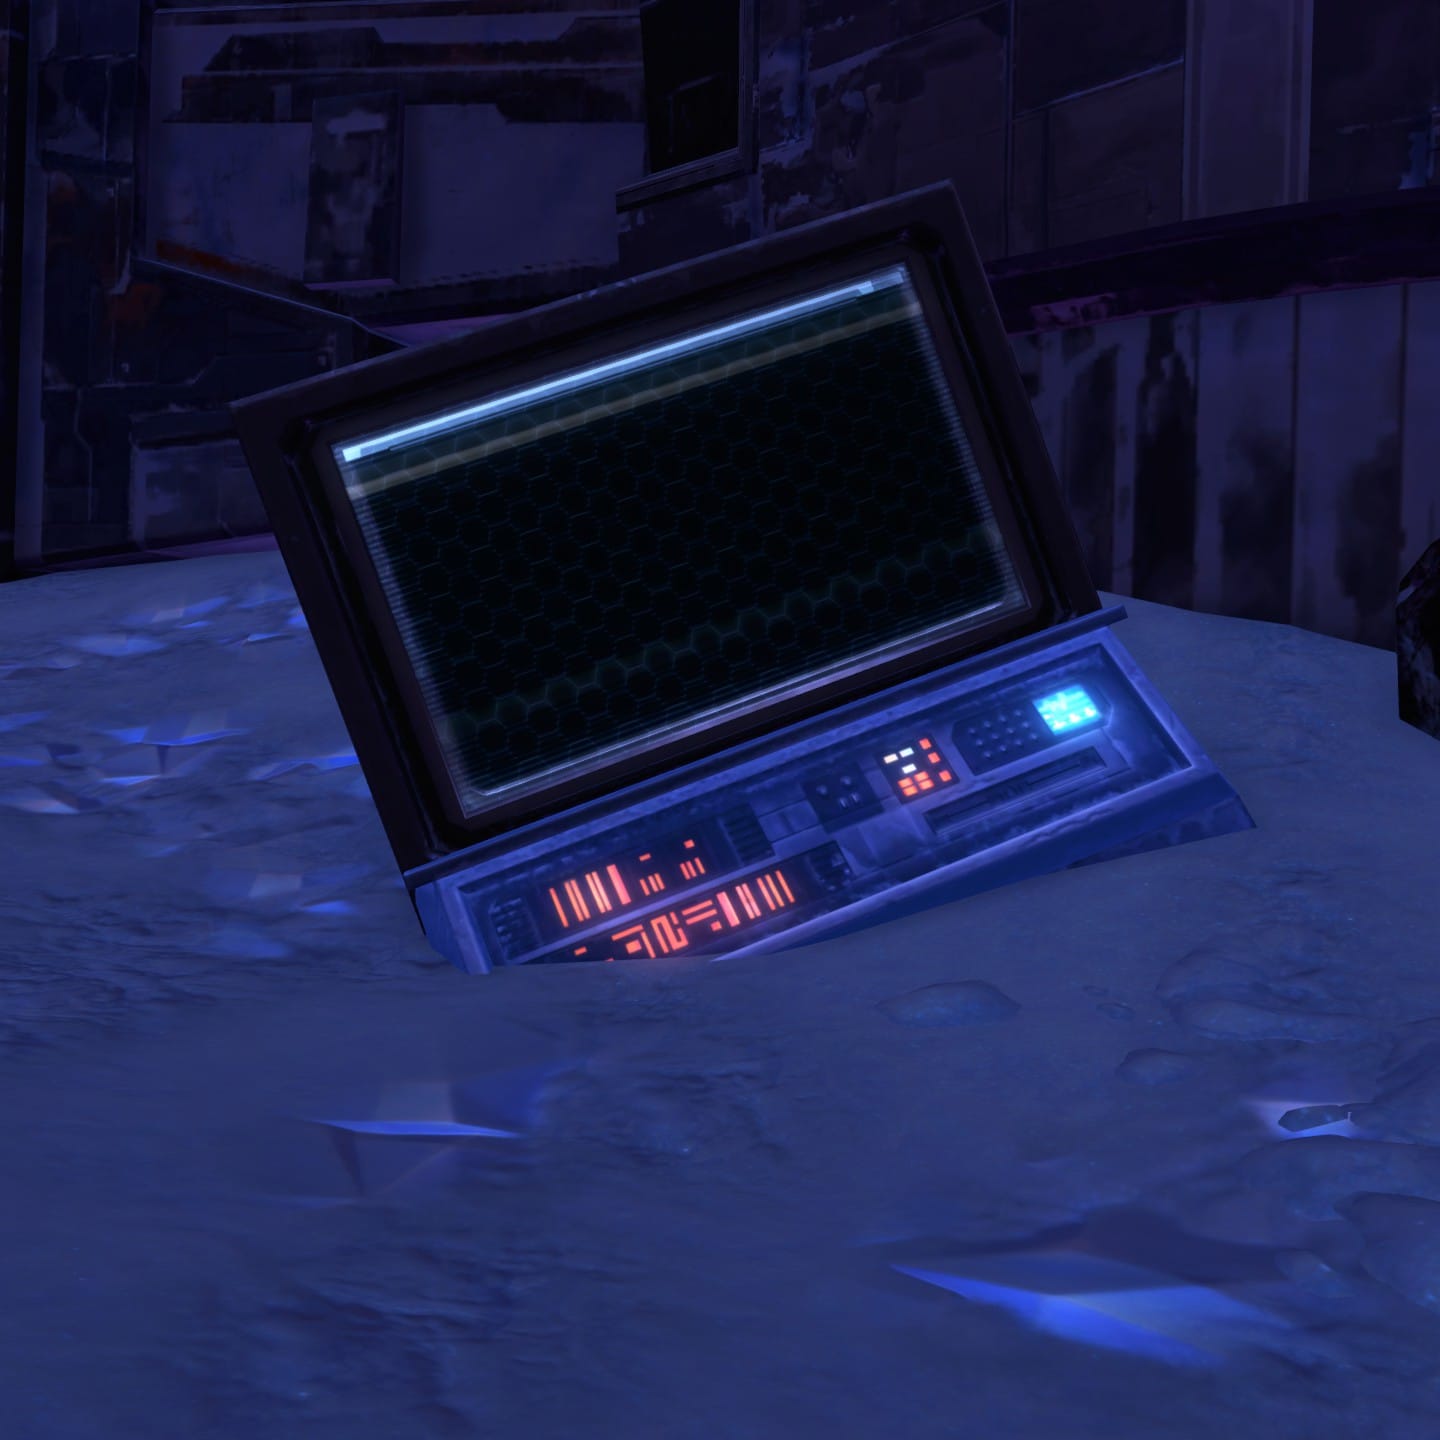
This will cause a Security Overseer droid to spawn that you’ll have to fight.
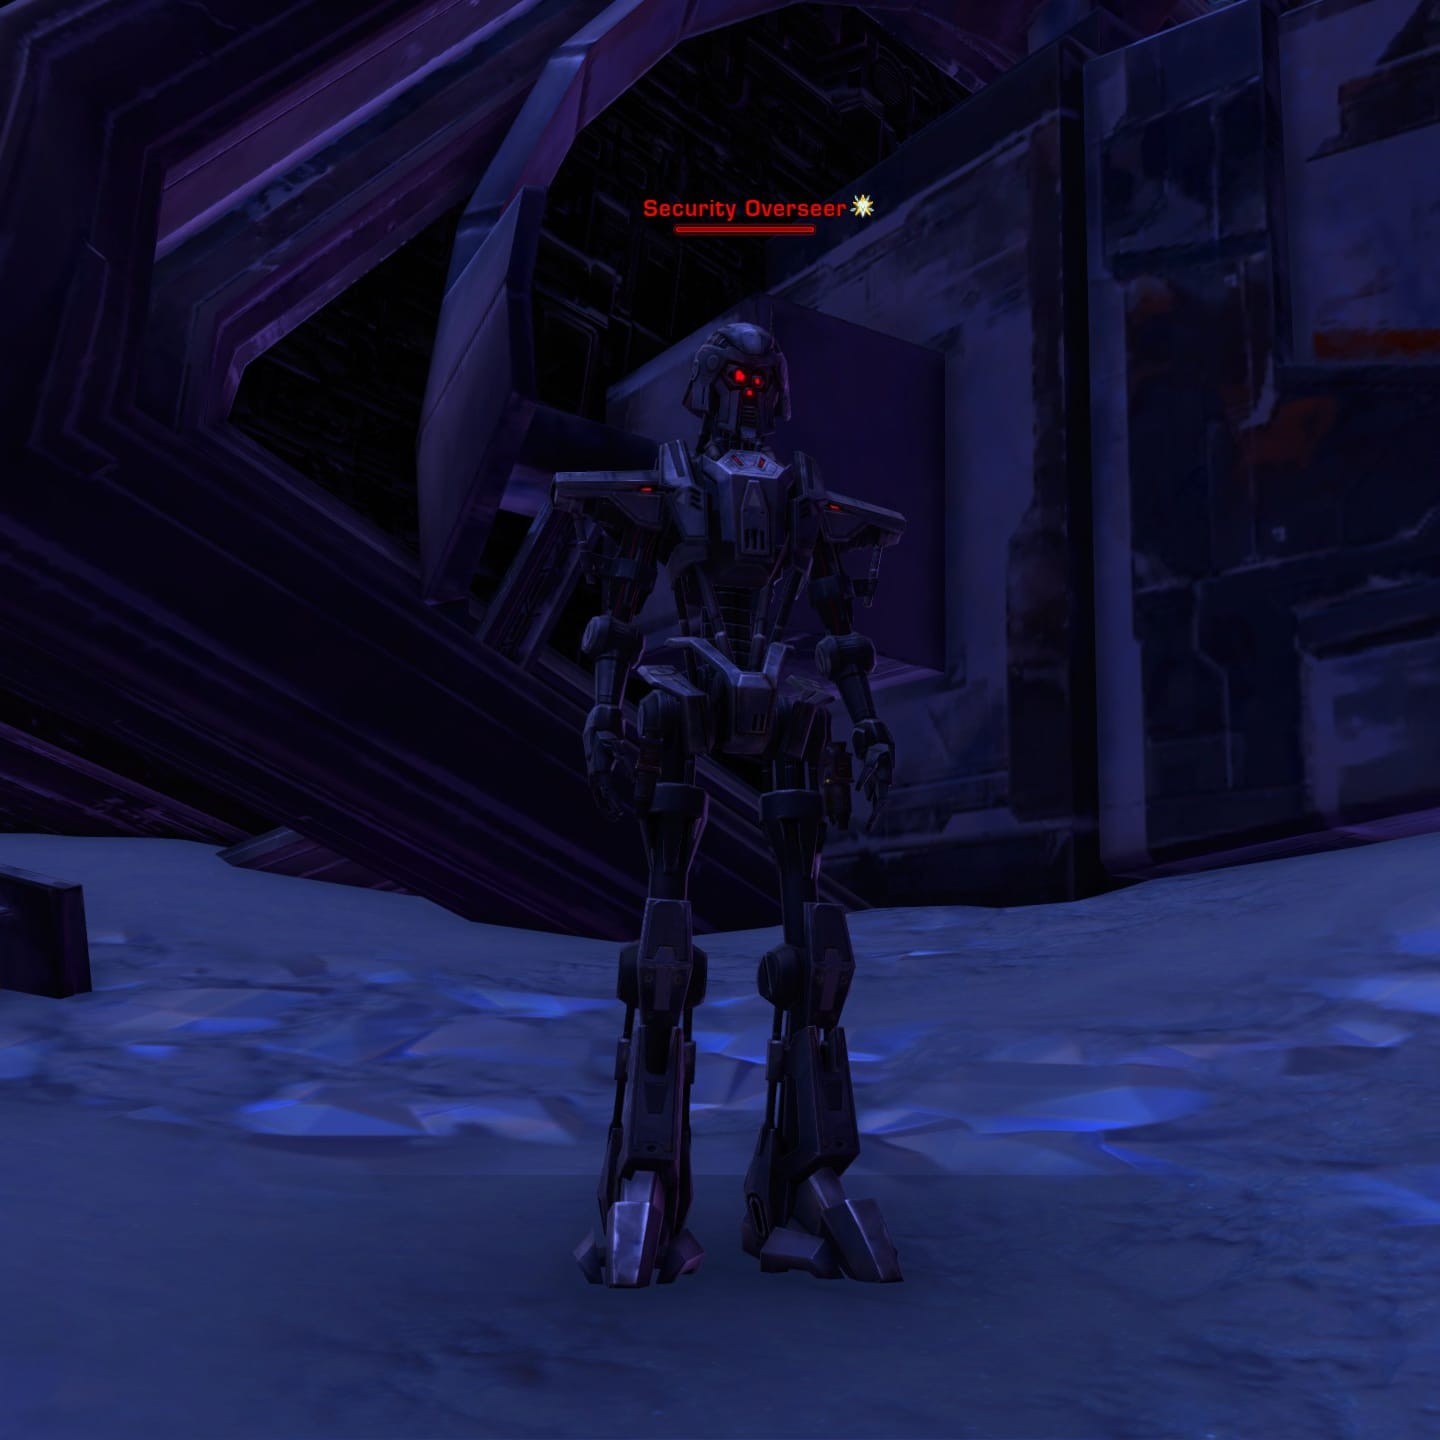
Once defeated, the Overseer will drop the Decryption Key and the quest will be complete.
Recommended Order
Section X’s quests are spread out so the following list provides a recommended order of quest completion for a clean and efficient walkthrough of the daily missions available here. The Republic daily quests here are not as streamlined as the Empire’s due to more spread out and 3 missions taking place in underground Rakata structures. Fortunately, you’ll have access to teleport back towards the entrances of these structures so you can get back out into the world to travel to the next quest.
- Head northeast from Camp Overlook and go to the Forward Training Camp to complete Imminent Threat.
- Head north and complete Bio-Reform in the Toxic Hazard Zone.
- Go to the Containment Section to complete Priority Containment. Do not get near the Dreadtooth world boss if you see it nearby. Once complete, use the Teleportation Console to teleport back to the entrance.
- Head west to complete Shattered Prison. Once complete, use the Teleportation Console to teleport back to the entrance. Alternatively, Quick Travel to Camp Overlook.
- Head to the Aurora Cannon Facility in the south portion of the map and complete Long Shots.
- Quick Travel back to Camp Overlook and go up the Northeast Path to obtain and complete Key to Decryption.
- Complete Daily Area: Section X.
Empire Missions
The following missions are available to players within the Empire.
Mission Terminal Location
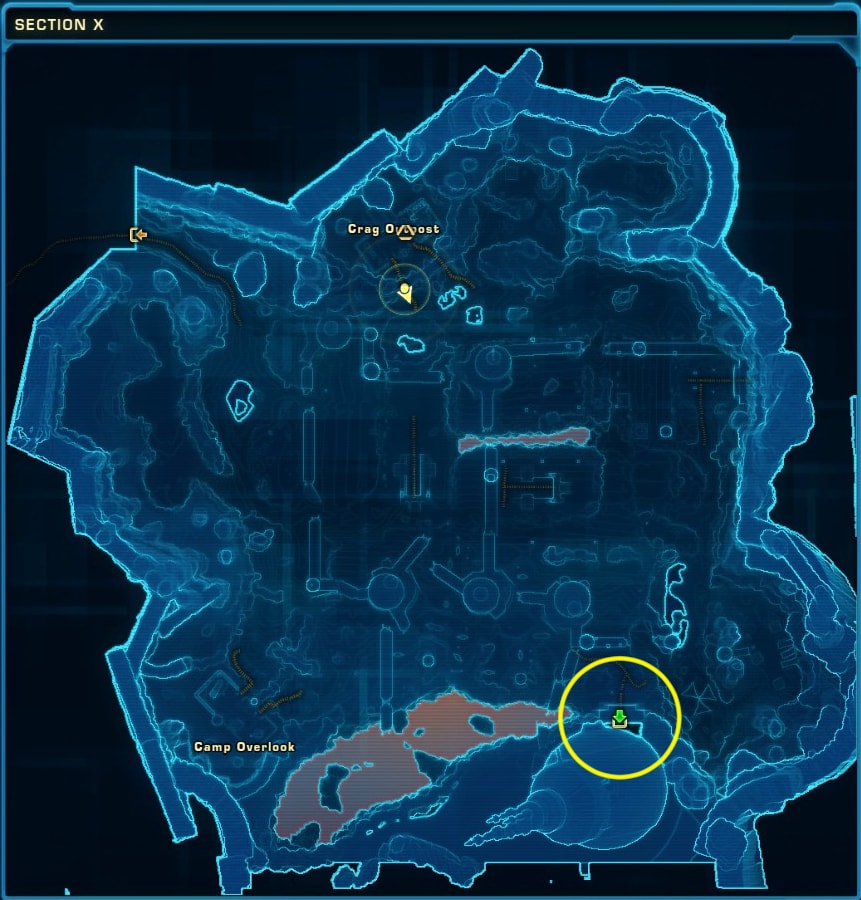
The terminal to retrieve your Weekly and Daily missions are very close to where you’re dropped off at the shuttle pad at Crag Outpost. The one on the left will give the Weekly and Daily missions while the one on the right will give you the Heroic mission.
[WEEKLY] DAILY AREA: Section X
Pick up this mission to receive credits, a Noble Decurion Chest, 50 Daily Resource Matrices, and a Dread Guard Holocron reputation item upon completion of the 6 daily missions in Section X. This quest can be completed 3 times a week, after which you’ll need to wait for the weekly quest reset. Once you complete the quests, return to the terminal to turn them in and complete the weekly.
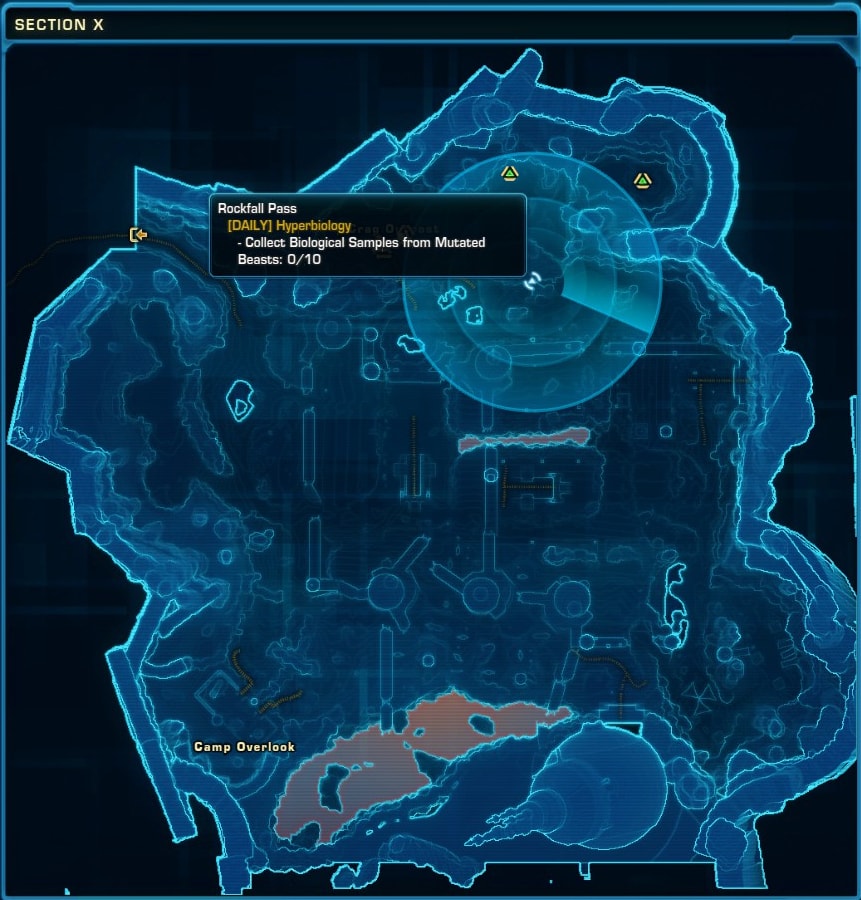
[DAILY] Hyperbiology
This is a simple quest that’ll be close to Crag Outpost. First you’ll need to defeat mutated beasts in the area to collect 10 Biological Samples.
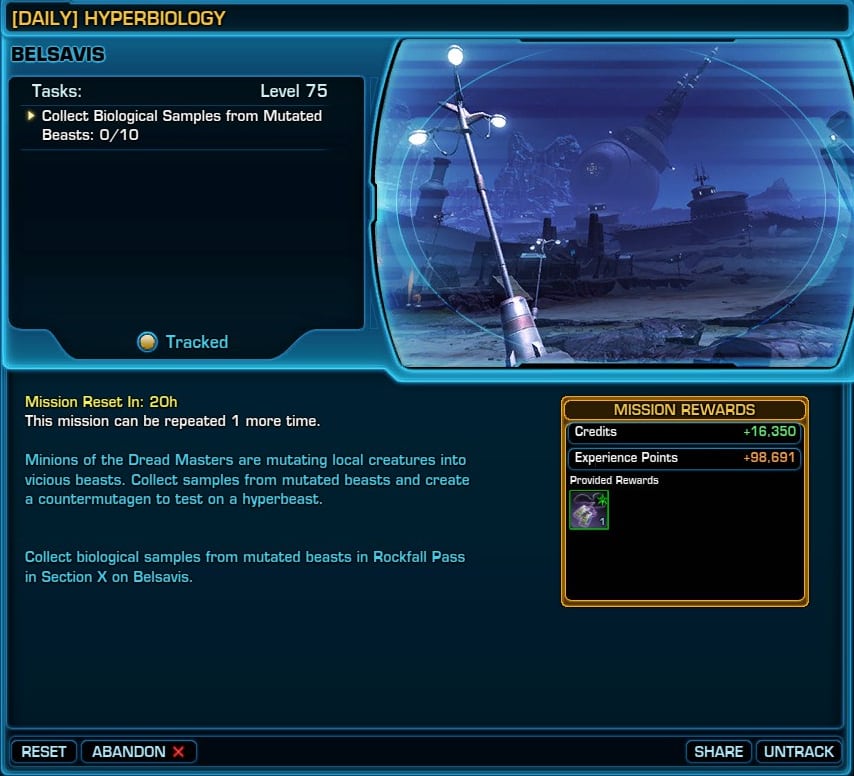
You’ll then head north to create a Serum at the Science Station then head East into a phased area to find the Hyperbeast.
The Hyperbeast will be friendly allowing you to inject it with the Serum. It will then become hostile and you’ll need to defeat it to get a Mutated Tissue sample from the Hyperbeast. Once you have done this, you will have finished the quest!
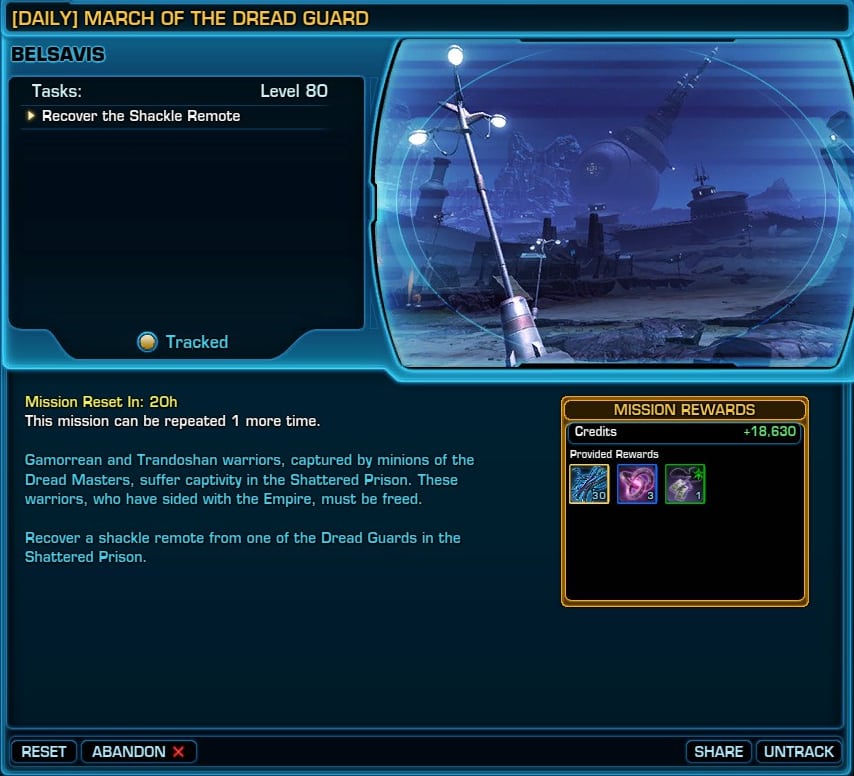
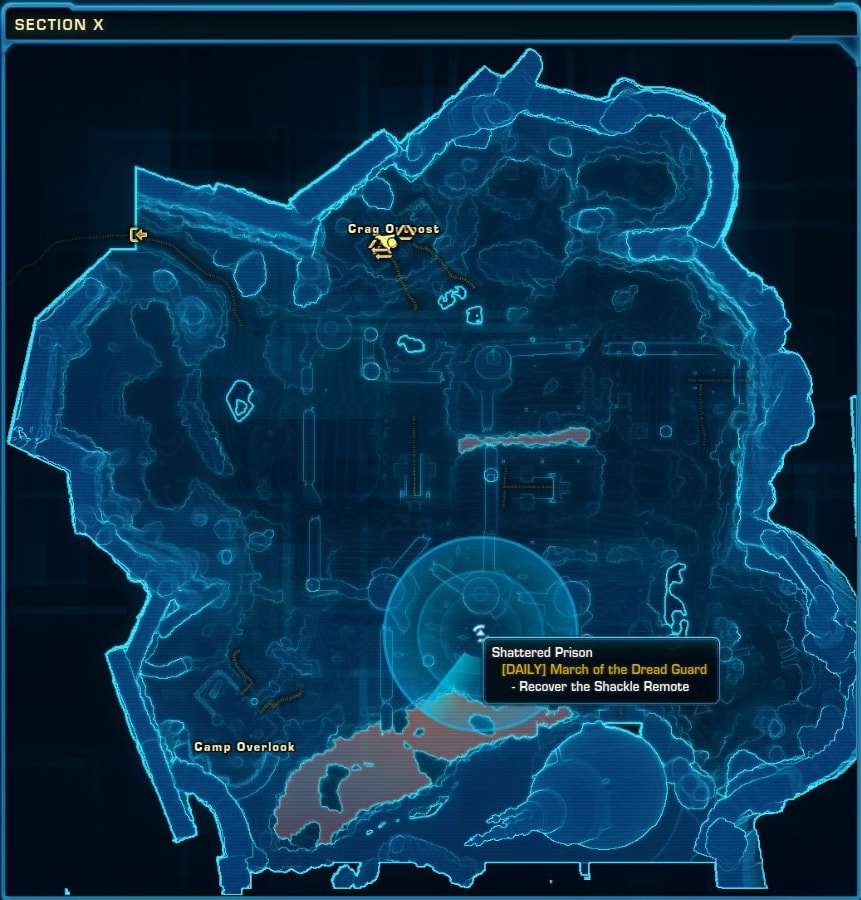
[DAILY] March of the Dread Guard
For this quest, head to the mission area and defeat Dread Guard NPCs until one of them drops a Shackle Remote. From there you’ll need to find a group of prisoners in the area, defeat their guards, and free them to finish the quest.
Bonus Mission: Defeat 24 Dread Guard Forces.
[DAILY] Data Raid
Head to the mission area and look for 4 Energy Tubes containing a Dread Guard Commander. Interact with the panel in front of them to disable them, though this will occasionally aggro the Commander inside if they are not defeated.

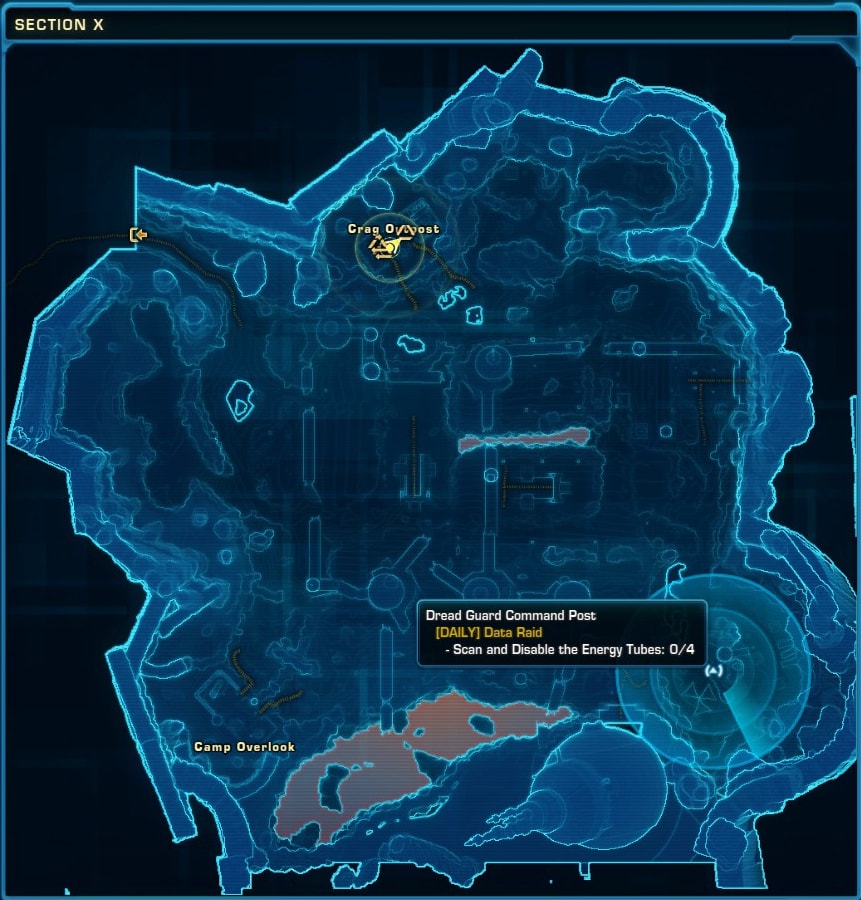

After that, head to the Eastern and Western Rakatan Pylons to disable them. Once you do that, the quest will be complete.
Bonus Mission: Defeat 18 Dread Guard Forces.
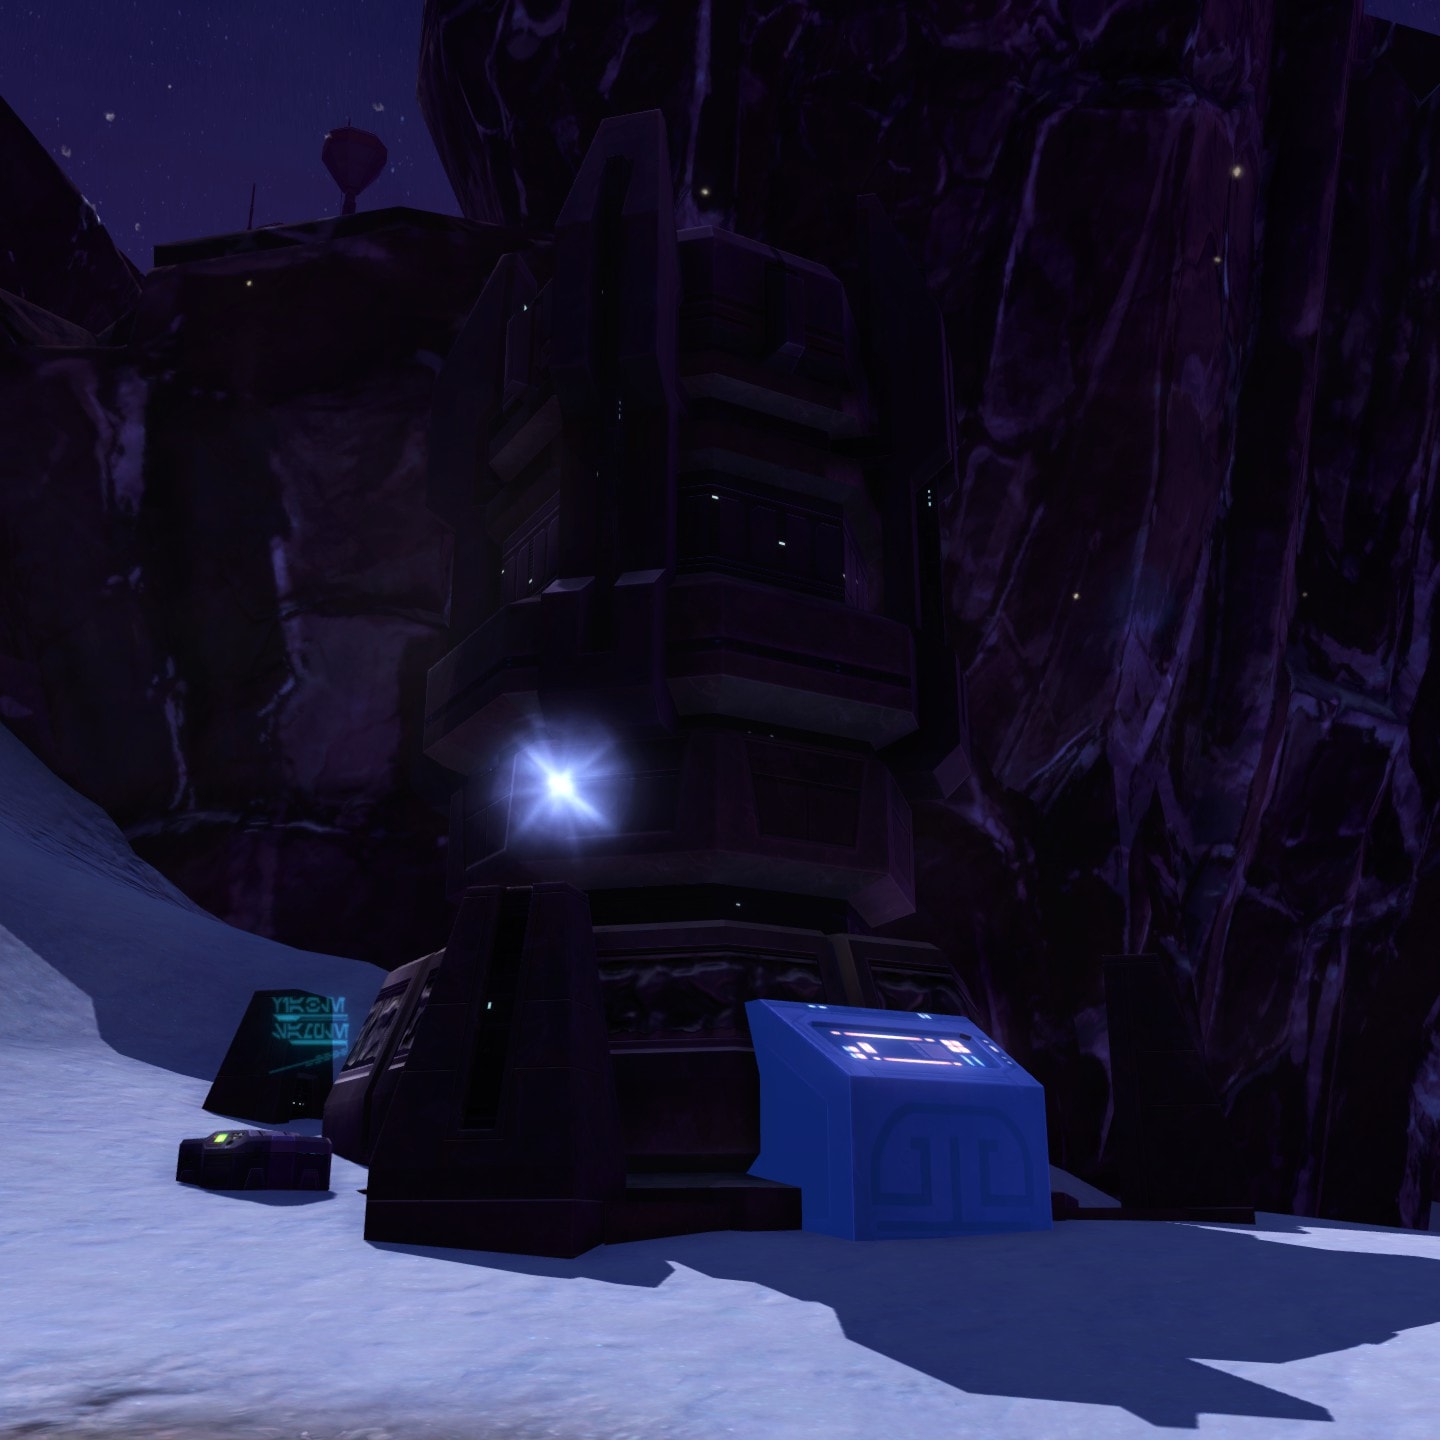
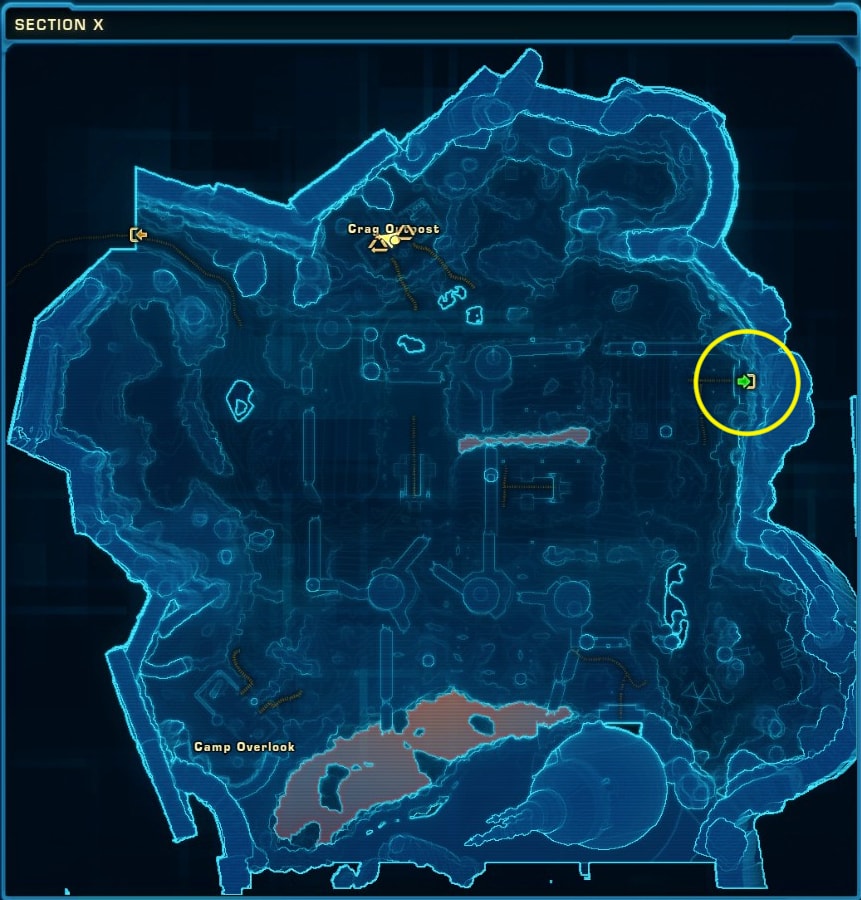
[DAILY] Targeted Misfire
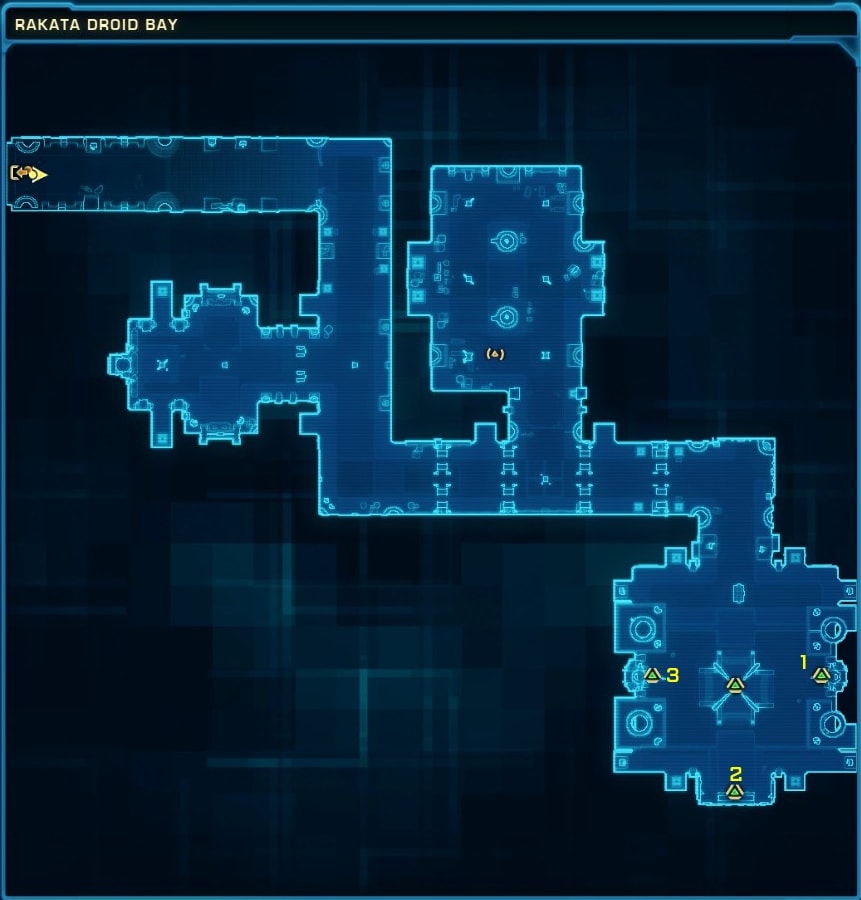
For Targeted Misfire, head towards the East side of the map to reach the Rakata Droid Bay. You’ll need to defeat Republic NPCs found there to find 3 Air Strike Codes and a Targeting Beacon, the latter of which is found on Jedi.
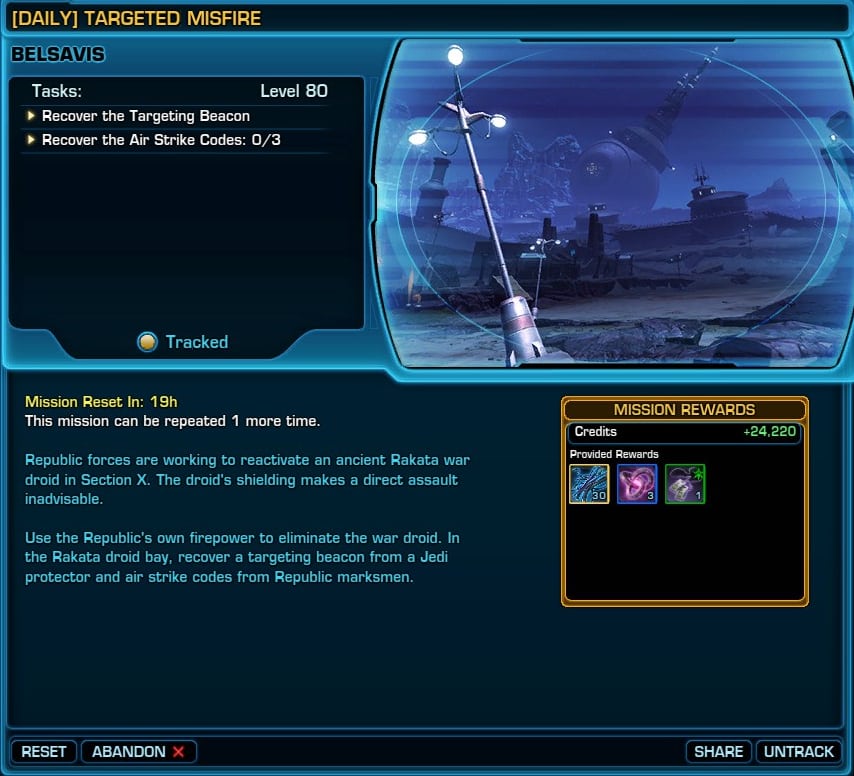
Once you have done that, head towards the south room and disable the First, Second, and Third Rakatan Devices to bring the shield around the Rakata War Droid down. Use the Targeting Beacon on the droid and open the Facility Roof with a nearby terminal.
After a few seconds, a strike fighter will fly by and attack the War Droid, activating it. Defeat the Rakata War Droid to end the quest.
Bonus Mission Stage 1: Defeat 26 Republic Forces
Bonus Mission Stage 2: Destroy 3 Research Stations

Bonus Mission Final Stage: Destroy the Generator and Recover Republic Research from the Jedi Field Commander
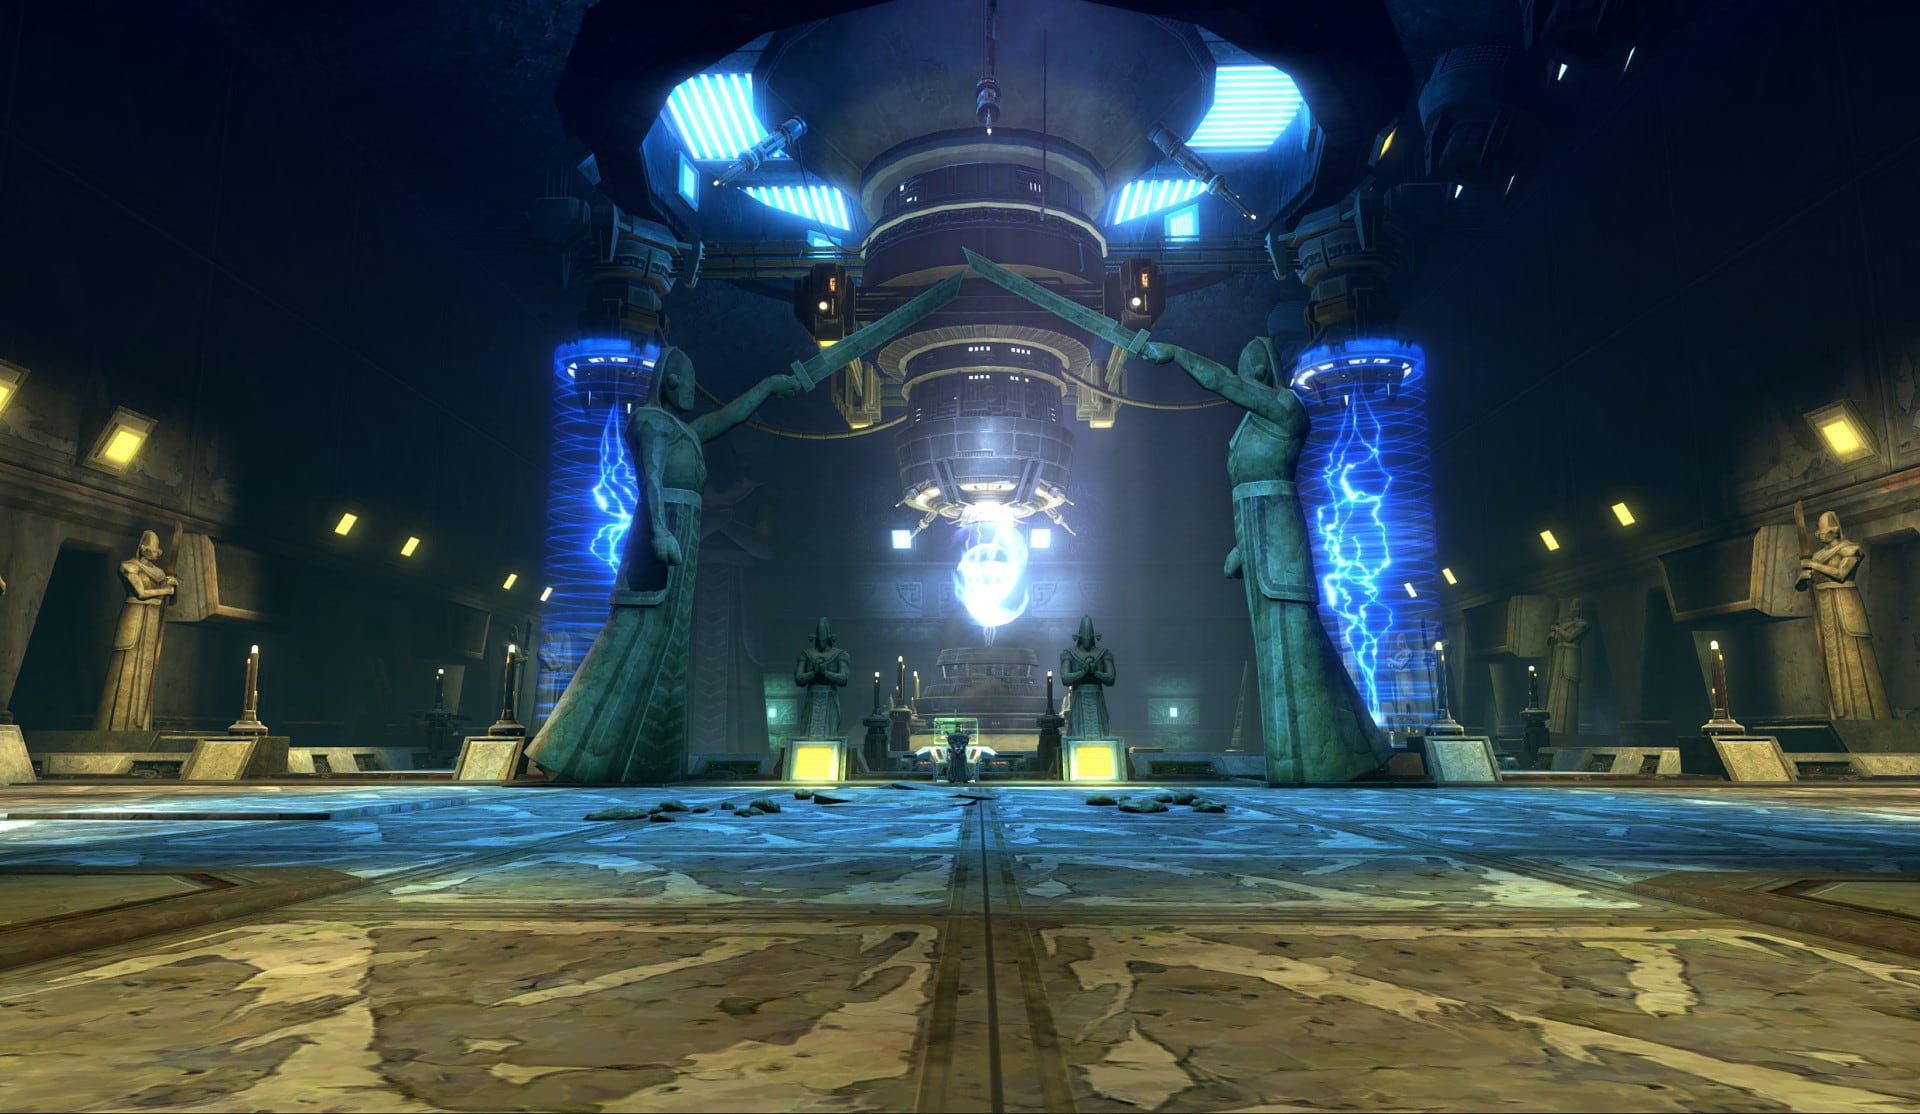
[HEROIC 4] The Aurora Cannon
For The Aurora Cannon, head to the Aurora Cannon Facility towards the south of the map and head inside.
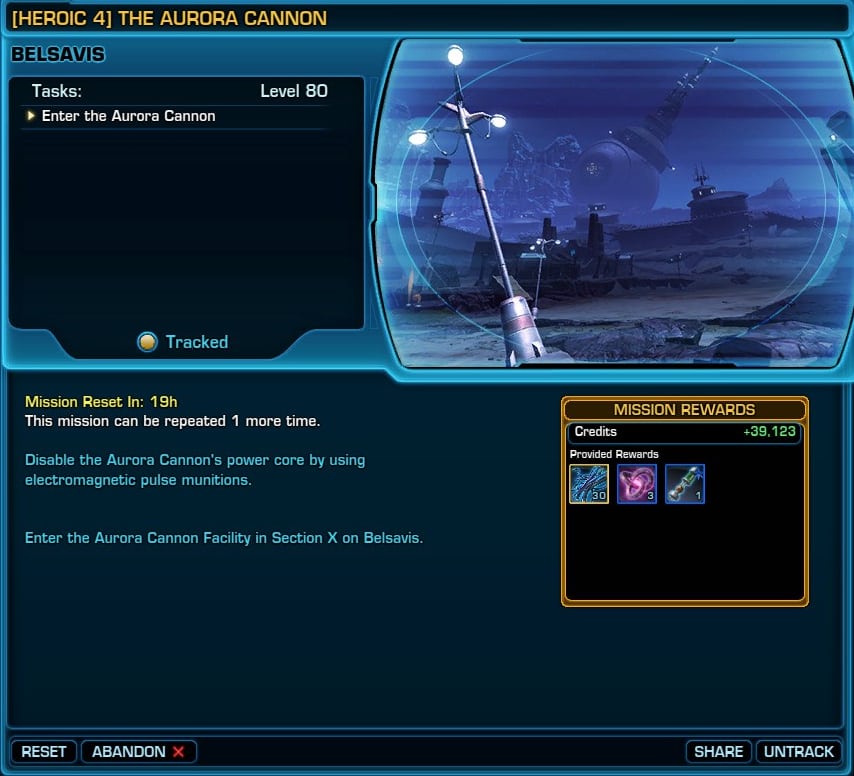
Once inside, you’ll have to fight (or sneak) your way through the facility to reach the Core. Beware of the Dread Guard Legion Commander at the console as they have a very wide aggro range WITH stealth detection.

To avoid fighting them, hug the walls and head to the platforms on the East or West part of the Core room.
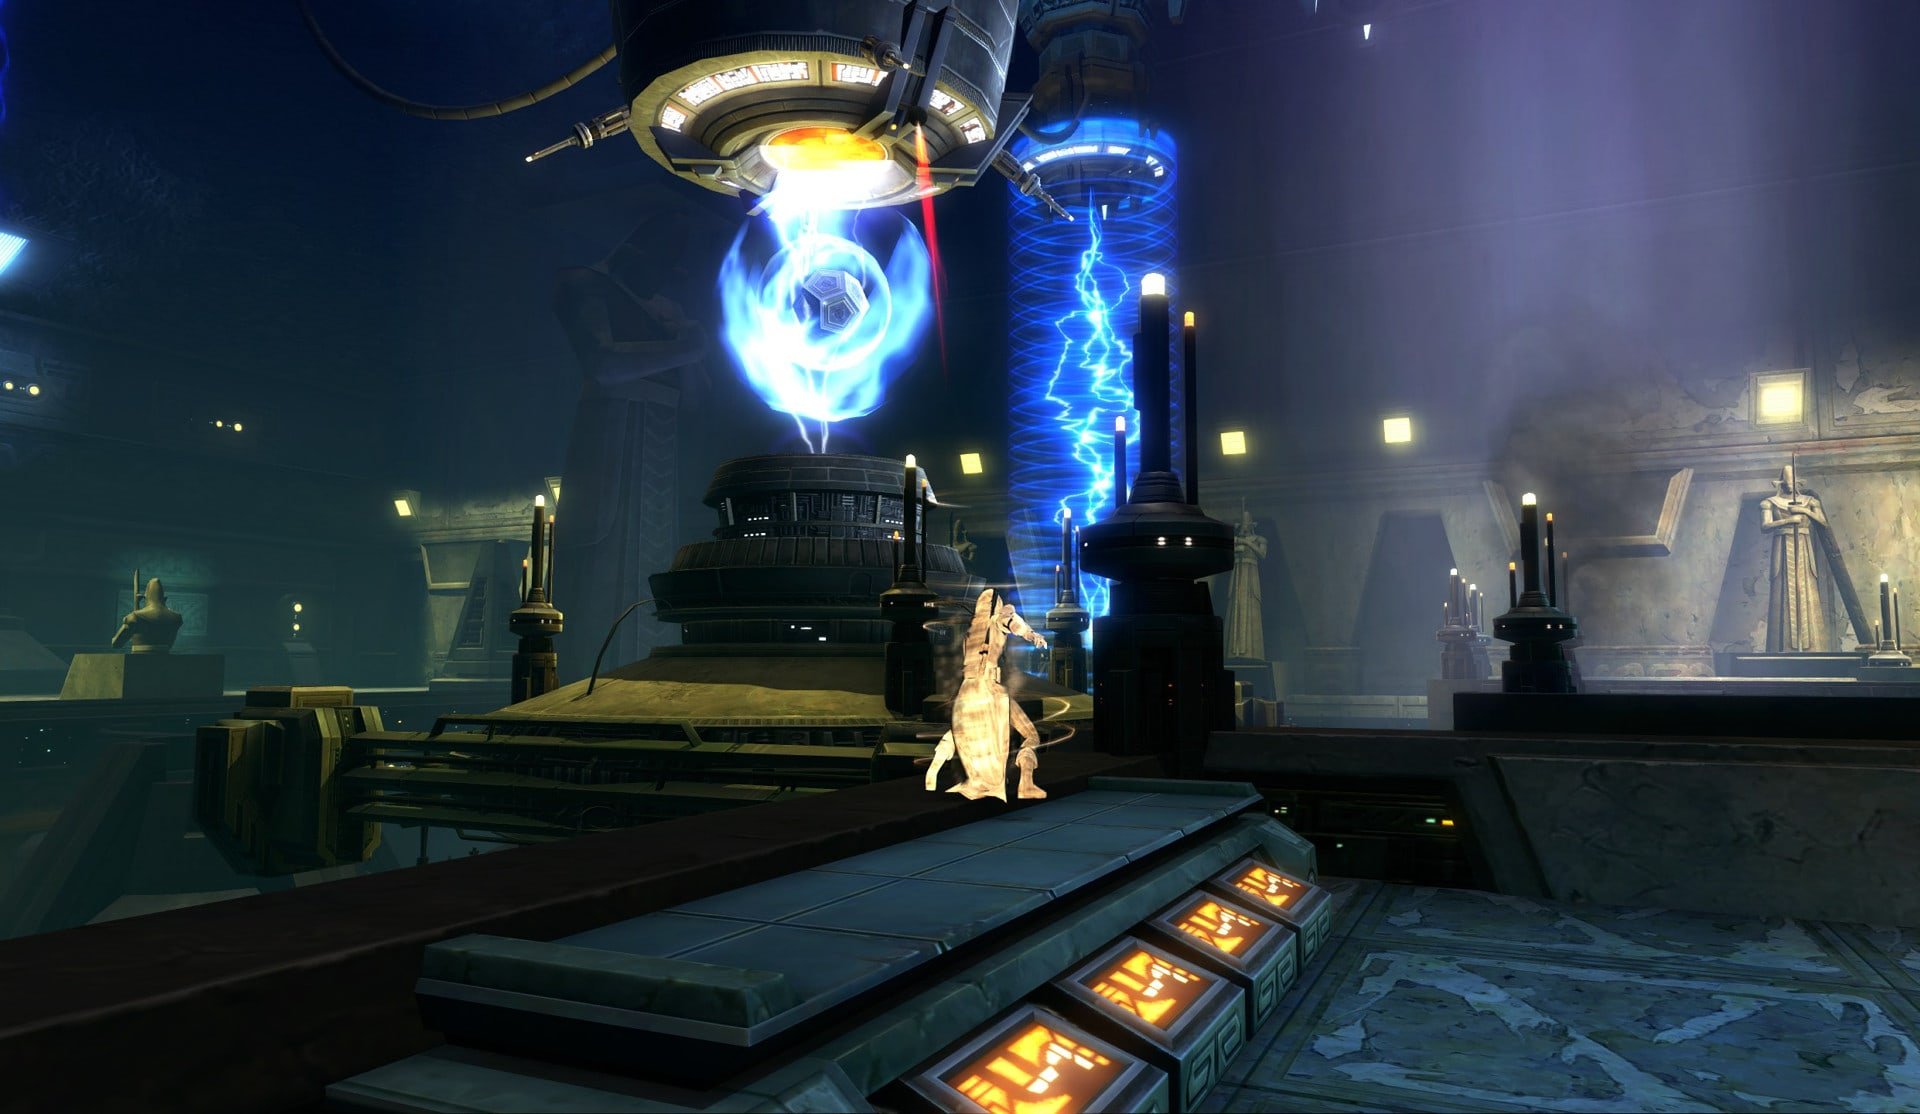
From there, chuck your EMP grenade at the Core by right clicking it and the quest will be complete! This is a very easy mission if you have stealth but it may take time to complete without it as there are numerous hostiles to fight in this map.
[AREA] Lost Reconnaissance
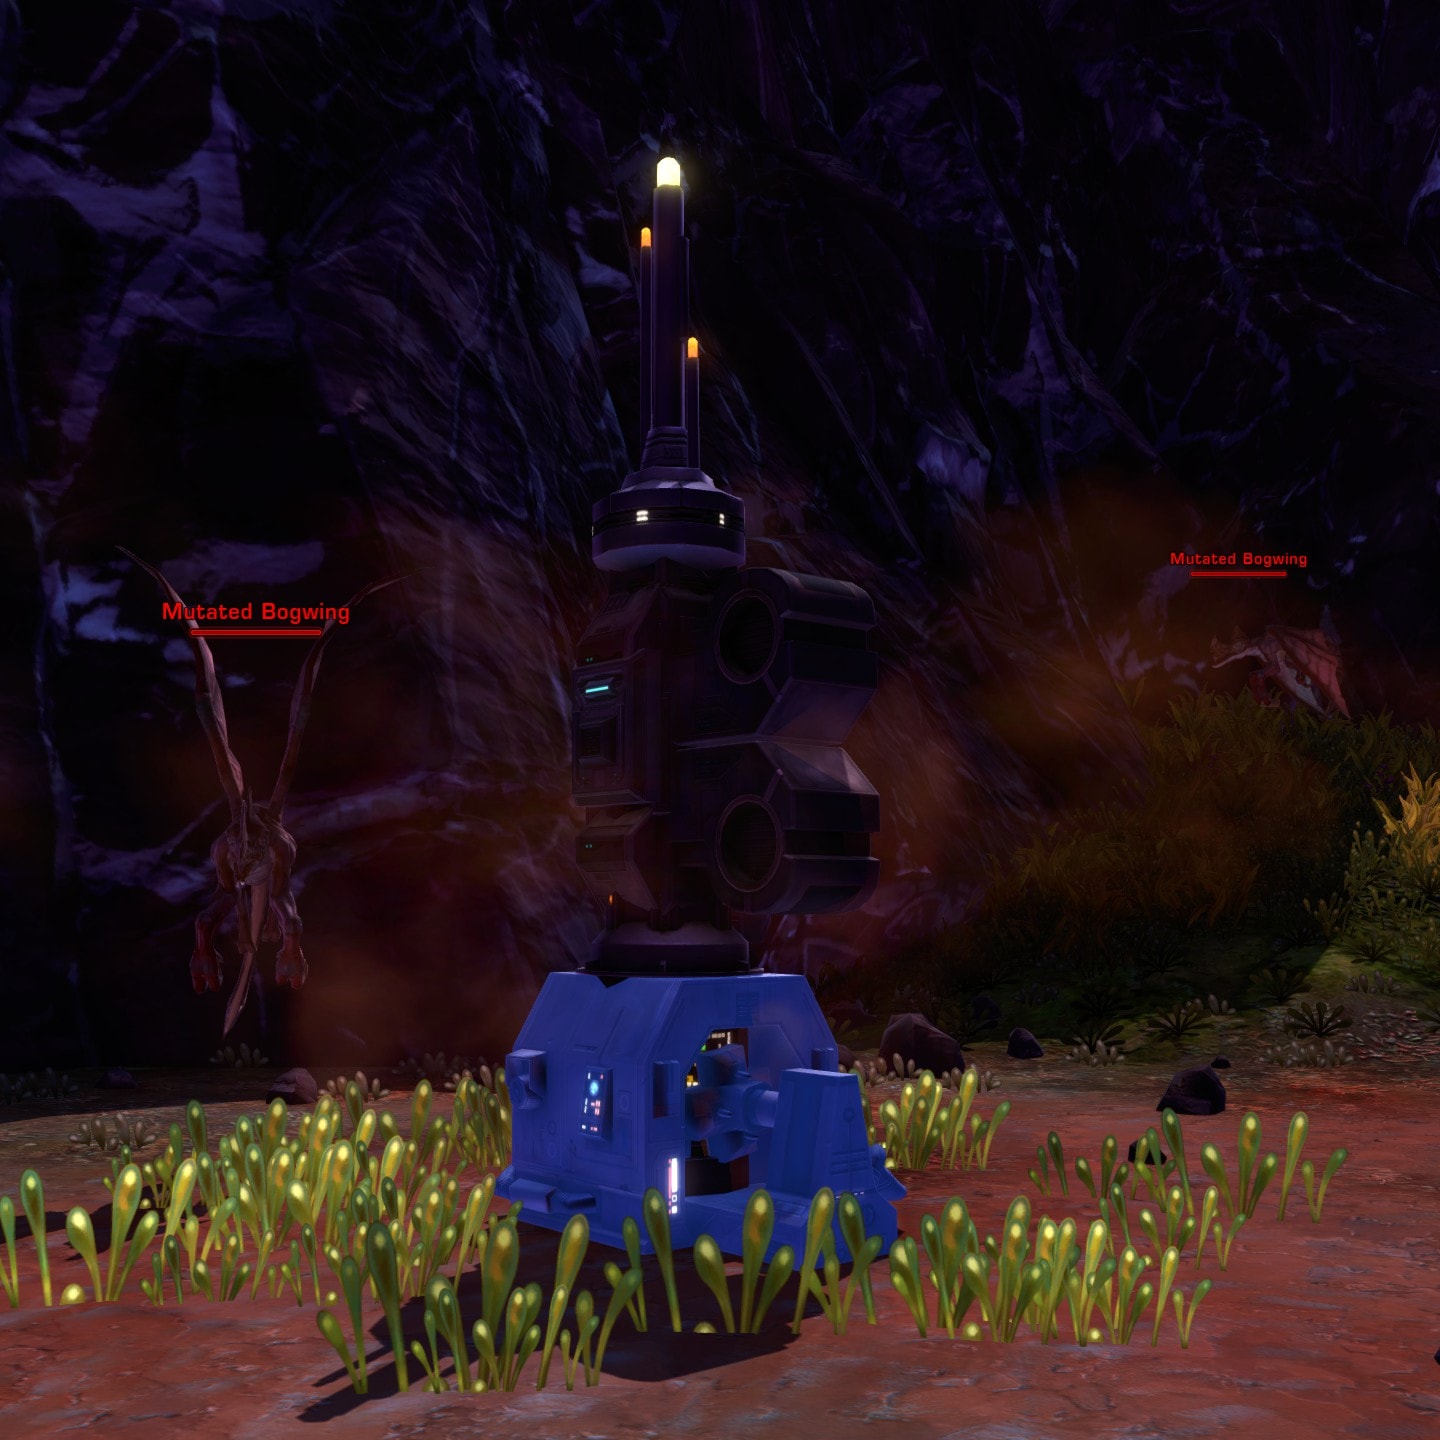
To obtain the Lost Reconnaissance mission, you’ll need to head to the Frozen Lake found on the Northwestern part of the map.
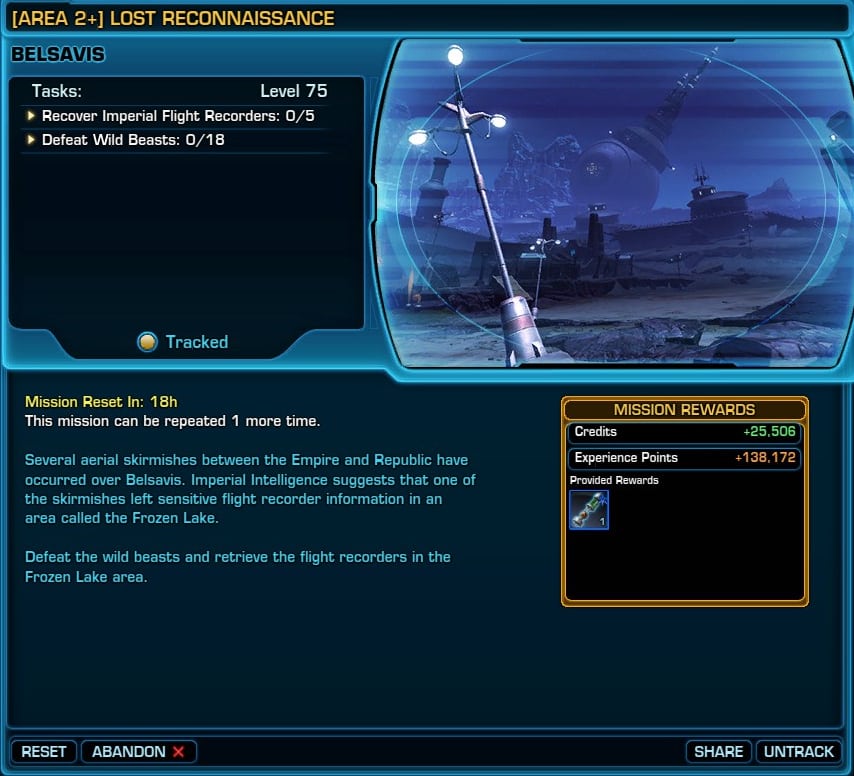
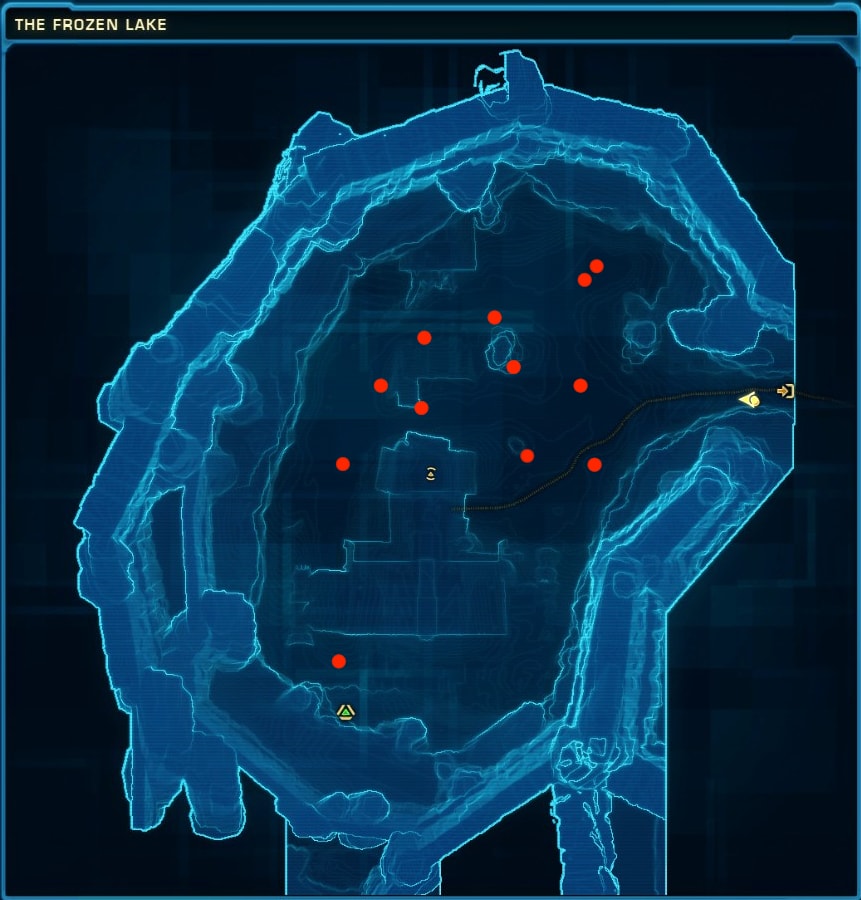
Once there it’ll be added to your mission log and you’ll have to recover 5 Imperial Flight Recorders and defeat 18 Wild Beasts in the area.
The Imperial Flight Recorders will appear on the ice like in the image below. Refer to the map for their locations as indicated by the red dots.

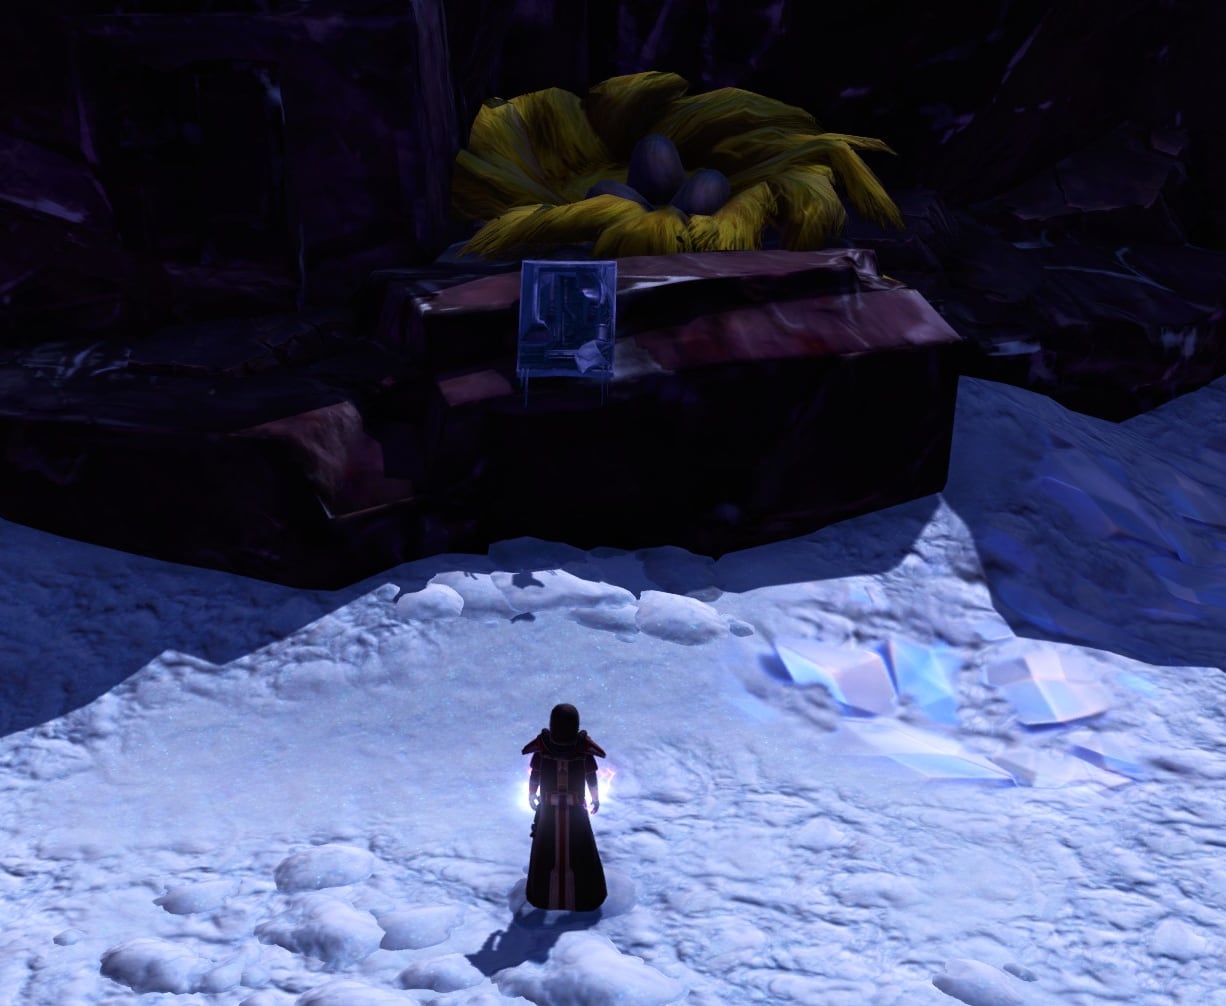
Once you have defeated the beasts and recovered the logs, head to the south of the Frozen Lake where a nest lays. Interact with the panel which will then summon a Frenzied Bogwing Mother. Defeat the Bogwing and loot it to recover the Master Black Box, doing so will complete the quest.
Recommended Order
Section X’s quests are spread out so the following list provides a recommended order of quest completion for a clean and efficient walkthrough of the daily missions available here.
- Make your way east from Crag Outpost and complete Hyperbiology.
- Head east to complete Droid Demolition.
- Exit the Rakata Droid Bay and go south to complete Dread Guard Command Post.
- Head west to complete Shattered Prison.
- Then head south to complete The Aurora Cannon.
- Quick Travel back to Crag Outpost and go up the Northeast Path to obtain and complete Lost Reconnaissance.
- Complete Daily Area: Section X.
Mission Rewards
Being one of the oldest Daily Areas in the game, the Section X missions don’t offer any shiny new gear or cosmetics. Each one will give you the following:
![]() Credits
Credits![]() Conquest Commendations
Conquest Commendations![]() Tech Fragments (if applicable to your character)
Tech Fragments (if applicable to your character) Green Reputation Token (solo missions)
 Blue Reputation Token (heroic missions)
 Blue Reputation Token Weekly Mission
The Weekly Mission will grant you a purple Reputation Token and a choice of one of the following items:
- Gear Chest with gear items based on your current gear level
- FP-1 Stabilizer
Reputation Tracks
There are two separate reputation tracks for the Republic and Imperial players with both offering the exact same rewards:
- Title: Hero of Section X (at Hero standing)
- Title: The Section Guardian (at Legend standing)
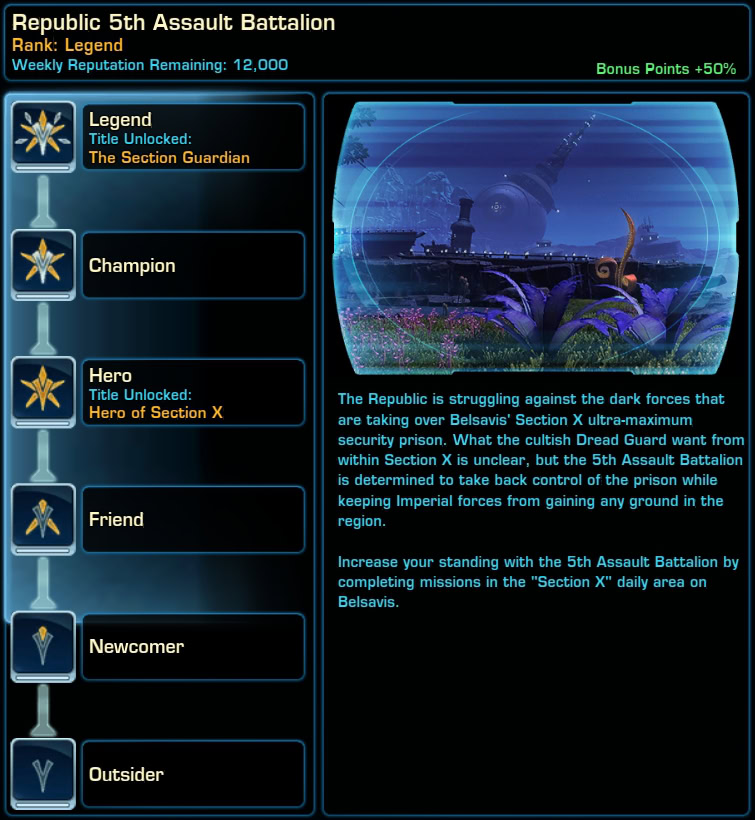
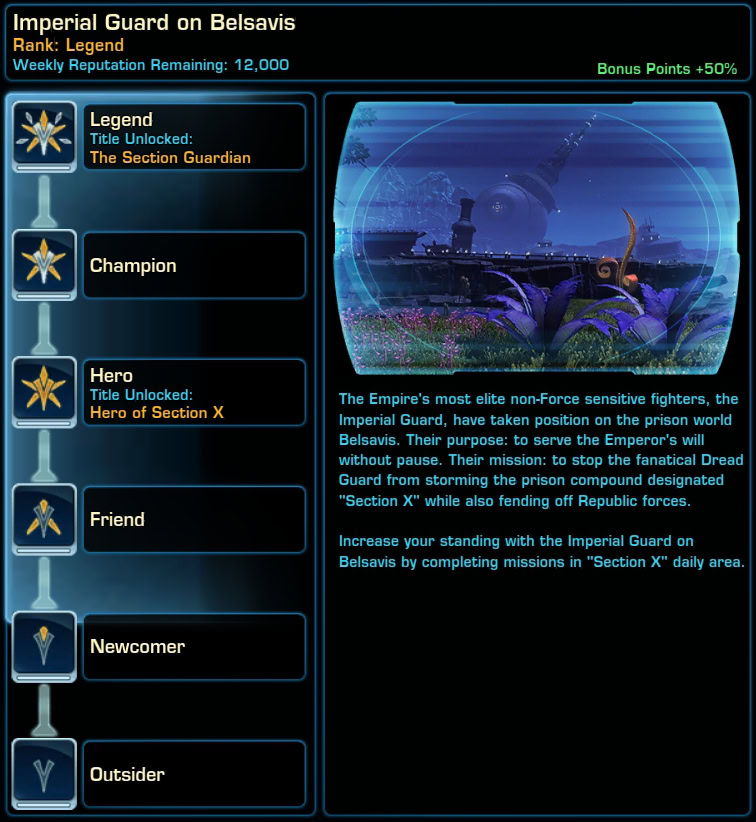
The reputation tracks are available in the Reputation tab in your Legacy window. You can earn reputation by completing the daily and weekly missions and use up the tokens you get from them.
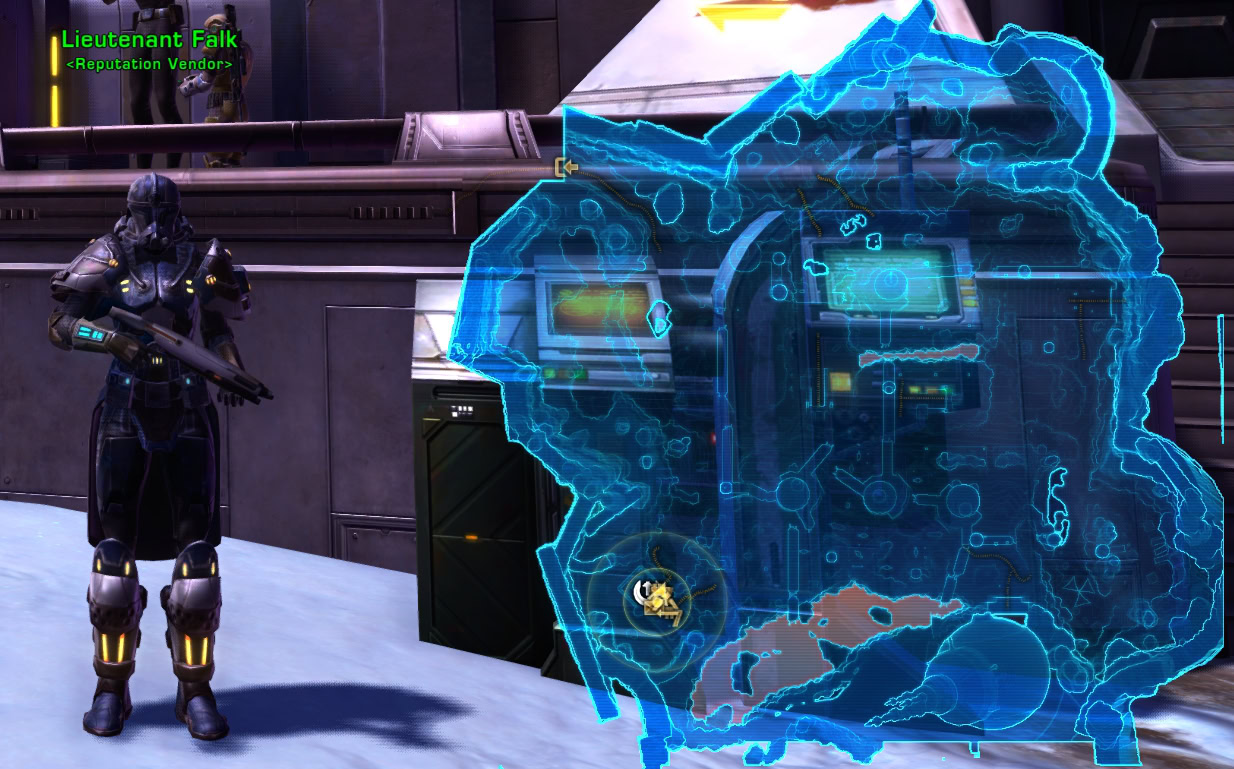
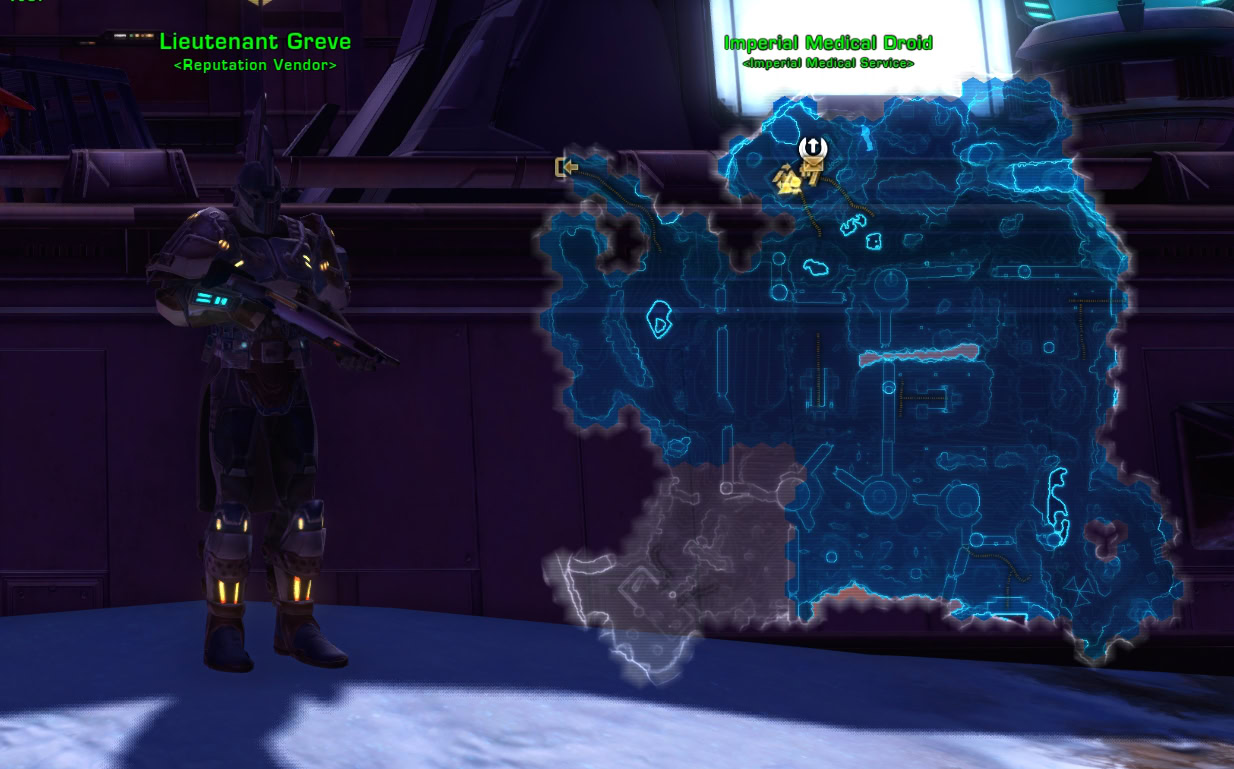
Reputation Vendors
The Section X Reputation Vendor is located next to the terminals where you get the daily missions.
The vendor offers a full armor set with unique visuals of the helmet for Republic and Empire characters, a minipet, a dye module schematic, and six decorations.
These goods require increased reputation standings with the Republic 5th Assault Battalion (Republic) and the Imperial Guard (Empire) in order to purchase.
Below the table, you can see visual previews of the items.
| Icon | Item Name | Reputation Requirement | Price |
|---|---|---|---|
 | Baby Drouk | Friend | |
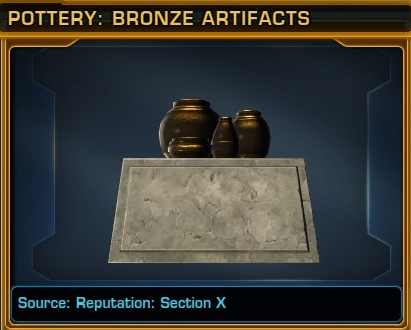
| Pottery: Bronze Artifacts | Legend | Universal Prefab MK-3  x1 x1 |
|
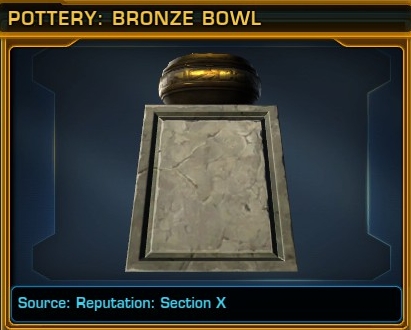
| Pottery: Bronze Bowl | Friend | Universal Prefab MK-3 x1 |
|
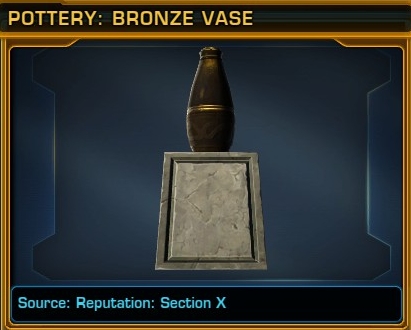
| Pottery: Bronze Vase | Hero | Universal Prefab MK-3 x1 |
|
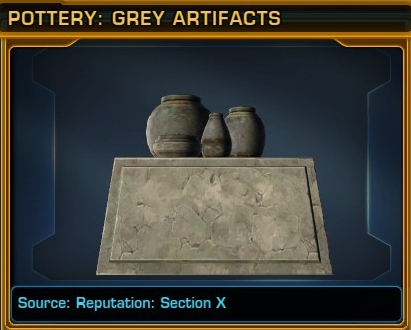
| Pottery: Grey Artifacts | Legend | Universal Prefab MK-3 x1 |
|
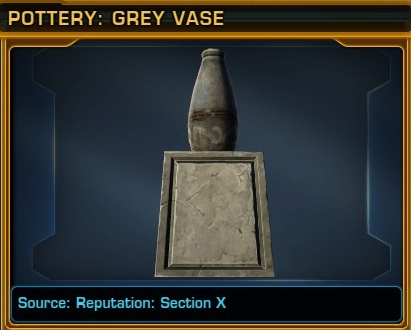
| Pottery: Grey Vase | Hero | Universal Prefab MK-3 x1 |
|
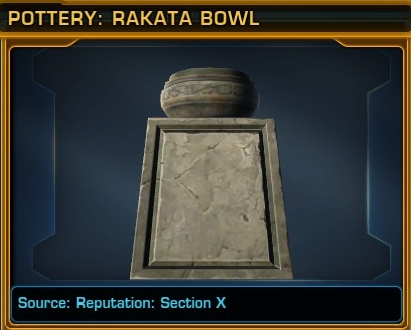
| Pottery: Rakata Bowl | Friend | Universal Prefab MK-3 x1 |
|
 | Schematic: Primary Deep Red Secondary Black Dye Module | Legend | |
 | Section Guardian Belt | Champion | |
 | Section Guardian Boots | Champion | |
 | Section Guardian Bracer | Champion | |
 | Section Guardian Chestguard | Champion | |
 | Section Guardian Gauntlets | Champion | |
 | Section Guardian Helmet (Republic) | Champion | |
 | Section Guardian Helmet (Empire) | Champion | |
 | Section Guardian Legplates | Champion |
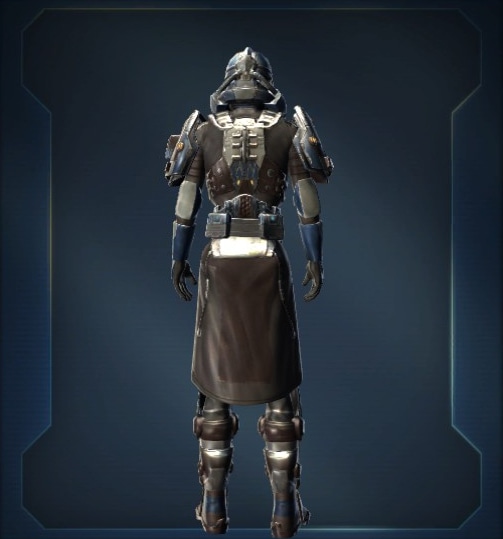
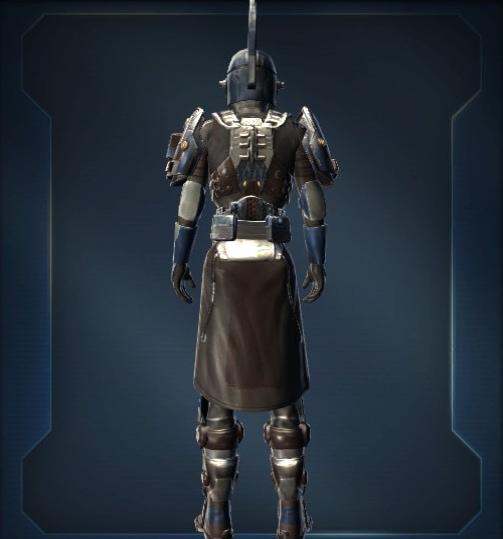
Section Guardian Armor Set
The Section Guardian armor set will cost you 87,400 credits to purchase and requires the Champion standing with the Republic 5th Assault Battalion/Imperial Guard to purchase.
The design for the outfit changes depending on which faction the player character is on. Due to this, you cannot obtain the Imperial look of this armor on a Republic character.


Schematic: Primary Deep Red Secondary Black Dye Module
This dye module set will cost you 100,000 credits to purchase and requires the Legend standing with the Republic 5th Assault Battalion/Imperial Guard to purchase.


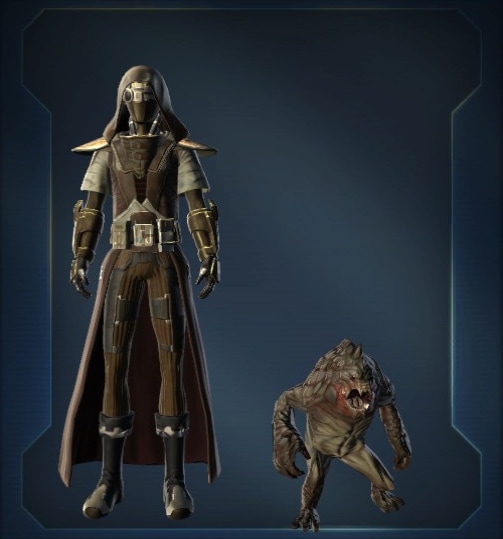
Baby Drouk Pet
The Baby Drouk pet will cost you 250,000 credits to purchase and requires the Friend standing with the Republic 5th Assault Battalion/Imperial Guard to purchase.
Decorations
The decorations available at Section X will require a Universal Prefab MK-3 to purchase. The Bronze pottery can be purchased at the Friend rank while the Grey Pottery can be purchased at the Hero rank.
These pottery decorations make great display pieces to add some archaic flair to your stronghold!
Achievements
The list of achievements for the Daily Area, Section X, on Belsavis, is very standard. None of the achievements has any unique or special rewards granted for unlocking and completing them.
| Icon | Name | Category | Legacy Points | Has Rewards | Description: | Rewards: |
|---|---|---|---|---|---|---|
 | Section X Rampage | General | 10 | No | Defeat 1000 non-player opponents while in Section X. | No |
 | Section X Annihilation | General | 25 | No | Defeat 2500 non-player opponents while in Section X. | No |
 | Section X Eradication | General | 50 | No | Defeat 5000 non-player opponents while in Section X. | No |
 | Section X Extinction | General | 100 | No | Defeat 10000 non-player opponents while in Section X. | No |
 | Section X: Opposing the Dread Guard | General | 5 | No | Defeat 10 Dread Guards in Section X. | No |
| Section X: Disarming the Dread Guard | General | 5 | No | Defeat 50 Dread Guards in Section X. | No |
| Section X: Damaging the Dread Guard | General | 10 | No | Defeat 100 Dread Guards in Section X. | No |
| Section X: Striking the Dread Guard | General | 10 | No | Defeat 250 Dread Guards in Section X. | No |
| Section X: Crippling the Dread Guard | General | 25 | No | Defeat 500 Dread Guards in Section X. | No |
| Section X: Devastating the Dread Guard | General | 50 | No | Defeat 2000 Dread Guards in Section X. | No |
 | Section X: Dread Host Bruiser | General | 5 | No | Defeat 10 Dread Hosts in Section X. | No |
| Section X: Dread Host Basher | General | 5 | No | Defeat 50 Dread Hosts in Section X. | No |
| Section X: Dread Host Brawler | General | 10 | No | Defeat 100 Dread Hosts in Section X. | No |
| Section X: Dread Host Enforcer | General | 10 | No | Defeat 250 Dread Hosts in Section X. | No |
| Section X: Dread Host Battler | General | 25 | No | Defeat 500 Dread Hosts in Section X. | No |
| Section X: Dread Host Assailant | General | 50 | No | Defeat 2000 Dread Hosts in Section X. | No |
 | Exterminating Section X | General | 5 | No | Kill 25 boglings, skinflayers, acklays, k’lor’slugs and other creatures in Section X. | No |
| Advanced: Exterminating Section X | General | 5 | No | Kill 100 boglings, skinflayers, acklays, k’lor’slugs and other creatures in Section X. | No |
| Expert: Exterminating Section X | General | 10 | No | Kill 250 boglings, skinflayers, acklays, k’lor’slugs and other creatures in Section X. | No |
| Elite: Exterminating Section X | General | 25 | No | Kill 500boglings, skinflayers, acklays, k’lor’slugs and other creatures in Section X. | No |
| Supreme: Exterminating Section X | General | 50 | No | Kill 2500 boglings, skinflayers, acklays, k’lor’slugs and other creatures in Section X. | No |
 | Section X Conquest | General | 10 | No | Complete all Combat achievements for Section X. | No |
 | Explore Section X | Exploration | No | Uncover all 11 map areas in Section X. | No | |
 | Novice Defender of Section X | Player Vs. Player | 5 | No | Defeat 10 enemy players in Section X. | No |
| Defender of Section X | Player Vs. Player | 5 | No | Defeat 50 enemy players in Section X. | No | |
| Elite Defender of Section X | Player Vs. Player | 10 | No | Defeat 100 enemy players in Section X. | No | |
| Master of Section X | Player Vs. Player | 25 | No | Defeat 500 enemy players in Section X. | No | |
| Conquest of Section X | Player Vs. Player | 50 | No | Defeat 1000 enemy players in Section X. | No | |
| Section X: Infiltrating the Republic | Player Vs. Player | 5 | No | Defeat 30 Champion difficulty Republic base guards and turrets in Section X. | No | |
| Section X: Infiltrating the Empire | Player Vs. Player | 5 | No | Defeat 30 Champion difficulty Empirial base guards and turrets in Section X. | No | |
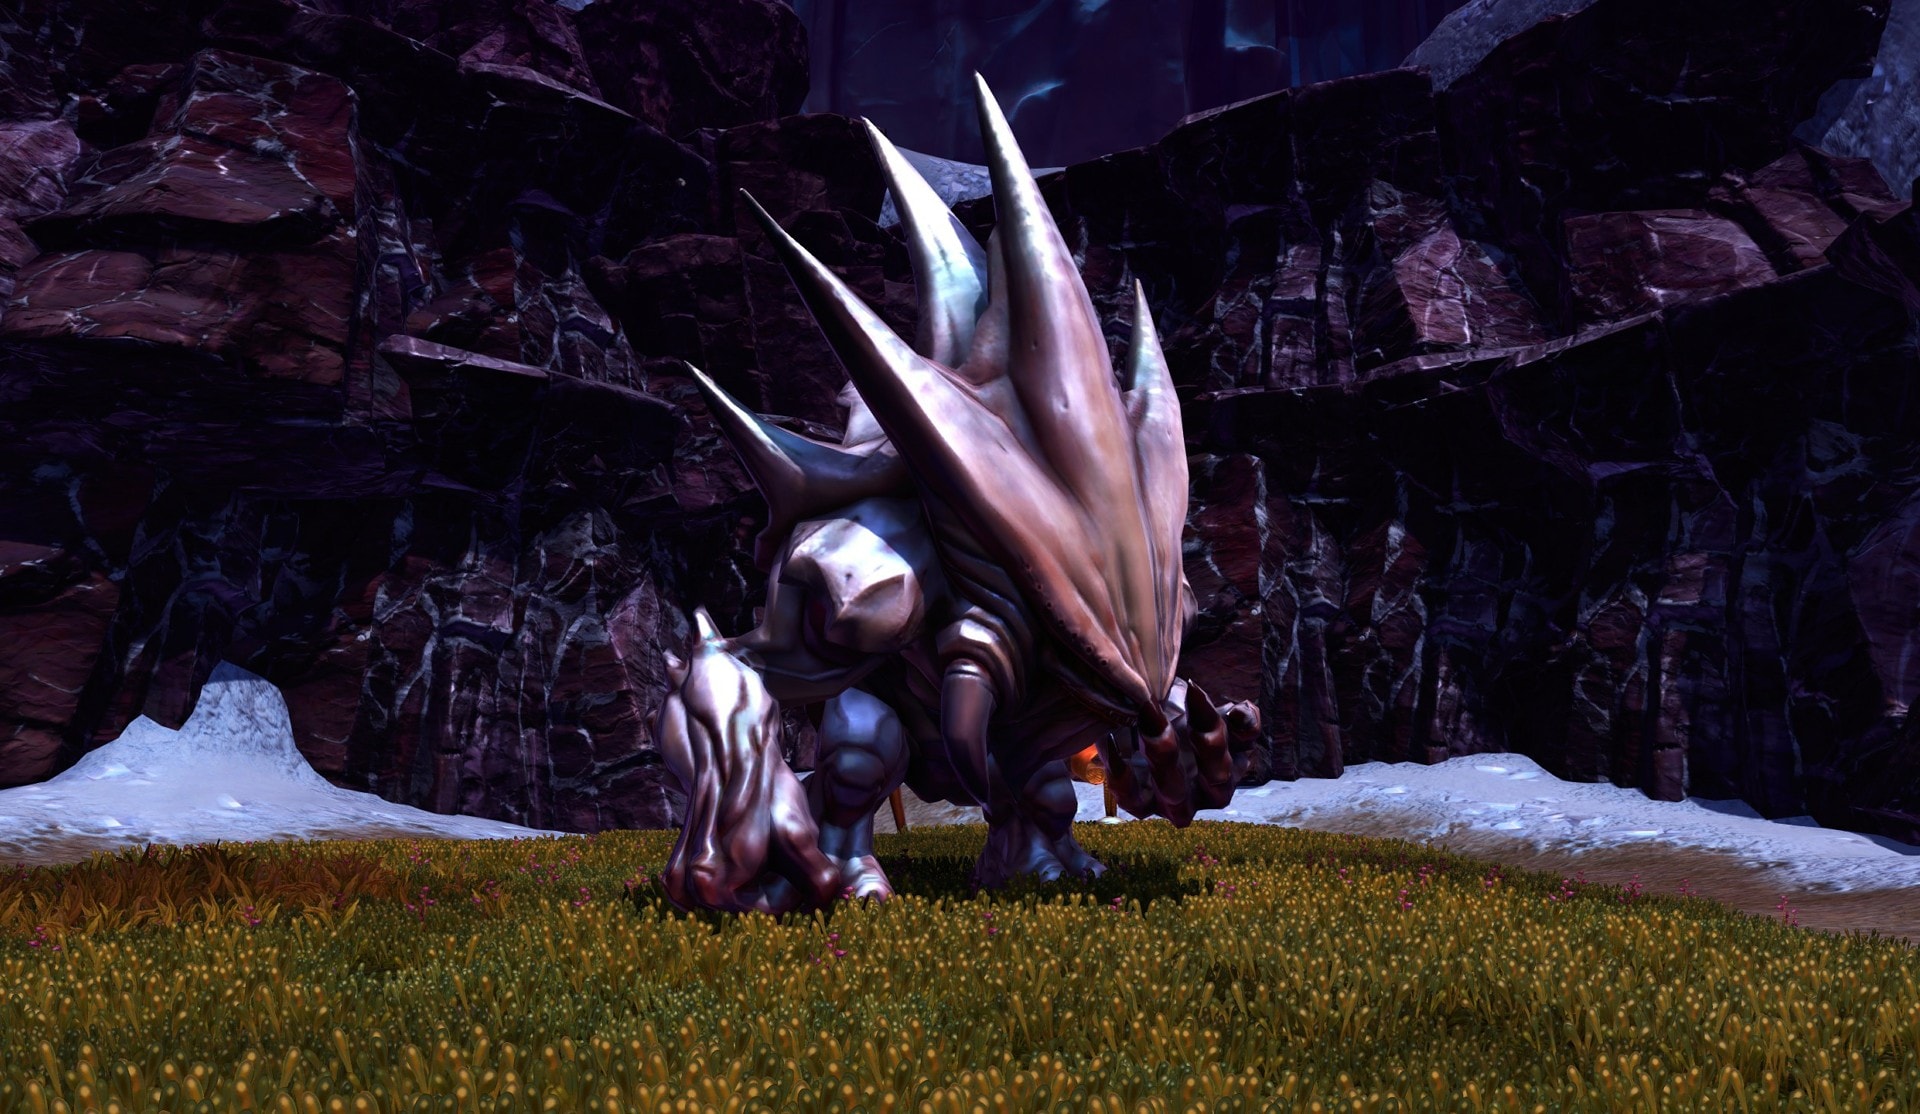
| Dreadtooth | World Bosses | 10 | No | Defeat Dreadtooth in Section X. | No | |
| Dreadtooth Corrupted | World Bosses | 10 | No | Defeat Dreadtooth while he is corrupted in Section X. | No | |
| Dreadtooth Frenzied | World Bosses | 10 | No | Defeat Dreadtooth while he is frenzied in Section X. | No | |
| Nightmarish Dreadtooth | World Bosses | 25 | No | Defeat Dreadtooth while he is nightmarish difficult in Section X. | No |
HK-51 Mission Chain Start
From the camp at Section X starts one of the longest mission chains in the entire game – the discovery and building of HK-51, one of the earliest companions BioWare added to the game post launch.
This chain of missions is not a repeatable, but it starts from Section X. Talk to a little droid right next to the shuttle in the Section X camp for your faction. For Republic players, the droid’s tag is B6-31. For Imperials, it’s G0-A1.
This will start the chain of missions with the first one being a Heroic 2+ taking you to The Frozen Lake area in the northwestern part of Section X.