The Sharpshooter aims to be the master accuracy and area control in Star Wars Zero Company. This guide covers ability mechanics, weapon choices, secondary specializations, and build tips.
Best Sharpshooter Build Overview
The Sharpshooter excels in single target damage and area control due to Overwatch bonuses. If you want to build a sniper, this is a necessary specialization!
- Best Weapons: Longarm Blaster or Blaster Pistol
- Best Mods: Cycler Barrel, Assassin’s Scope, Bracing Stabilizer (Longarm) or Ergonomic Stabilizer (Pistol)
- Best Utilities: Targeting Visor, Double-Dose Bacta Stim, and Auto Rangefinder
- Secondary Specialization: Scoundrel (Longarm) or Gunslinger (Pistol)
- Recommended Talent: The Bigger They Are… or Cold Blooded
- Cross Training Priority: Focus Points, Critical Chance, Critical Damage
Let’s dive deeper and explain why and how each of those recommendations work together and how to use the Medic Specialization to its max potential in various situations.
Sharpshooter Abilities and Mechanics
The Sharpshooter Specialization will grant an Operator the following four abilities: Precision Shot, Zero In, Pick Them Off, and Sharpshooter Training.

Precision Shot (Ultimate)
Fires a calculated blaster shot that Always hits.
A simple ability that lets you hit a guaranteed shot for a target within line of sight for 6 Advantage. This counts as a blaster attack, so it’ll benefit from Lethal stacks or weapon modifications.
Its defining trait is its increased critical damage which goes up to +50% at max rank. Focus this after maxing Zero In if you’re making a sniper.
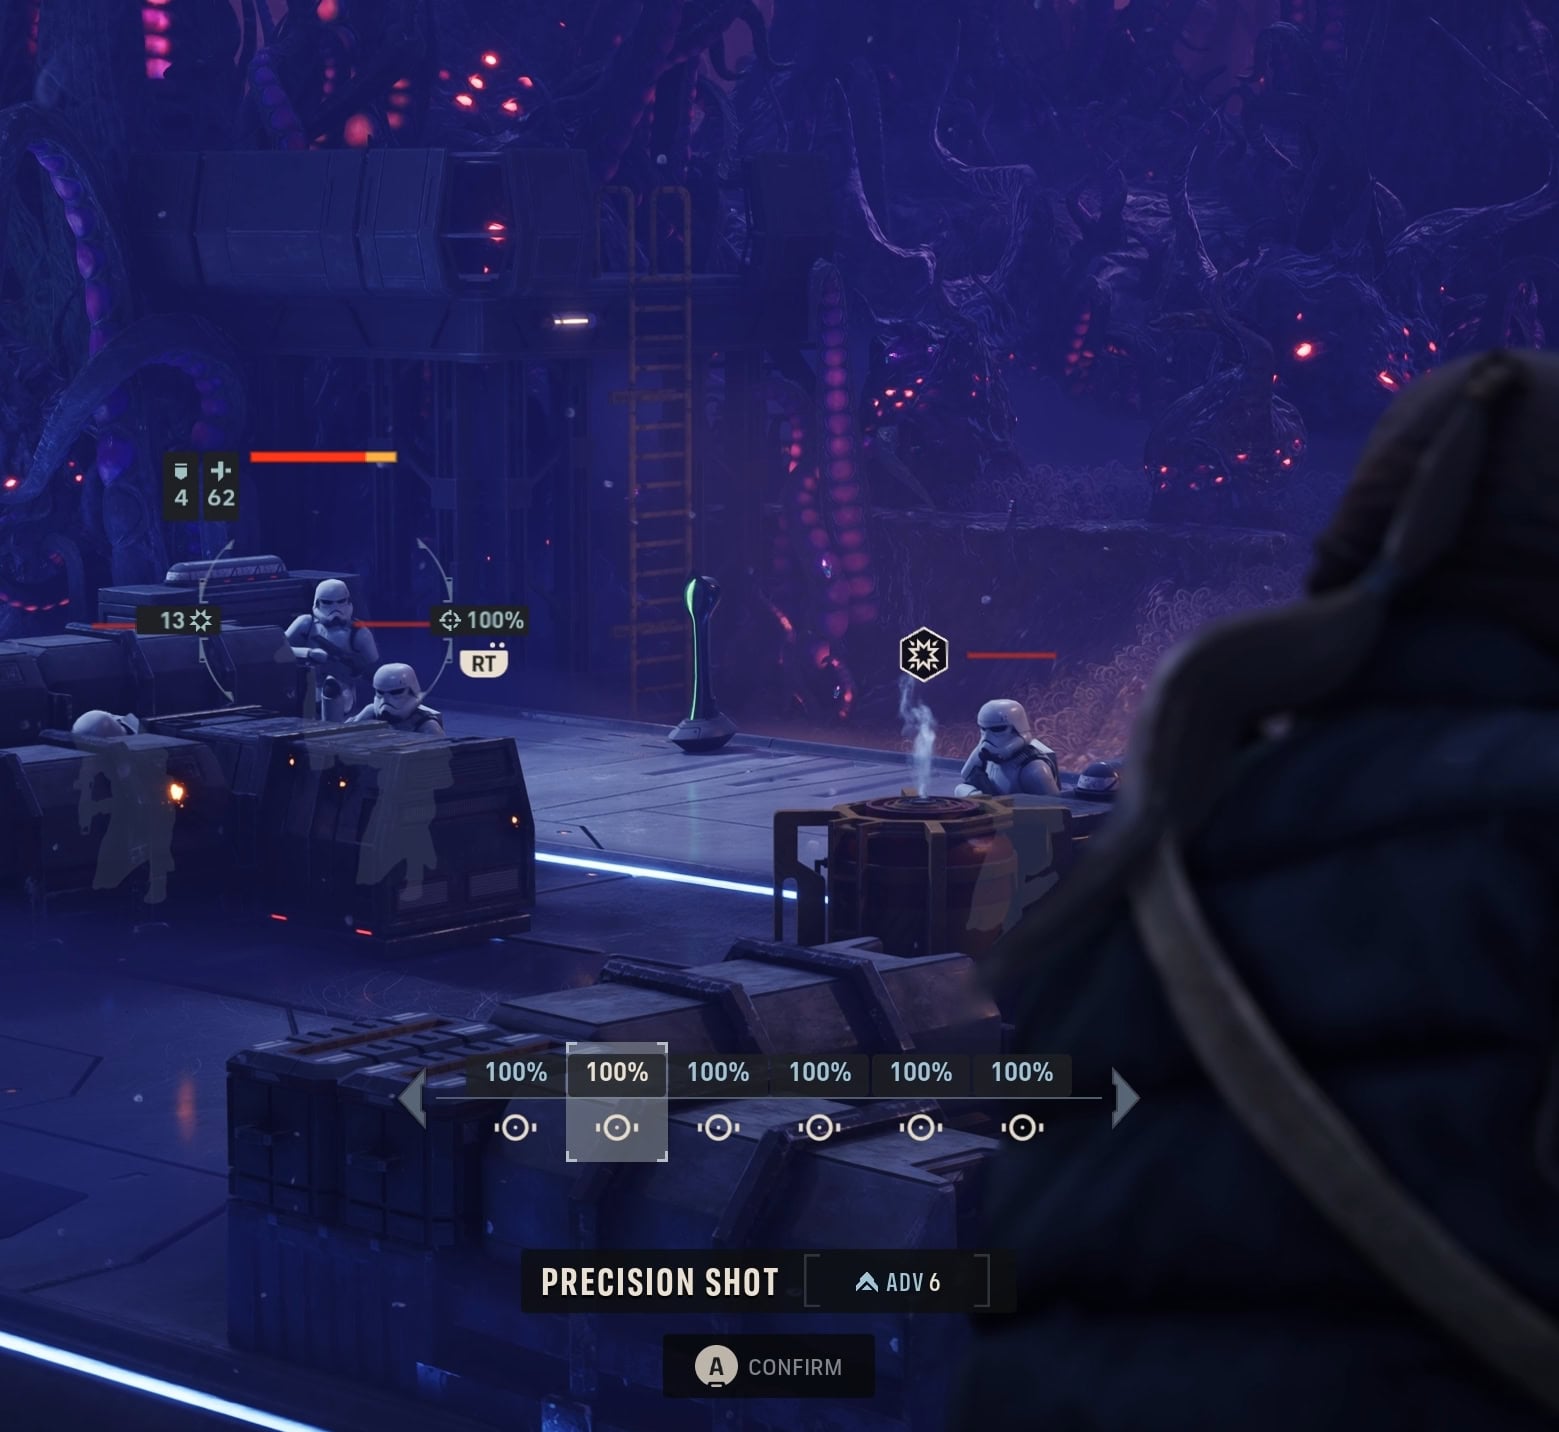
This ability consumes a lot of Advantage for a single weapon shot, use it wisely and on targets you need to go down ASAP.

Zero In (Standard)
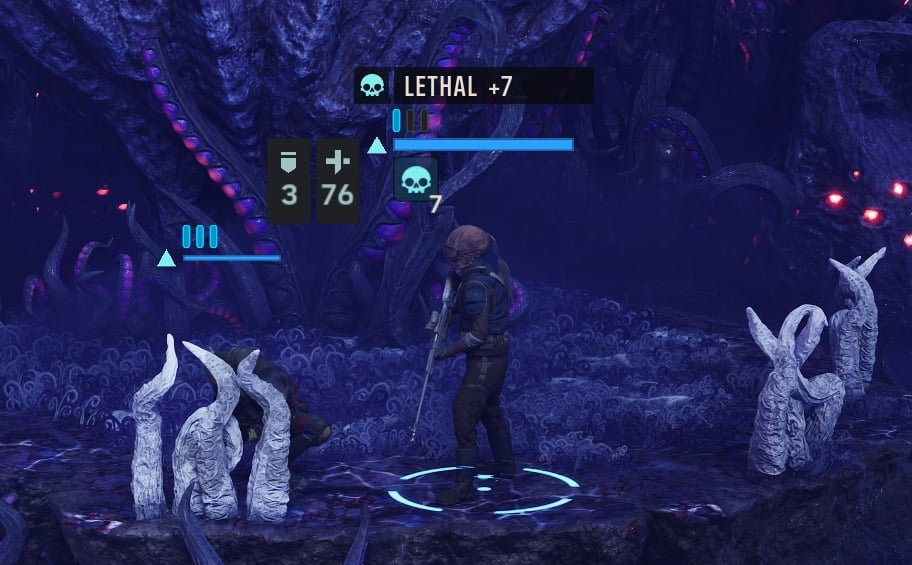
Set up a position for accurate shooting and gain 3 Stacks of Lethal, increasing Chance-To-Hit by +15% and Critical Chance by +9%.
Zero In is good for an Operator looking to stay in one place for an extended duration of time, making the Longarm Blaster ideal for this playstyle. At max rank, you’ll get 8 stacks of Lethal for a total of +40% Chance-To-Hit and +24% Critical Chance.
Lethal stacks are lost if you move or are forcefully moved. Due to this, a Sharpshooter will likely spend their first turn or two getting into a good position. Be sure to get somewhere with cover.
Try to position the Sharpshooter on the high ground to get a better view of the area. This also decreases the chance of enemies not being within line of sight due to cover or terrain.

Pick Them Off (Passive)
Increases Overwatch Chance-To-Hit by +5% and Overwatch Damage by +2.
Max this ability if you’re looking for area control. The Longarm Blaster will be best with covering distance, while the Repeater is great for covering a wider area. This assumes you’ve upgraded the weapon’s Overwatch range and/or area.
If you’re using a Repeater for the wider Overwatch area, it would be best to use Sharpshooter as a secondary specialization and maxing this ability. If using other weapons, max Zero In first followed by Precision Shot.
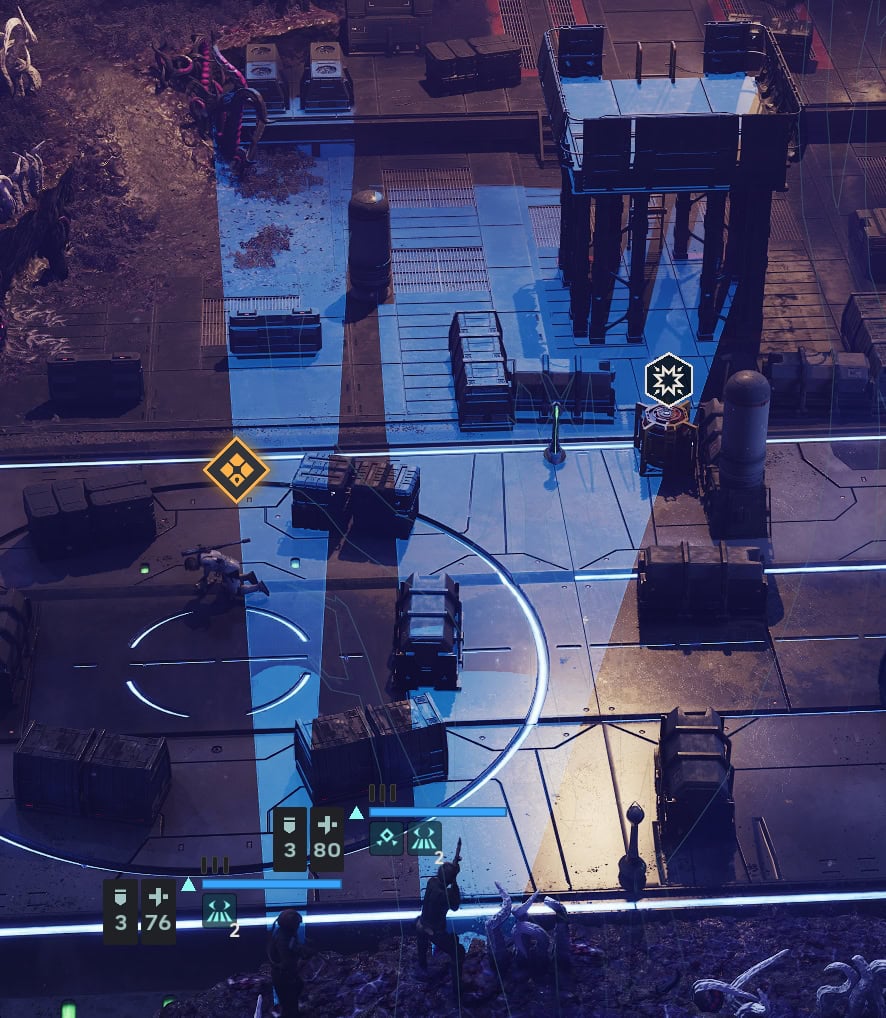
Overwatch is great to use if you want more than one shot per turn if you’re using the Longarm Blaster. 1 AP spent for Overwatch results in 1 reaction shot, allowing up to 1 shot against 3 enemies as a reaction.

Sharpshooter Training (Passive)
This Operator has a +10% Chance-To-Hit bonus on all Blaster Attacks.
Recommended Weapons
With the added critical hit chance from Zero In, Sharpshooter works best with weapons that have good critical chance upgrades: the Longarm Blaster and Blaster Pistols.
Longarm Blaster
The Longarm Blaster works really well with the Sharpshooter due to its high critical hit damage. If you upgrade its critical hit chance, you can add a total of +7%. Stack this with other passive critical chance bonuses.
If you combine max Lethal stacks (+24%), base weapon critical chance (+5%), Targeting Visor (+12%), Assassin’s Scope (+12%), and Longarm critical chance upgrades (+7%), you can reach 60% critical hit chance with the Longarm Blaster.
Blaster Pistols
Blaster Pistols have the lowest base damage of the weapons, but it has critical chance scaling close to the Longarm Blaster. At max rank, the Blaster Pistol gets an additional +6% critical hit chance.
While a Longarm Blaster requires Den Level 10 to reach max critical chance, the Blaster Pistol only requires Den Level 7. Using the previously mentioned critical sources, the Blaster Pistol can get at least 59% critical hit chance.
With less AP required to fire, that 1% difference doesn’t mean that much as you can dish out a lot more shots than the Longarm Blaster. The critical hits go a long way to make up for the Pistol’s low base damage.
Recommended Weapon Mods and Utilities
Whether using the Longarm Blaster or Blaster Pistol, you’ll want a Cycler Barrel and an Assassin’s Scope. A Cycler Barrel gives the Operator a chance to regain 1 AP, which is useful for an extra shot for the Longarm Blaster or Pistol.
You won’t find an Assassin’s Scope until the mid-game when you can get better Black Market quality or as a reward from Operations. This simple yet useful mod adds +12% critical chance to the blaster it’s used on.
For Utilities, use a Targeting Visor for increased chance-to-hit and critical chance. Pair this with a Double-Dose Bacta Stim. A Longarm Sharpshooter will often be away from the team and away from a team’s medic, so this helps them patch up after receiving a hit.
If you’ve chosen the third Utility Slot unlock, the Auto Rangefinger is a great choice to ignore chance-to-hit penalties derived from range.
Best Secondary Specialization Pairings
The Sharpshooter is great for providing assist attacks and would benefit from even more critical chance, so using Scoundrel or Gunslinger as a secondary specialization will make for a great choice.
Scoundrel
Scoundrel is better suited for a Longarm Blaster build. You’ll be using this for the Identify Weakness, Never Play Fair, and Scoundrel’s Instinct abilities.
Identify Weakness lets you choose a target to make Vulnerable for a critical hit. If you want to prioritize single target damage, max this so increase its range to 28 meters.
A Sharpshooter should be in a good position to attack most or all enemies, so using them for assist attacks is great due to their accuracy and high damage. Max Never Play Fair over Identify Weakness if you want better assist attacks.
Scoundrel’s Instinct is just a solid bonus to ignore 4 points of Defense. As you’re more stationary, a Bracing Stabilizer is another good weapon mod for increased damage when the Operator has not moved.
Gunslinger
Use Gunslinger if you’re using Blaster Pistols. Keen Eye can add +15% critical chance and Quick Draw is great to use with your final AP to mop up.
Adding this to the 59% critical chance mentioned earlier, you can easily have 74% critical chance. Though by that point, you should already have at least 80%+ critical chance due to cross training rewards.
The more critical chance you have, the more likely Quick Draw will kill a target to refund 1 AP, repeating until no one’s alive or you failed to defeat something.
The Onslaught passive increases blaster damage by 1 for each time you fire on the same turn, making it great with an Ergonomic Stabilizer.
Recommended Talents
You’ll want The Bigger They Are… for a Longarm Sharpshooter/Scoundrel Operator, or Cold Blooded for a Pistol Sharpshooter/Gunslinger Operator.
Scoundel’s Identify Weakness ability has you covered for a guaranteed critical hit on a target. As Elite and Boss enemies are going to have higher defenses, the extra damage on them is useful when paired with the Scoundrel’s Instinct passive.
Cold Blooded can grant up to 2 Vicious stacks with each use, making it more ideal for multiple shots in a turn. With the pistol using 1 AP for shot, you can better utilize a maxed out Cold Blooded talent.
Cross Training Priority
You’ll want Focus Points, Critical Chance, and Critical Damage. Focus points can help you max out your Zero In skill for better accuracy and damage. As this specialization can grant a lot of critical chance, adding more is extremely beneficial.
If neither option is available, you can’t go wrong with critical damage. Assuming you’ve maxed passive sources and got a few Cross Training critical chance rewards, you can easily reach 70-75%+ critical chance. Make those attacks hit even harder with a higher critical damage value!