Learn how to lease a Tailor’s Shop in Crimson Desert’s Charting the Unknown DLC, how to properly manage it to level it up quickly, what layouts and garment combos work best, and how to make a lot of money from this business.
Use the Table of Contents, located in the left panel (top left button on the mobile menu) to navigate through this long guide more easily and quickly.
Key Points
- Layout: Divide your Tailor’s Shop into workspaces for your Tailors and Weavers. Place Spinning Wheels with Looms in front of them. Do the same for Dye Vats and Sewing Workstations.
- Workstations: Leave enough room between your Sewing Workstations for your employees to move freely and place them as close as possible to the customers.
- Leveling Up: Lower prices to get a Positive Response, keep every selling slot filled, and hire more staff at Popularity levels 2 and 4.
- Popularity Level 4: Every Tailor’s Shop has the task “Welcome a special guest once”, so sell Classic garments to bring in more special guests.
- Profit: At Popularity level 5, raise prices to Mixed or Unsure and garments that match your Tailor’s Shop Unique Bonus Effect (Armor, Cloak or Headgear).
How to Choose Which Tailor’s Shop to Lease
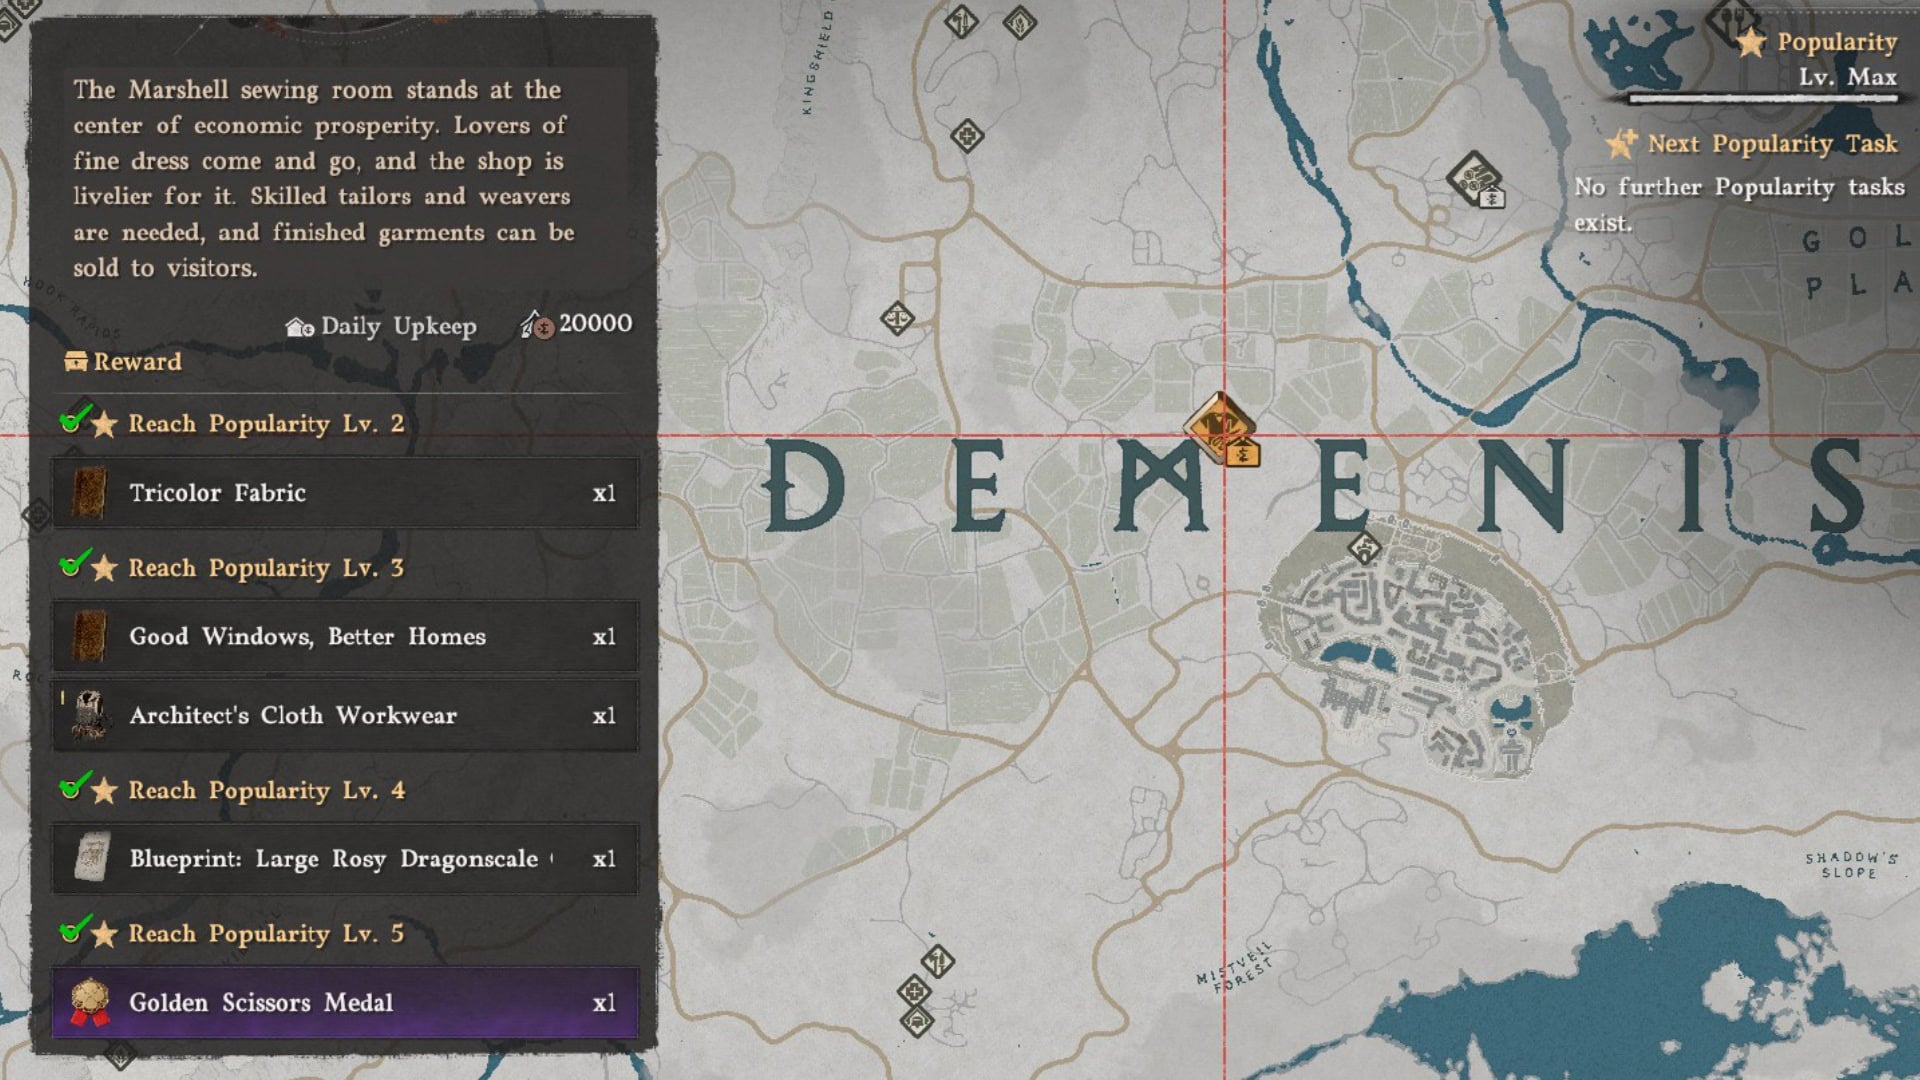
With only three Tailor’s Shops to choose from, I recommend you start with The Marshell Tailor’s Shop located in Demeniss. It’s accessible the earliest in the game out of the three, and its Unique Bonus Effect focused on Armor makes it easier to make a profit from it.
Outside of that, the only real difference between them (apart from the rewards, which you can check at the end of the guide) is their size and shape, you can choose based on location or the vibe you’re going for, as long as the space fits your plans.
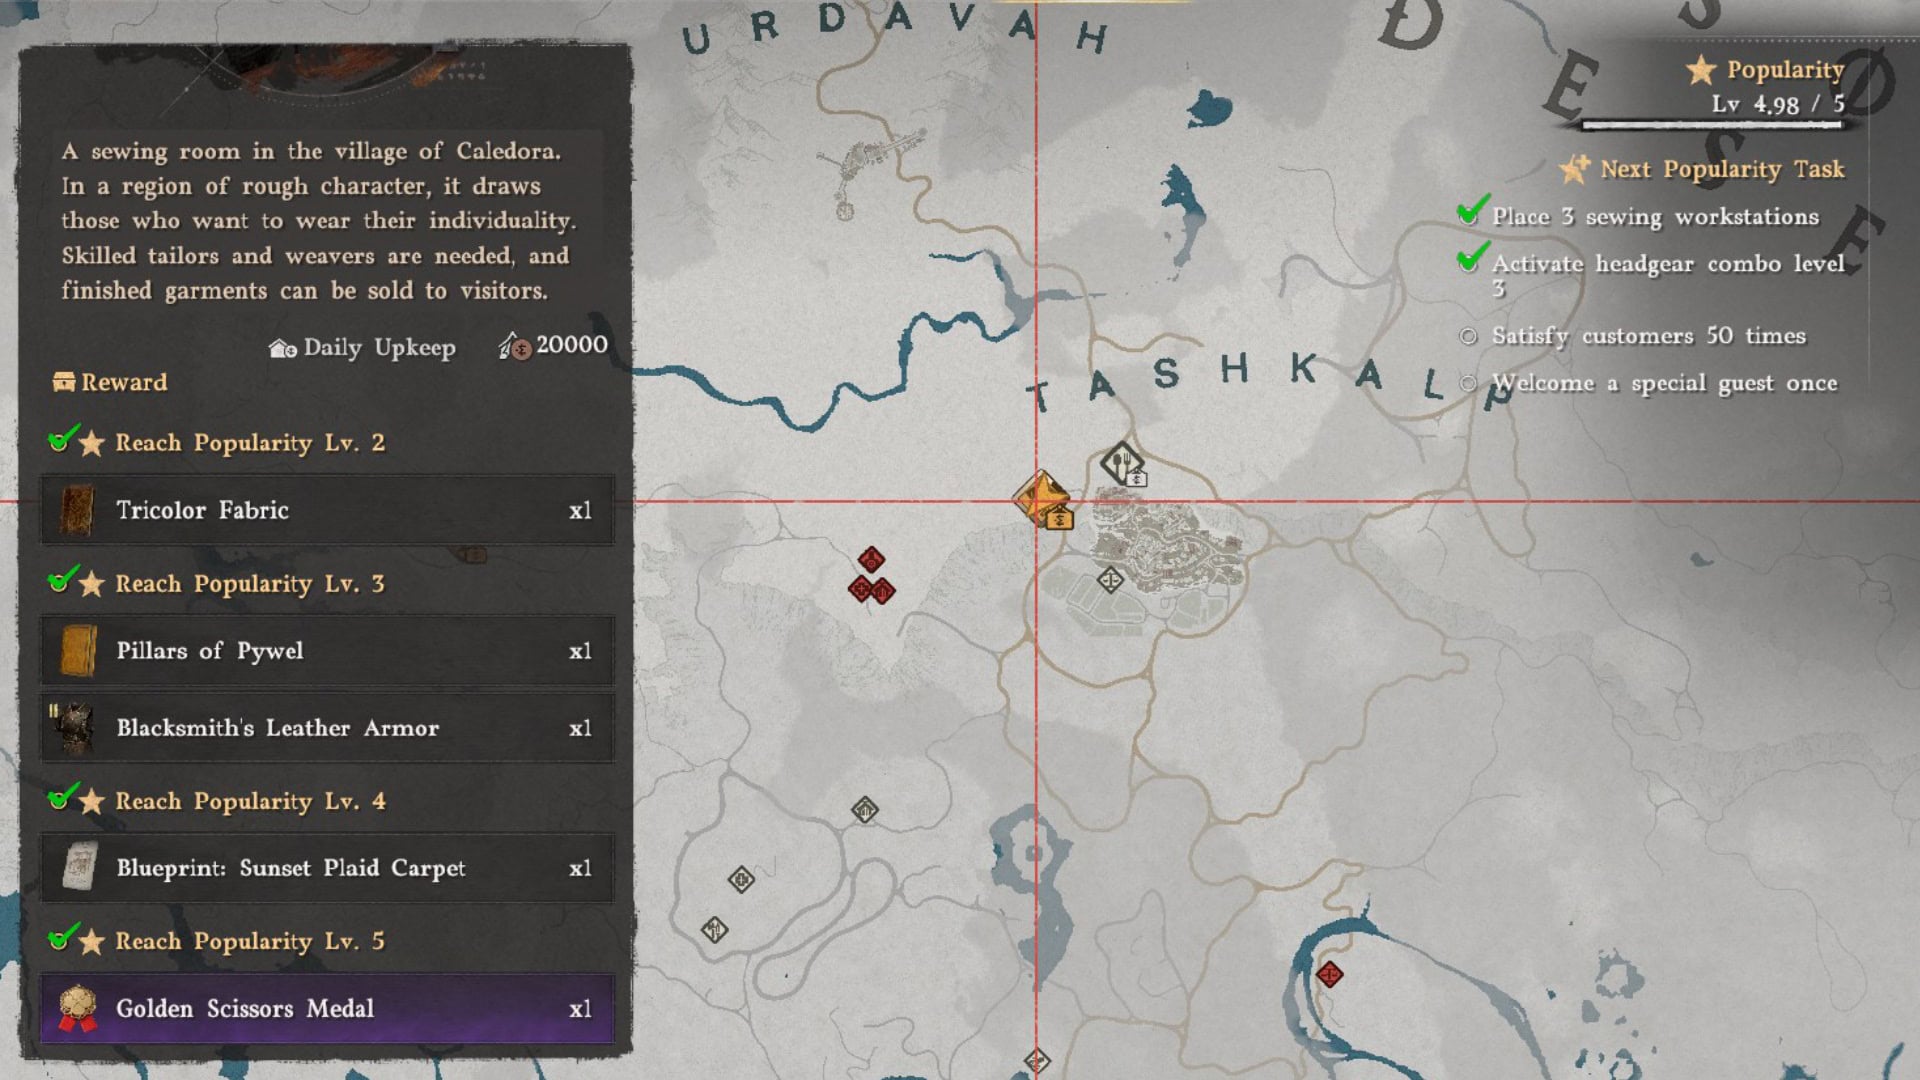
To learn more about leasing a facility, read our complete guide to Facility Management, where we explain everything from locations to the process of upgrading a facility, to making it successful, to rewards you earn.
Crimson Desert Facility Management Guide: Unlock & Earn MoneyOptimal Layout for Tailor Shops
Even though all facilities behave similarly. Tailor Shops have a few intricacies in how your employees perform their tasks that you can min-max to improve efficiency and maximize profits.
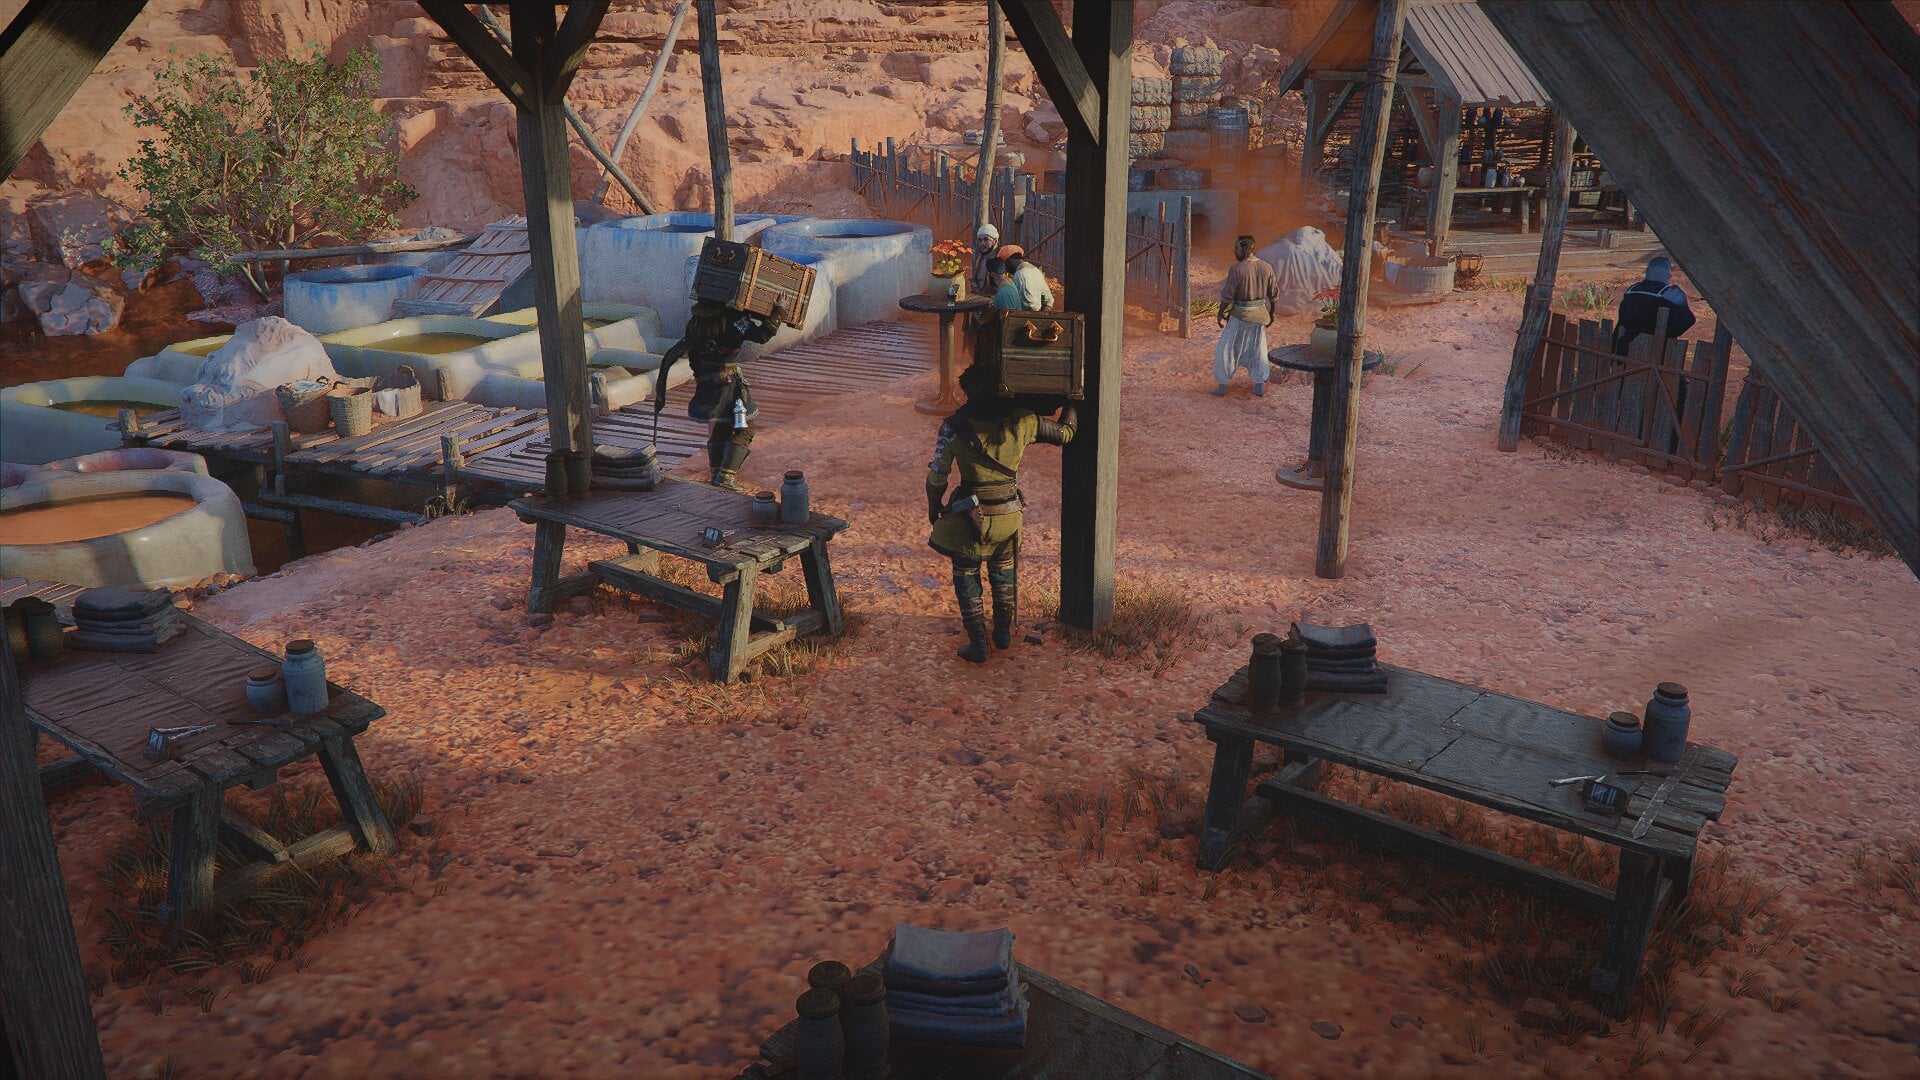
1. Make a Waiting Area by Placing Standing Tables
To help your employees reach customers more easily, place at least two Standing Tables near the entrance. This gives customers somewhere to wait and keeps a clear path for new arrivals.
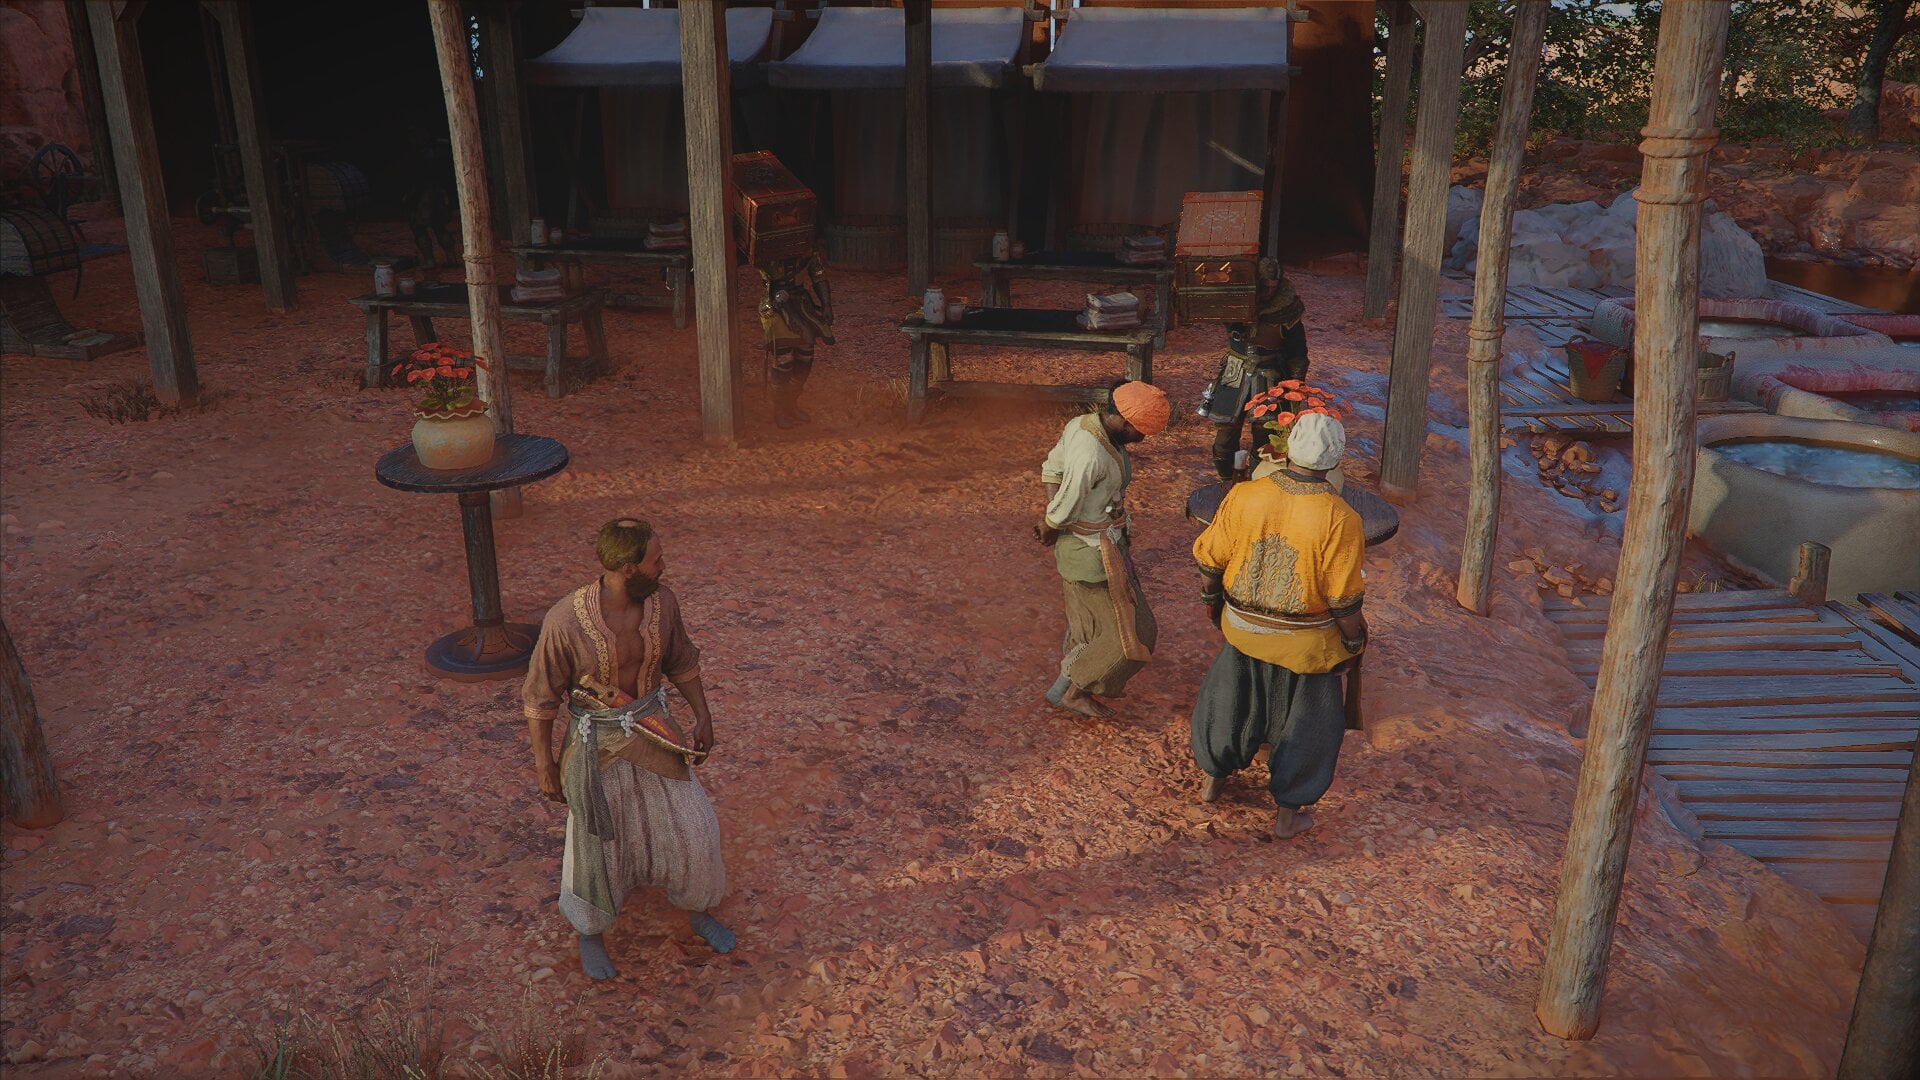
2. Give Your Waiting Area a Roof
If it starts to rain, your customers may panic and run away. To avoid this, place all your Standing Tables under a roof.
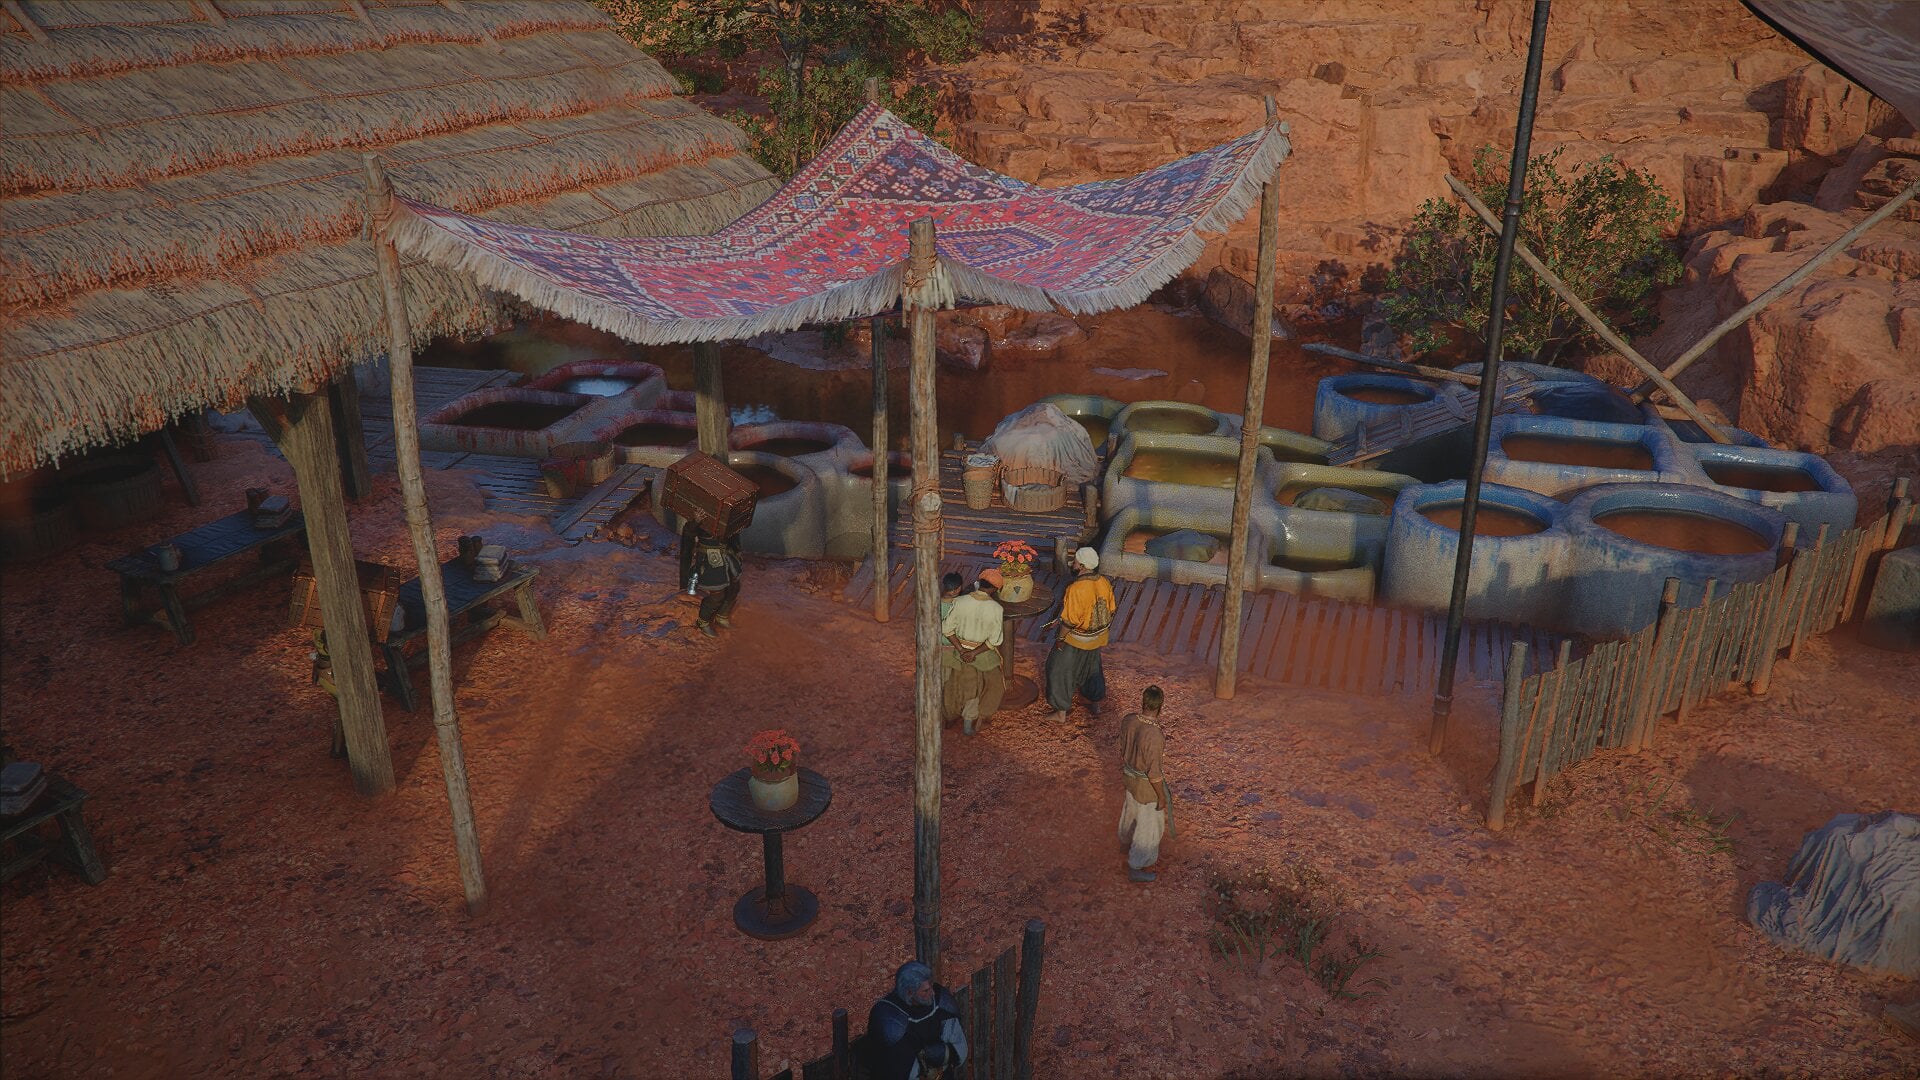
3. Divide Your Tailor’s Shop for your Tailors and Weavers
To give both your Tailors and Weavers room to work, divide your Tailor’s Shop into two clearly defined spaces.
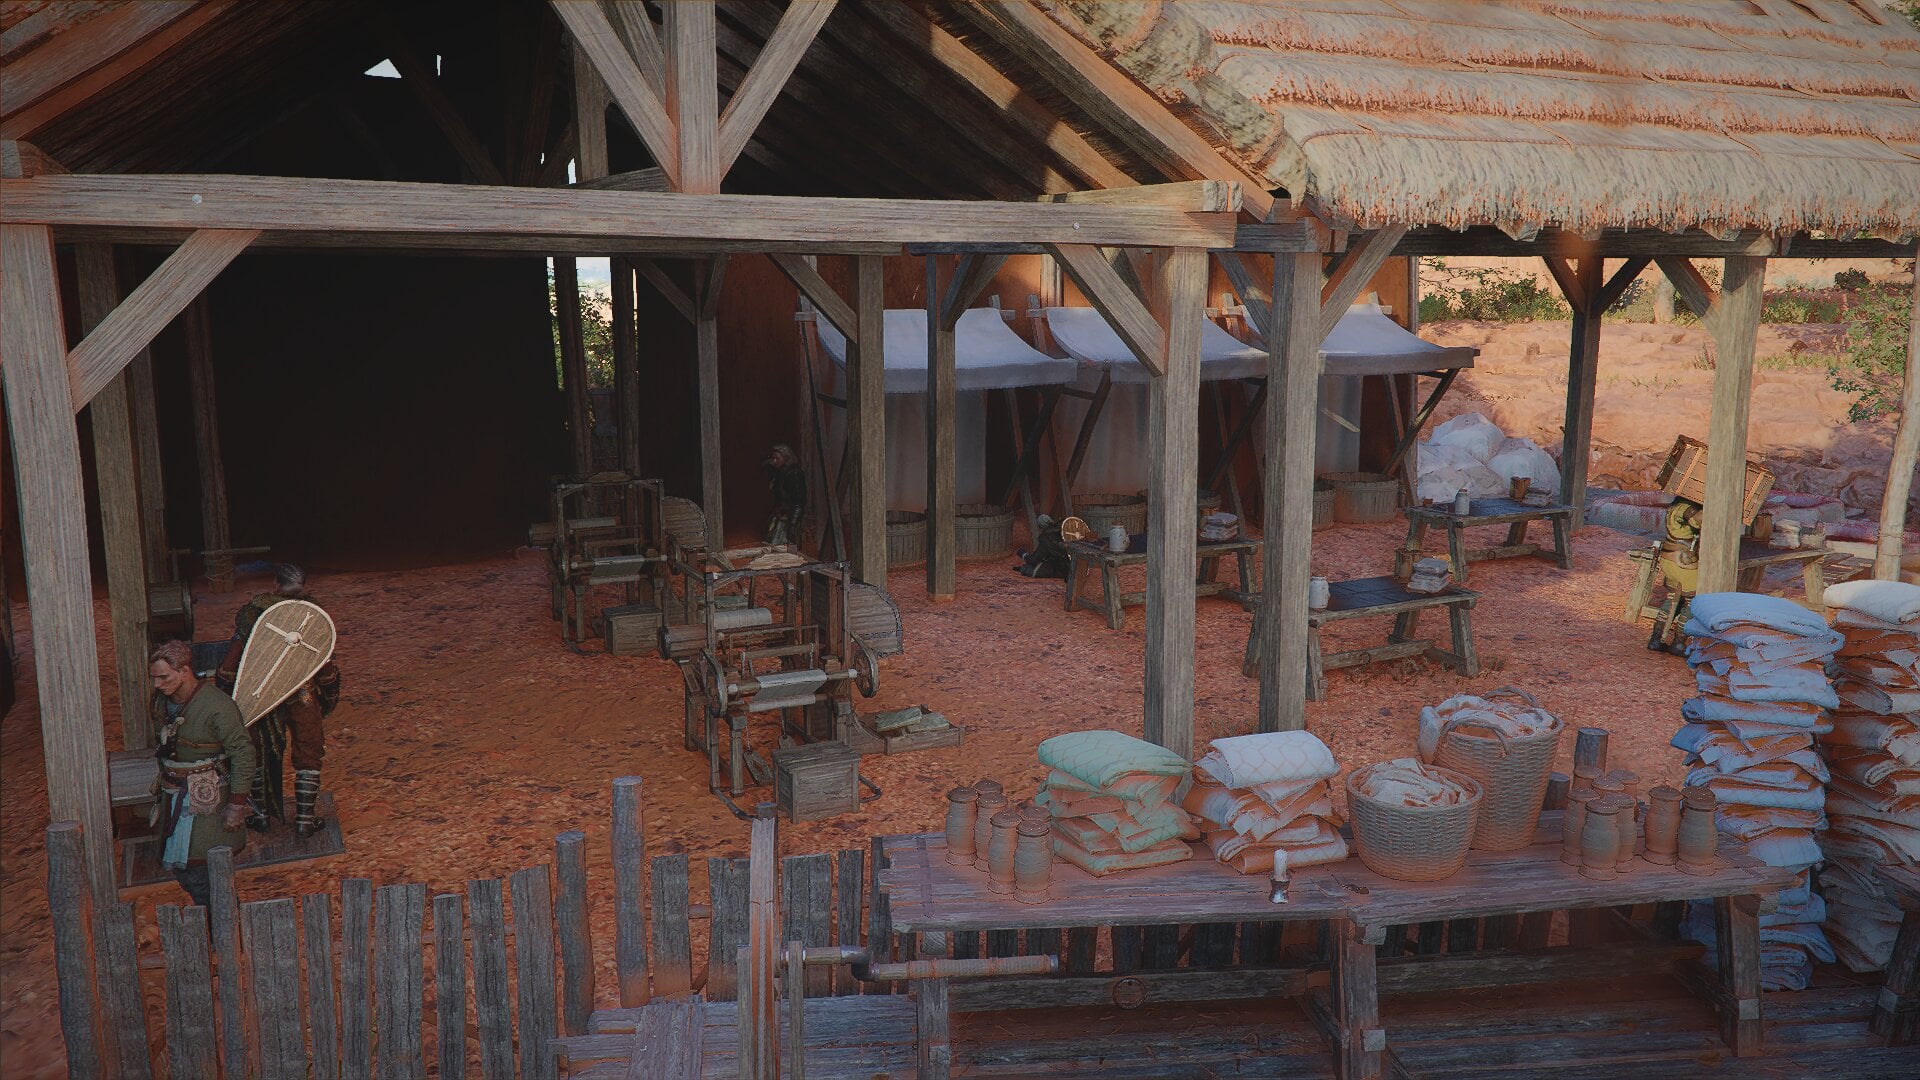
4. Place Spinning Wheels with Looms in Front of Them
Your Weavers’ work process starts with making thread on a Spinning Wheel and then taking the thread to a Loom to turn it into cloth. This setup gives your Weavers an optimal work space that they never need to leave.
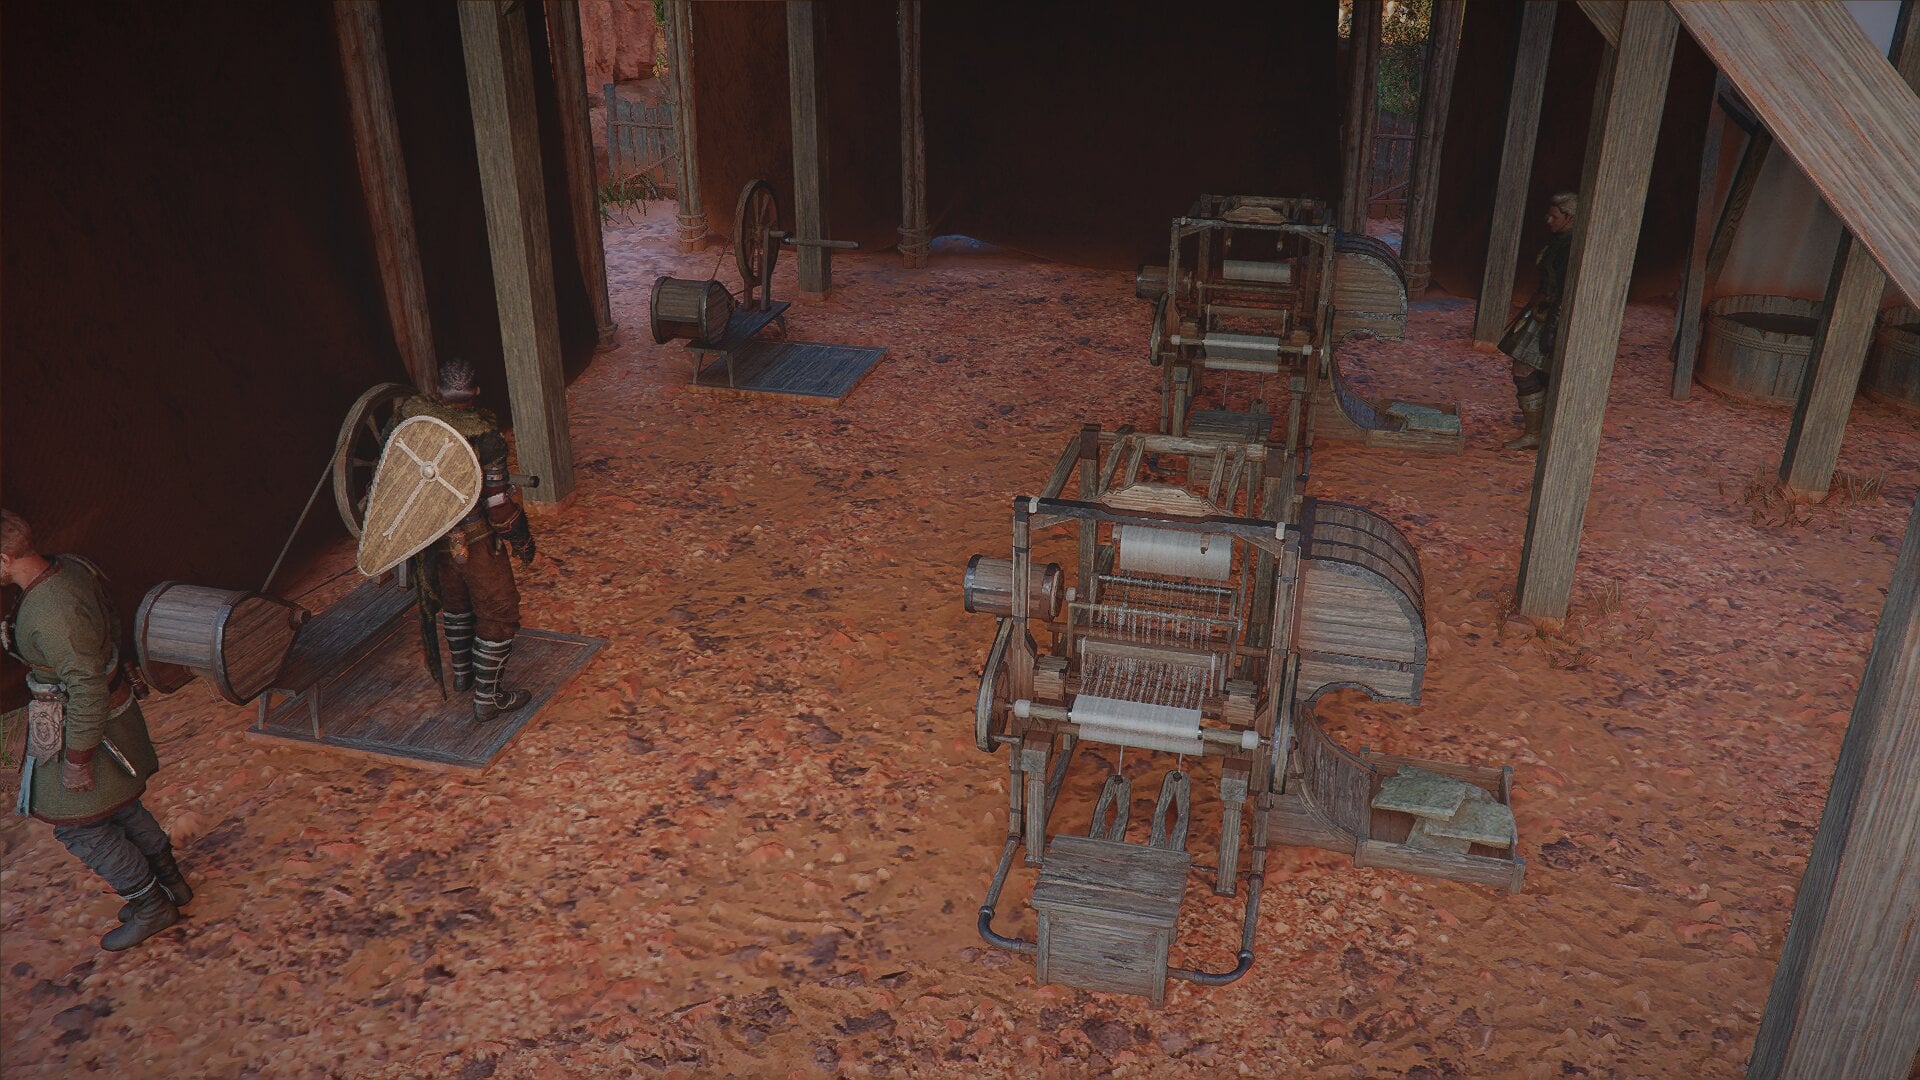
Place your Looms with the tray where the cloth accumulates facing towards your Tailors, to facilitate picking up the cloth.
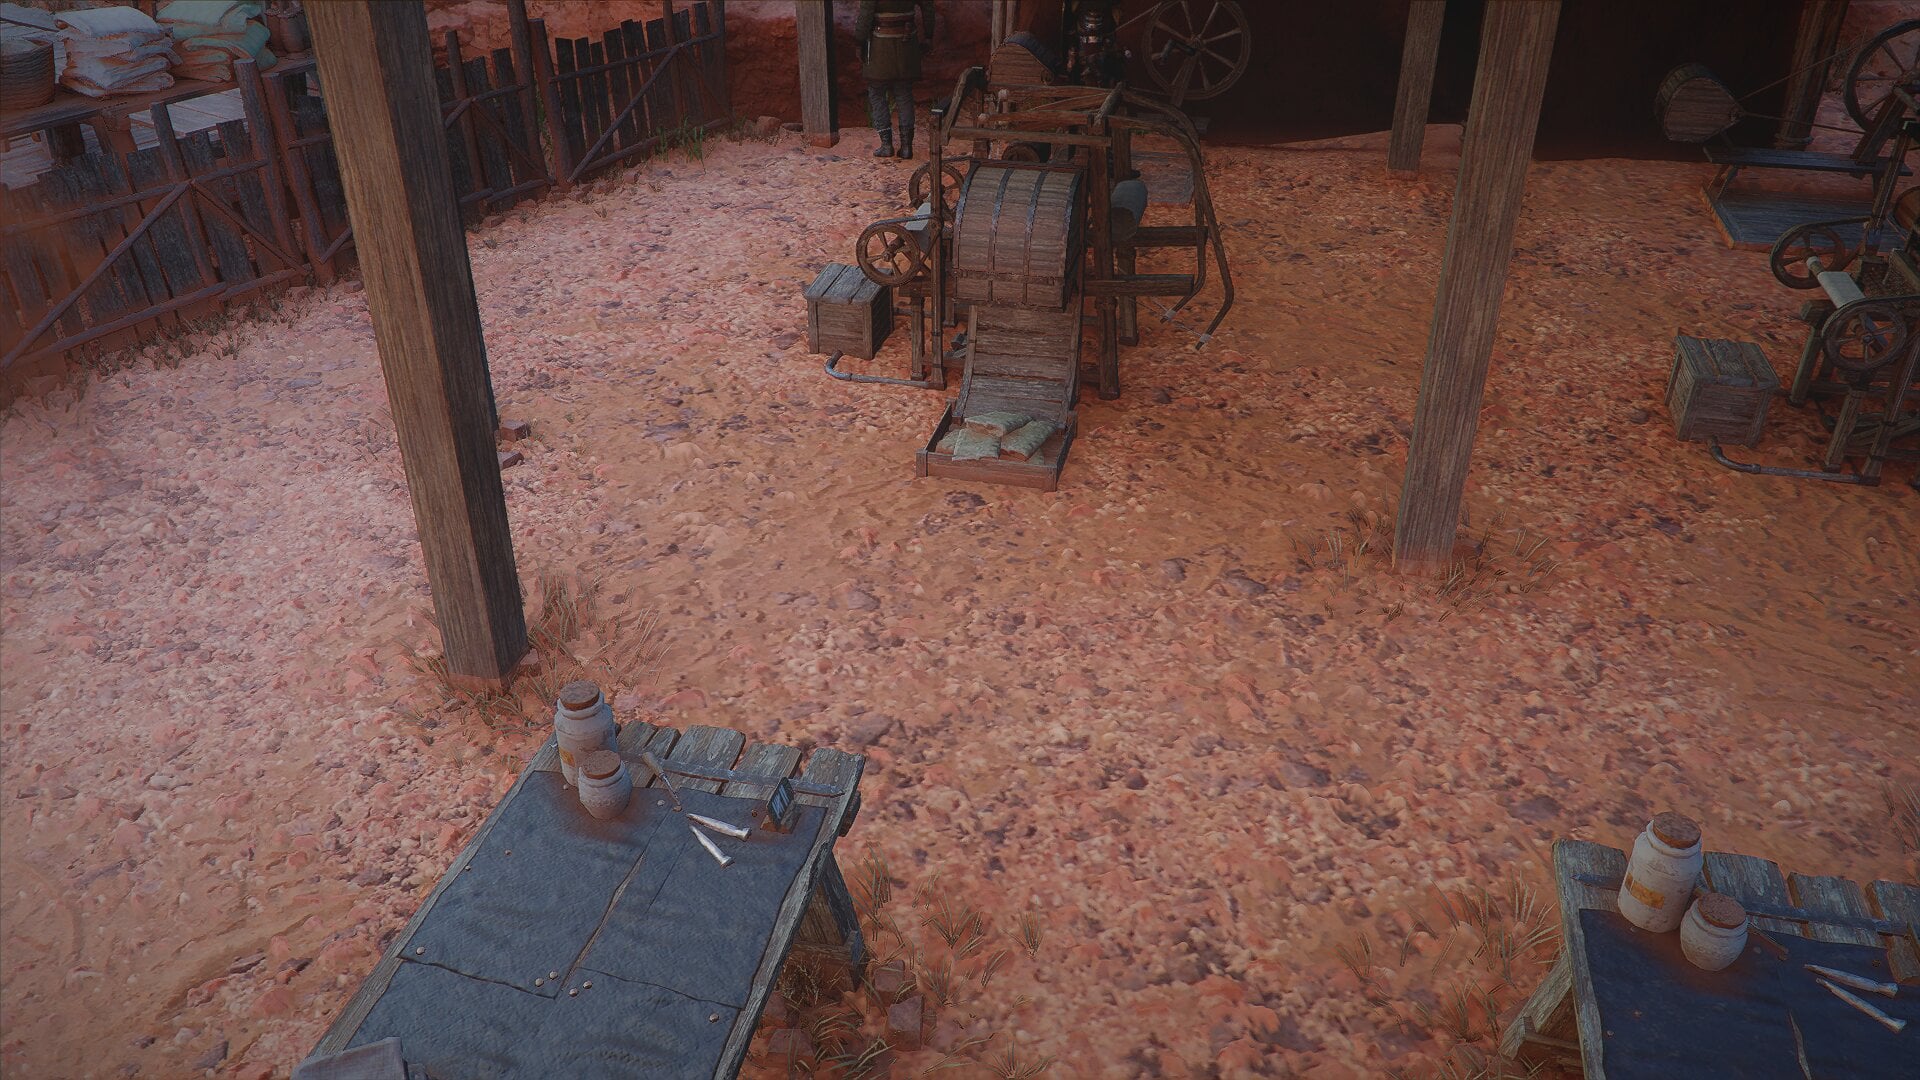
5. Place Dye Vats with Sewing Workstations in Front of Them
When working with the garments recommended in this guide, you’ll need to have installed Dye Vats for each color. Your Tailors’ work process will often start with picking up a piece of cloth and taking it to the Dye Vats before going to their Sewing Stations.
To give them optimal workflow, place your Dye Vats at the back of the shop with four Sewing Workstations in front of them.
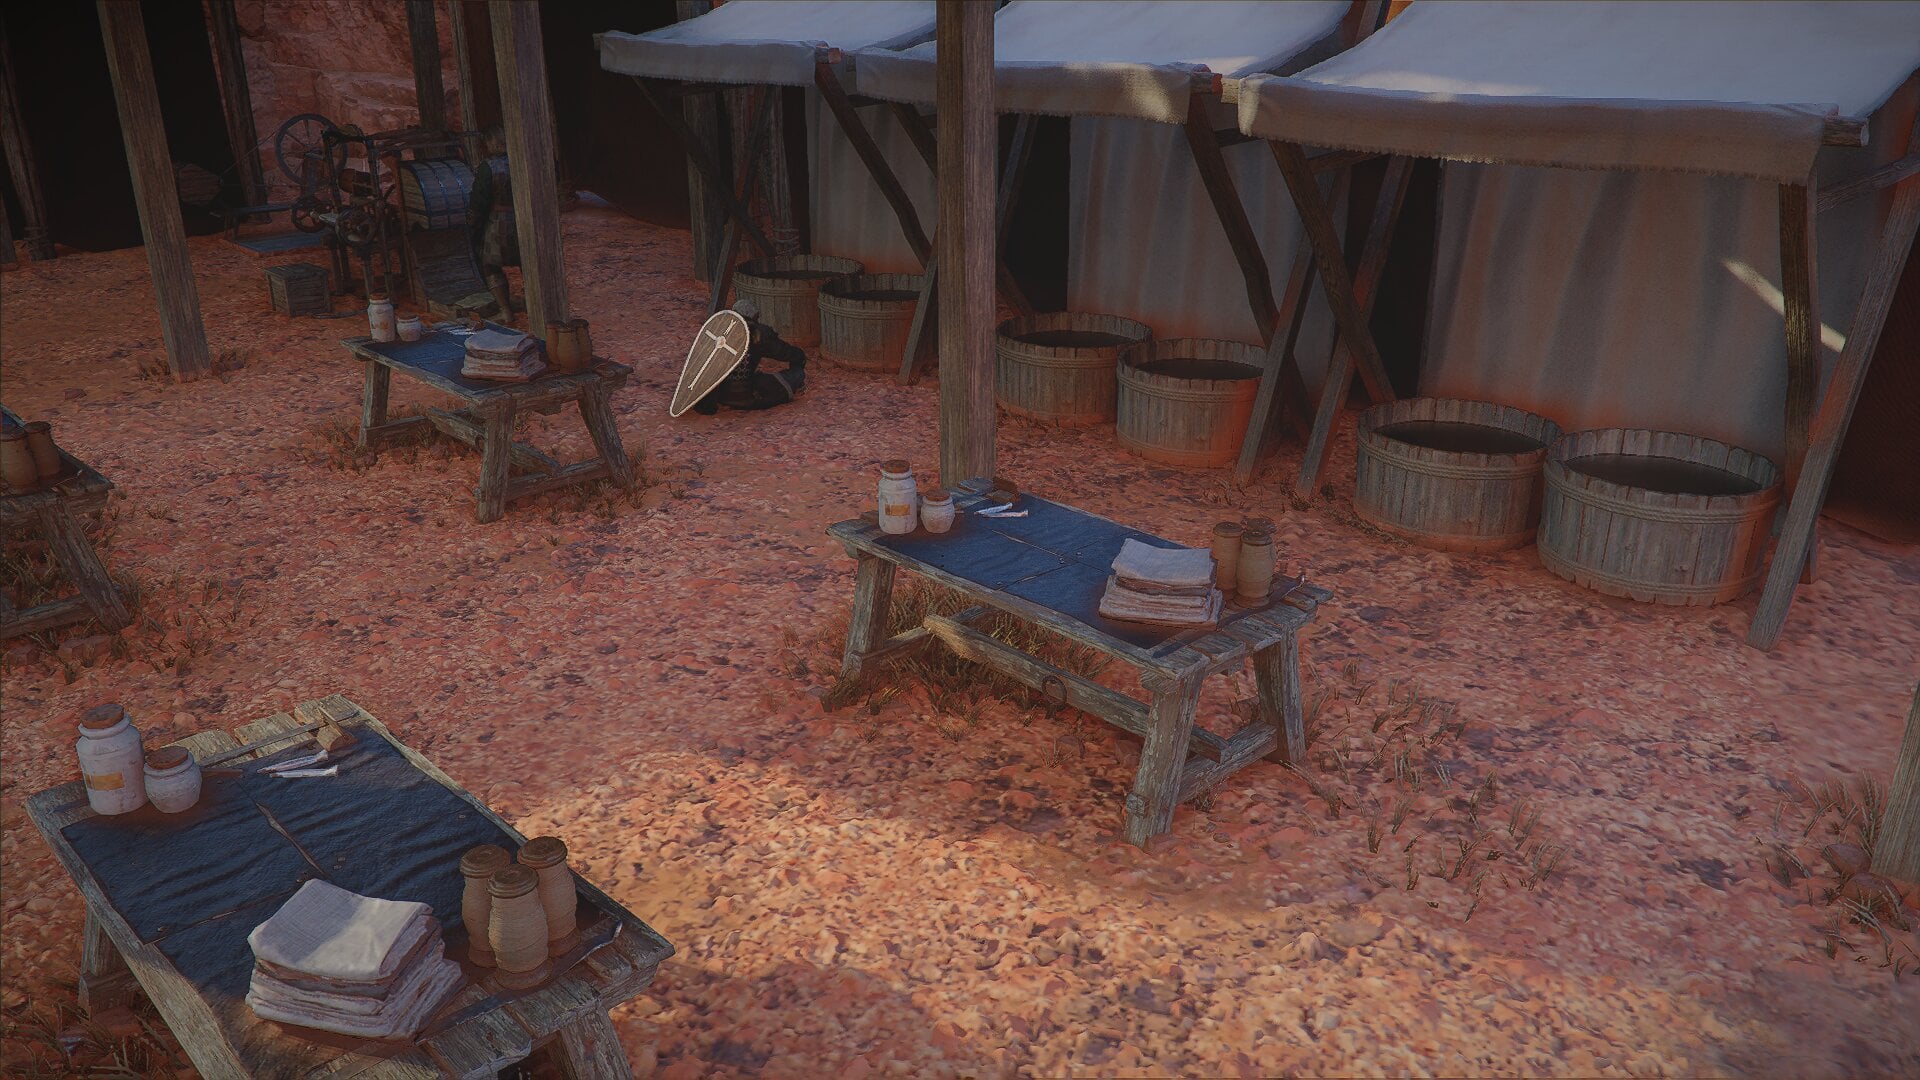
6. Place your Sewing Workstations Close to your Customers
Lastly, leave enough room between your Sewing Workstations for your employees to move freely, and place them as close as possible to the customers to facilitate delivering the finished garments.
Best Goods to Sell for Progression
While leveling up your Tailor’s Shop Popularity, focus on making sure customers leave satisfied rather than on making a profit:
- Lower your Selling Prices so your goods get a Positive Response.
- Make sure to hire more employees at levels 2 and 4.
- Make sure to fill all your selling slots. You unlock more slots with each level.
Focus on these Bonus Effects when selecting which goods to sell:
- Blue: Selling 1/2/3/4 blue goods increases their satisfaction rate by 10/25/50/70%
- Red: Selling 1/2/3/4 red goods increases their satisfaction rate by 10/25/50/70%
- Premium: Selling 2/3/5 goods increases customers by 10/20/30%
- Simple: Selling 1/2/3 goods increases work speed by 10/20/30%
- Practical: Selling 2/3/4 practical goods increases their Popularity by 1/2/3
- Classic: Selling 2/3/4 goods increases special guest visit chance by 10/20/30%
Each Tailor’s Shop has different Popularity Tasks, so you’ll have to adjust your goods accordingly to clear them. The only exception is at Popularity level 4, where all Tailor’s Shop share the Popularity Task of: “Welcome a special guest once.” This is where the Classic Bonus Effect comes in handy.
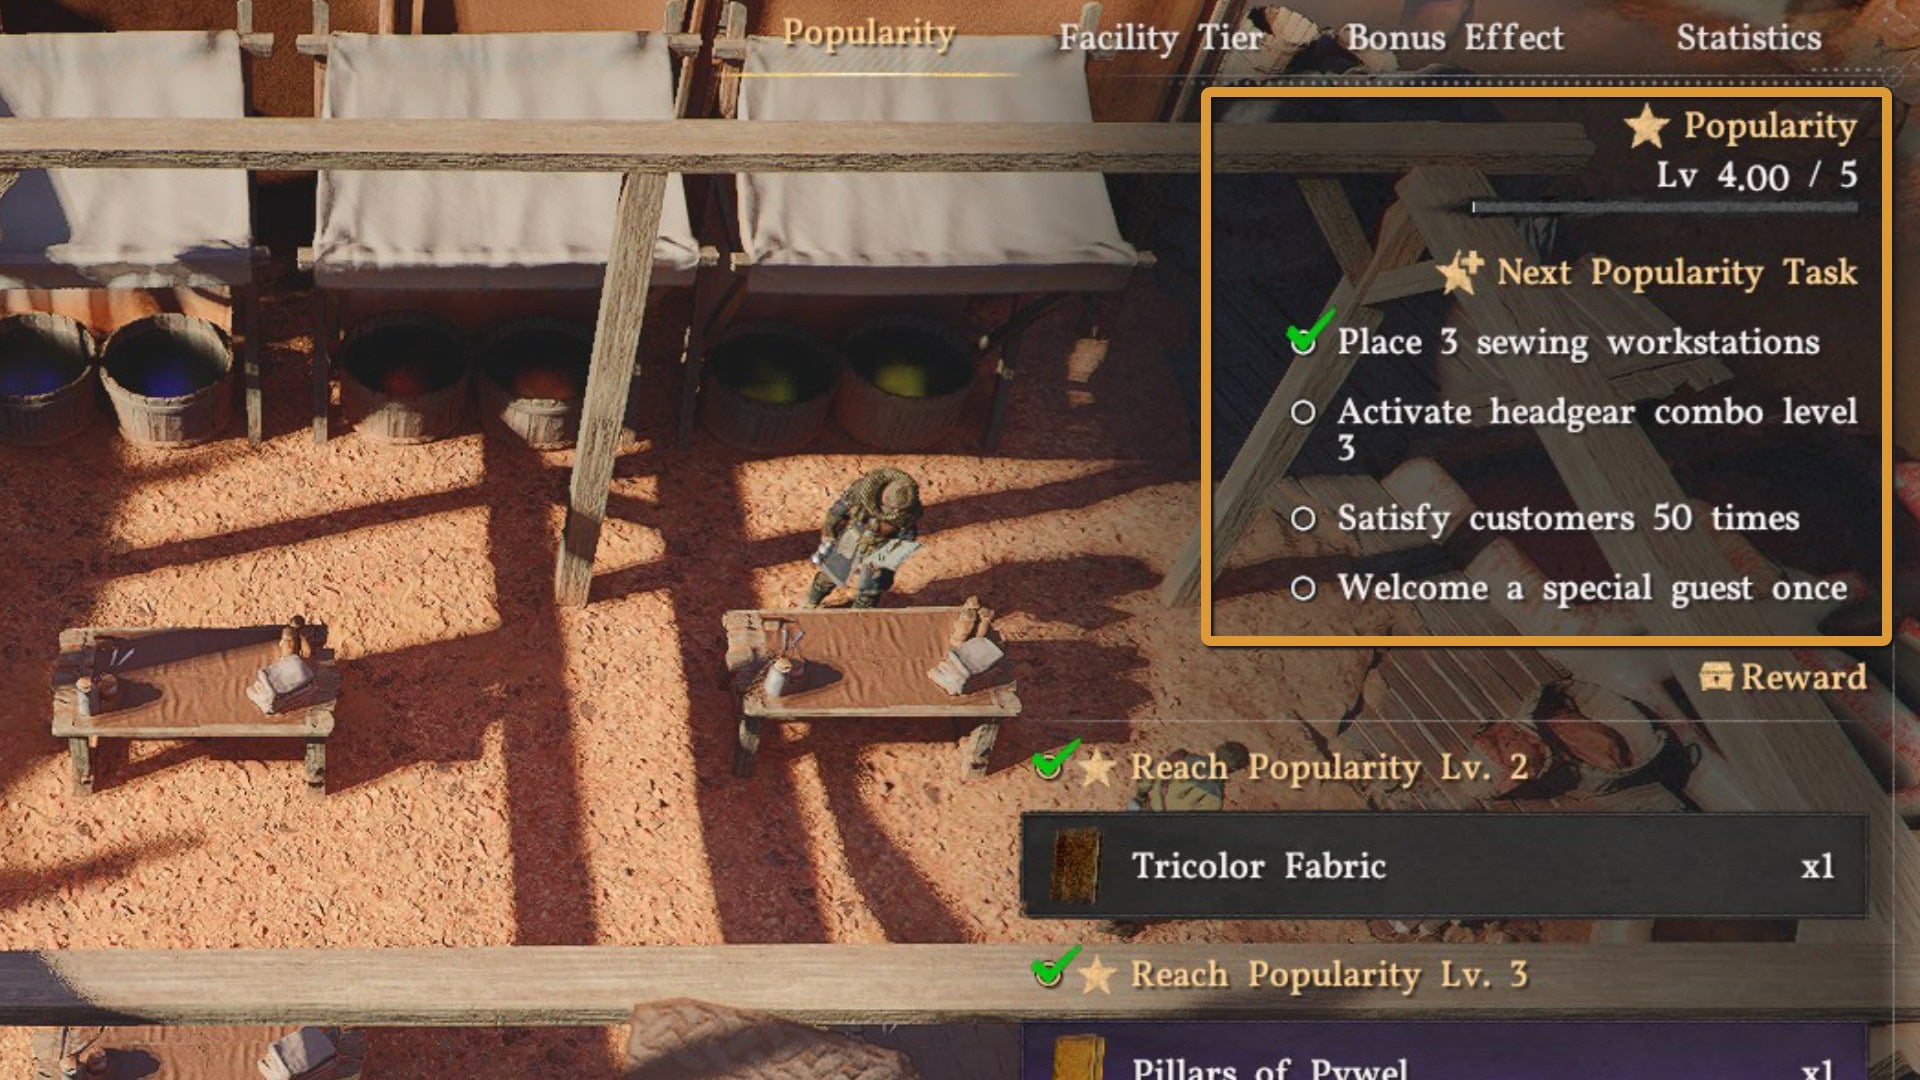
If customers keep losing patience and leaving, review the layout tips above and make sure that customers and employees aren’t getting stuck. You shouldn’t need the Bonus Effects that increase customer patience.
Best Goods to Sell for Profit
Once you reach Popularity level 5, you can switch your focus to increasing your profit margin:
- Increase the Selling Price of your goods to Mixed or Unsure tier of Response.
- Sell goods that align with your Tailor’s Shop Unique Bonus Effect.
Your Tailor’s Shop Unique Bonus Effect appears at the top of the list of active Bonus Effects. These raise your Selling Price and depend on the type of garments you are selling: Armor, Cloaks, or Headgear.
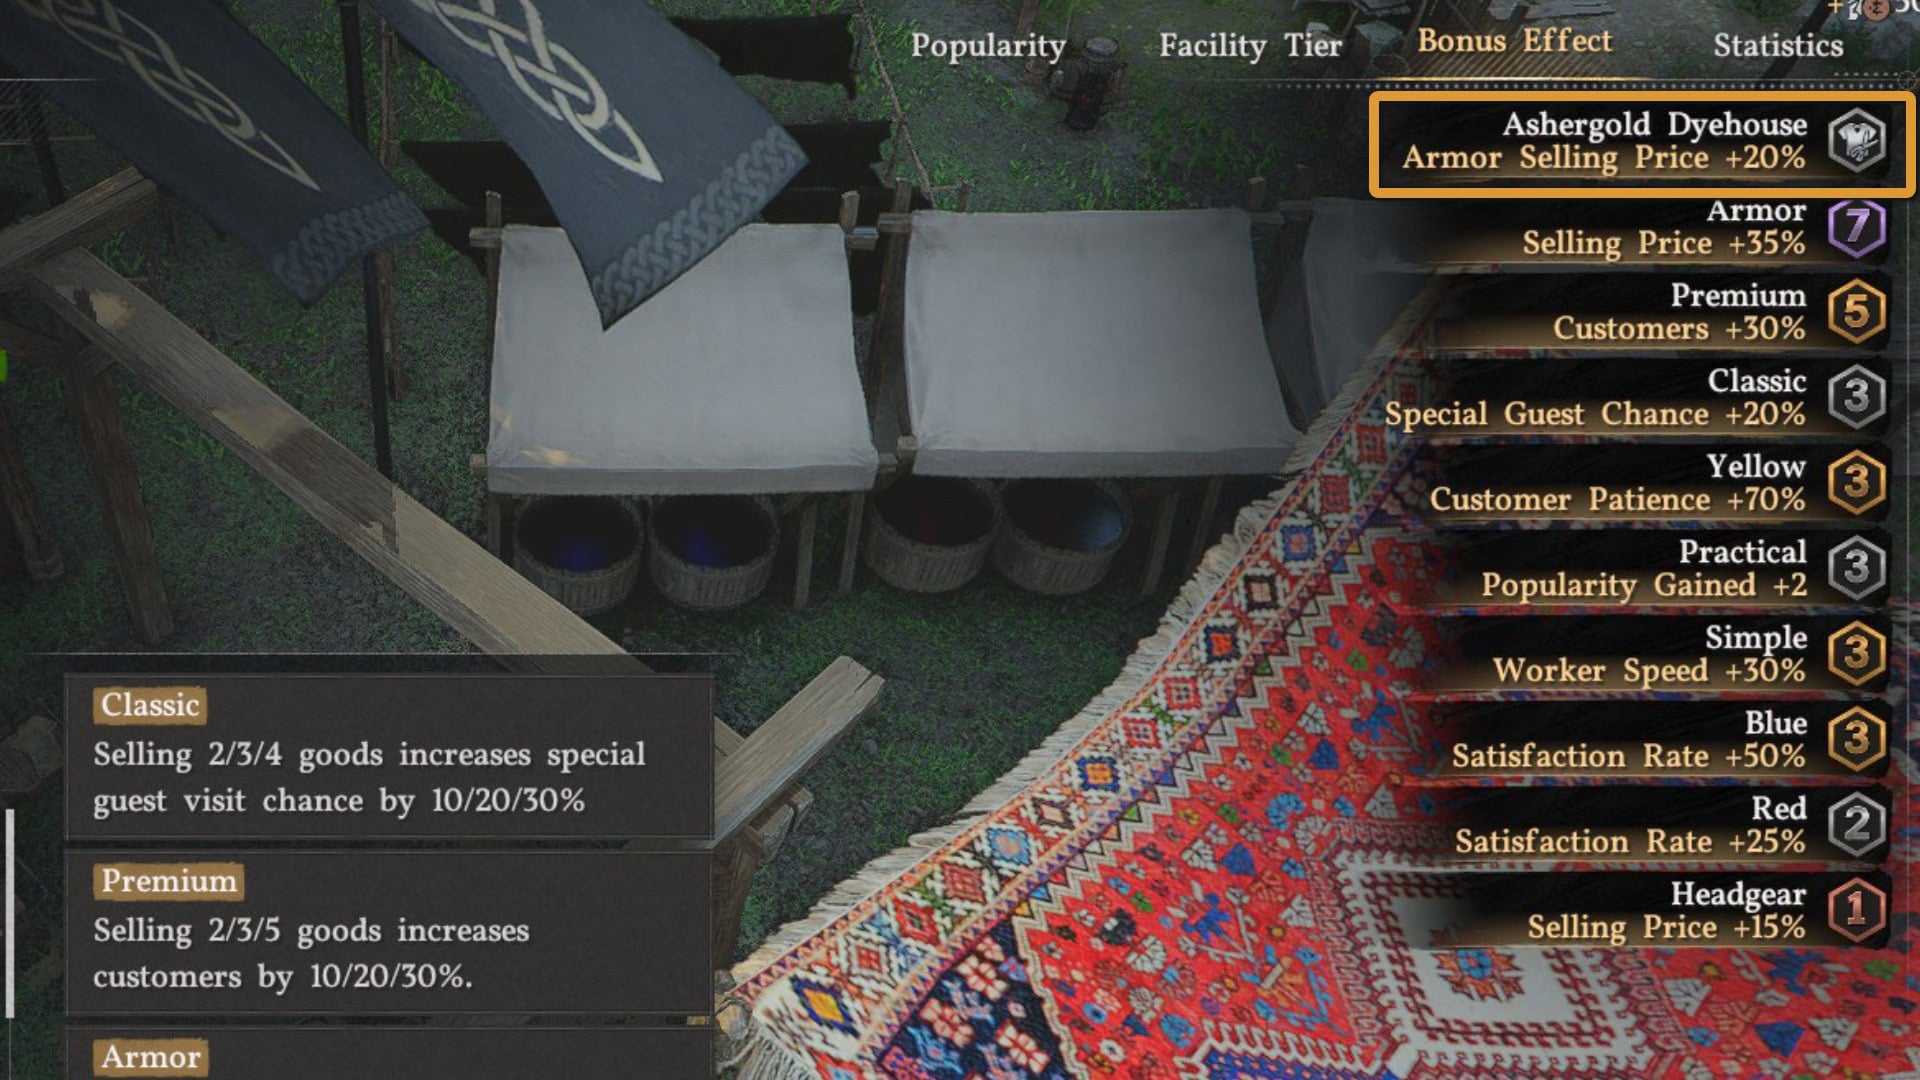
Keeping this in mind, focus on these Bonus Effects when selecting which goods to sell:
- Armor: Selling 1/2/3/4 armor increases their price by 10/20/30/35%
- Cloak: Selling 1/2/3/4 cloaks increases their price by 12/24/36/48%
- Headgear: Selling 1/2/3/4 headgear increases their price by 15/30/45/60%
- Premium: Selling 2/3/5 goods increases customers by 10/20/30%
- Simple: Selling 1/2/3 goods increases work speed by 10/20/30%
Recommended Goods to Sell for an Armor Tailor’s Shop
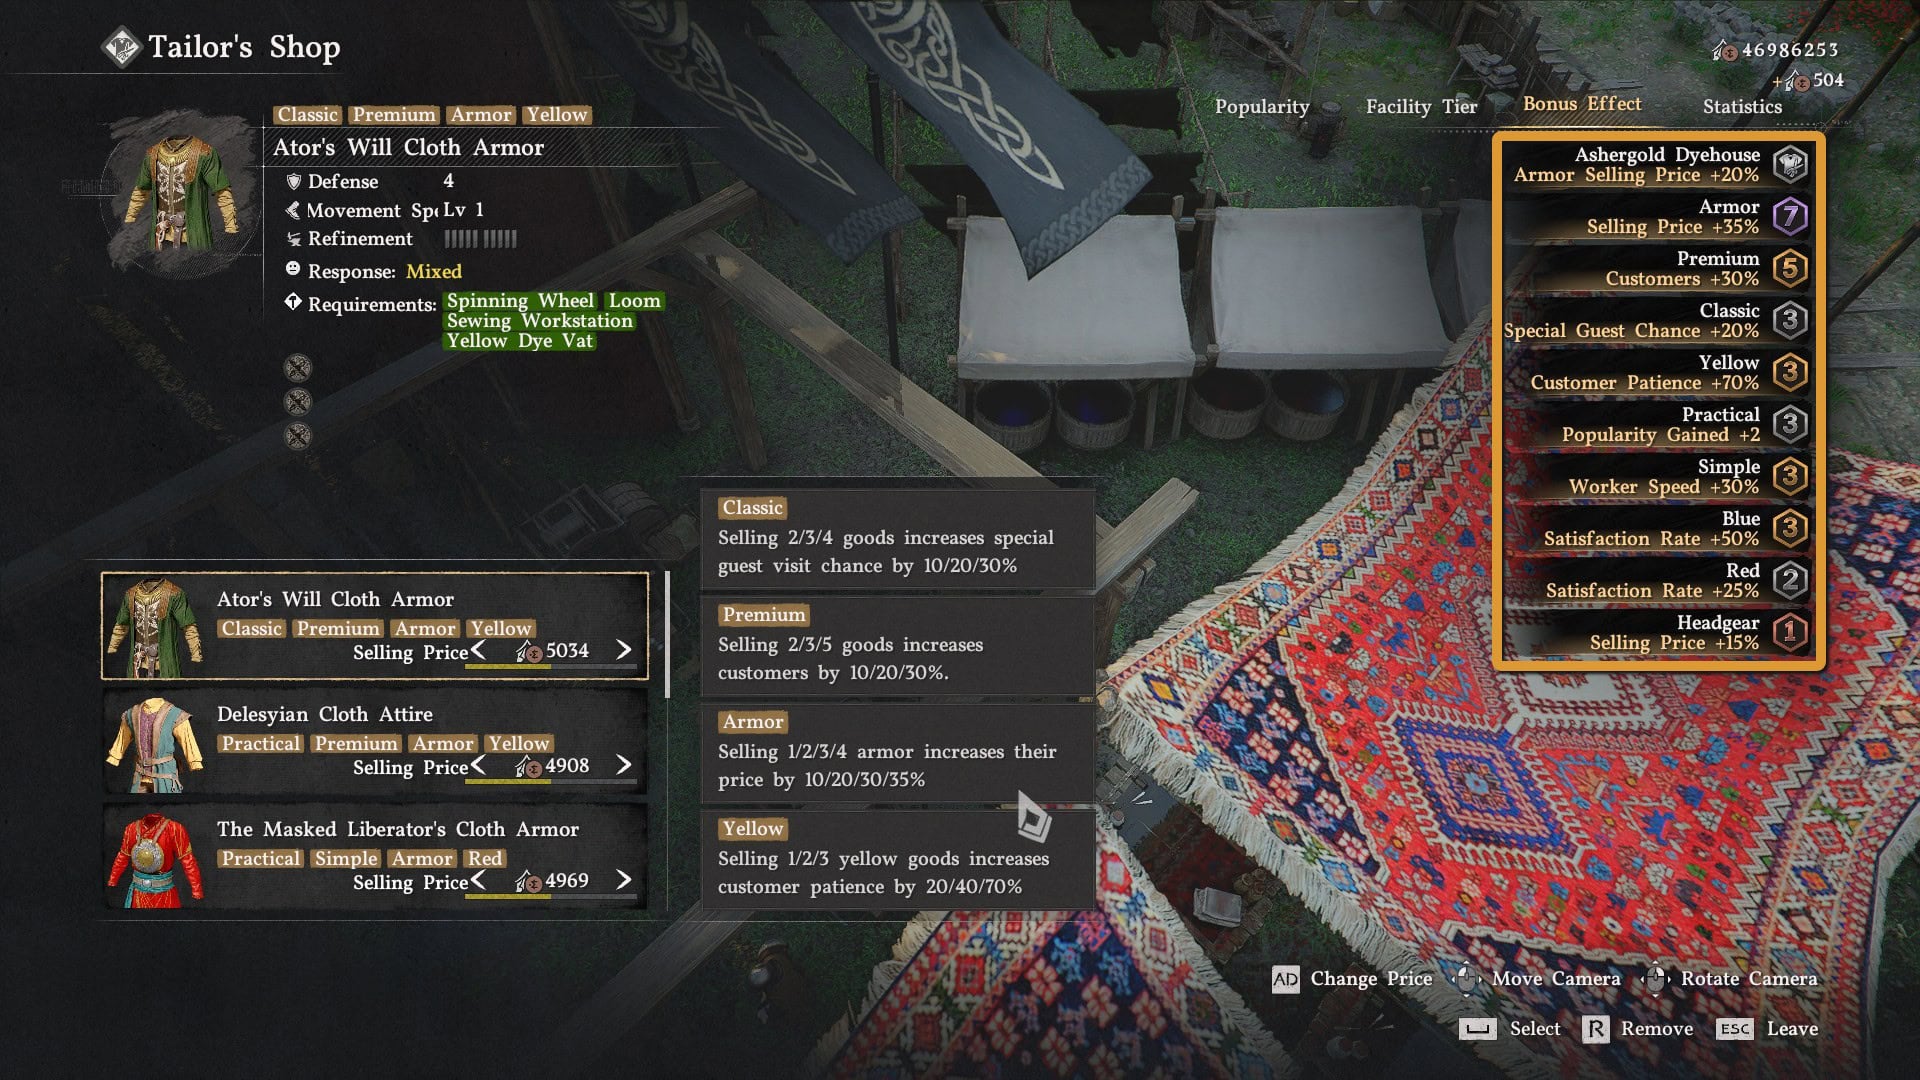
If you’re managing a Tailor’s Shop with an Armor Unique Bonus Effect, these are the garments I recommend selling along with the Response tier to set for each one:
- Ator’s Will Cloth Armor – Mixed
- Delesyian Cloth Attire – Mixed
- The Masked Liberator’s Cloth Armor – Mixed
- Tariv Cloth Attire – Mixed
- Sea Reaver’s Combat Suit – Mixed
- Scholastone Uniform – Unsure
- Dark Ringleader’s Cloth Helm – Mixed
- Tiorant Cloth Armor – Unsure
This setup gives you:
- Unique Bonus Effect: Armor Selling Price +20%
- Max Level Armor Bonus Effect: Selling Price +35%
- Max Level Premium Bonus Effect: Customers +30%
- Max Level Simple Bonus Effect: Worker Speed +30%
Additionally, you’ll get bonuses to Special Guest Chance, Popularity Gained, and Satisfaction Rate from the Bonus Effects that this set triggers.
Recommended Goods to Sell for a Cloak Tailor’s Shop
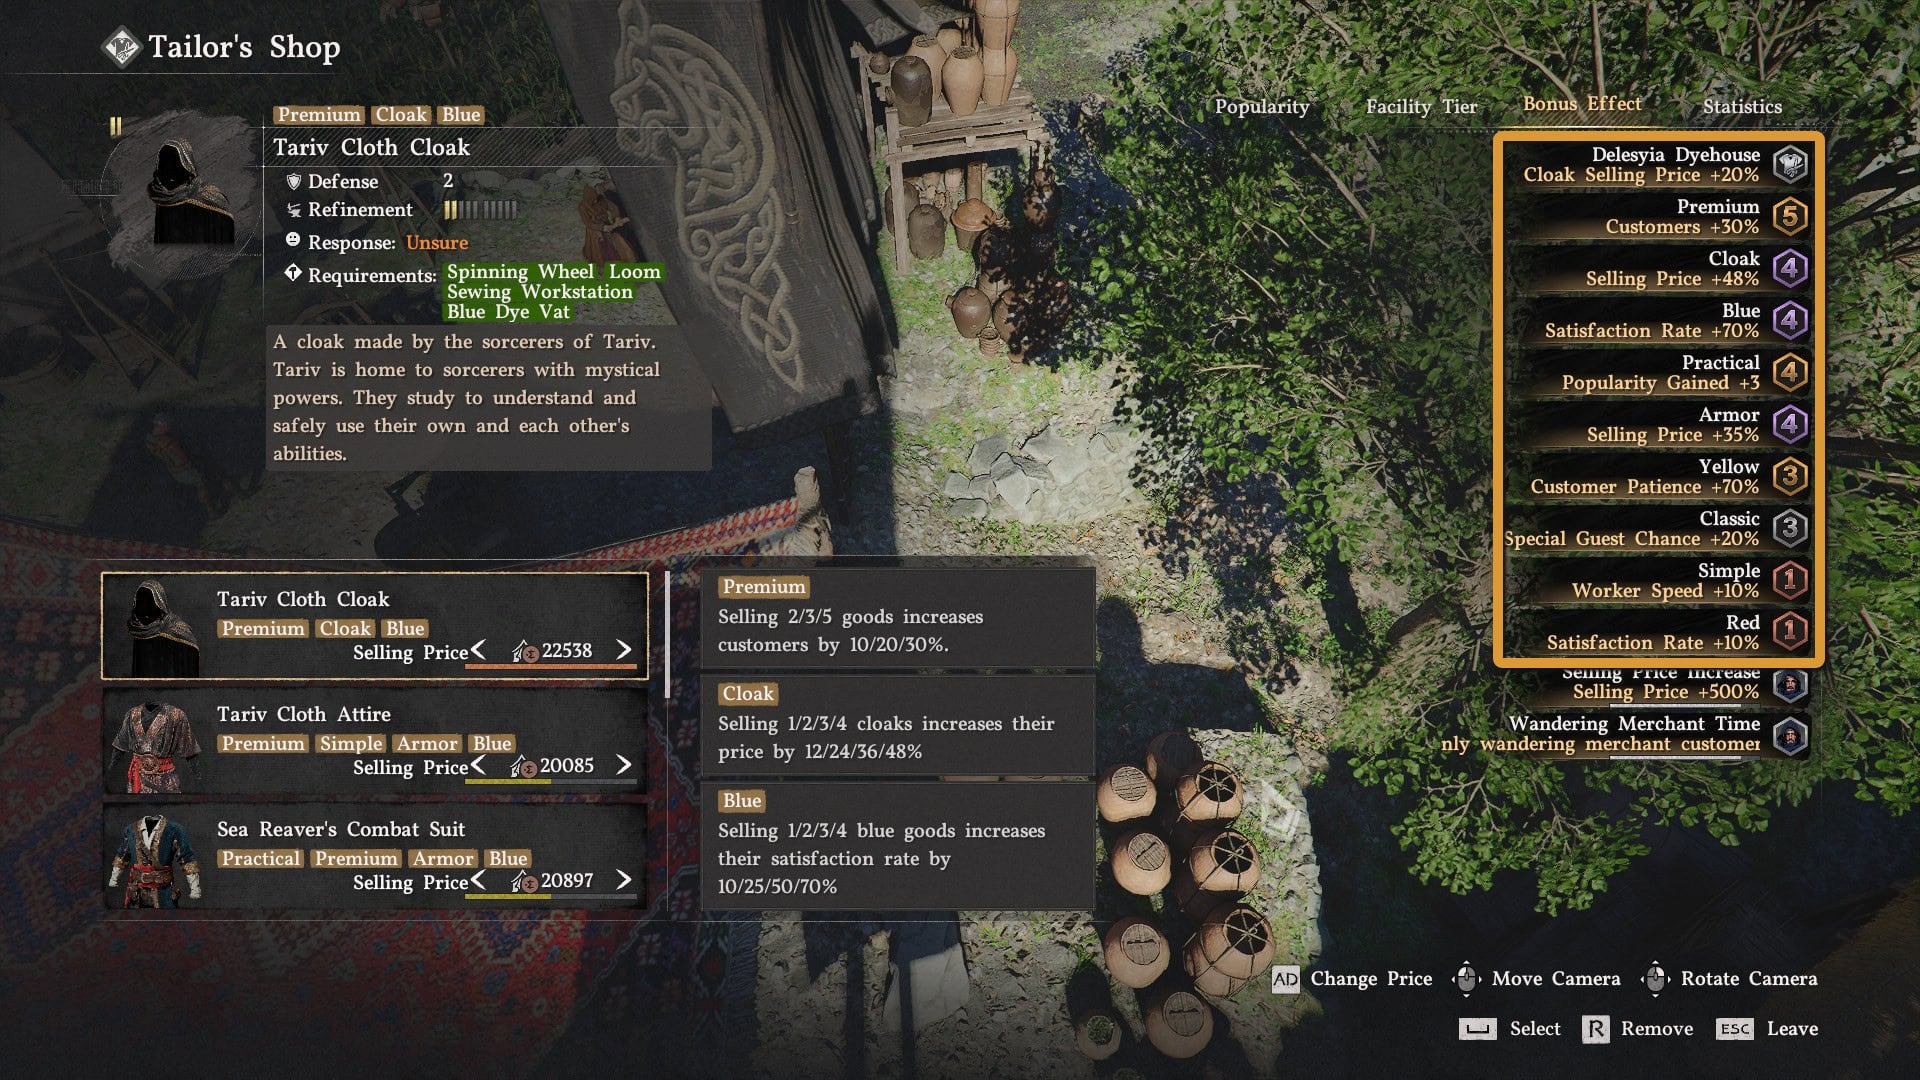
If you’re managing a Tailor’s Shop with a Cloak Unique Bonus Effect, these are the garments I recommend selling, along with the Response tier to set for each one:
- Tariv Cloth Cloak – Unsure
- Tariv Cloth Attire – Mixed
- Sea Reaver’s Combat Suit – Mixed
- Ator’s Will Cloth Armor – Mixed
- Delesyian Cloth Attire – Mixed
- Wolf Tracker Cloth Cloak – Mixed
- Delesyian Cloth Cloak – Unsure
- Tiorant Cloth Cloak – Unsure
This setup gives you:
- Unique Bonus Effect: Cloak Selling Price +20%
- Max Level Cloak Bonus Effect: Selling Price +48%
- Max Level Armor Bonus Effect: Selling Price +35%
- Max Level Premium Bonus Effect: Customers +30%
Additionally, you’ll get bonuses to Satisfaction Rate, Popularity Gained, Customer Patience, Special Guest Chance, and Worker Speed from the Bonus Effects triggered by this set.
Recommended Goods to Sell for a Headgear Tailor’s Shop
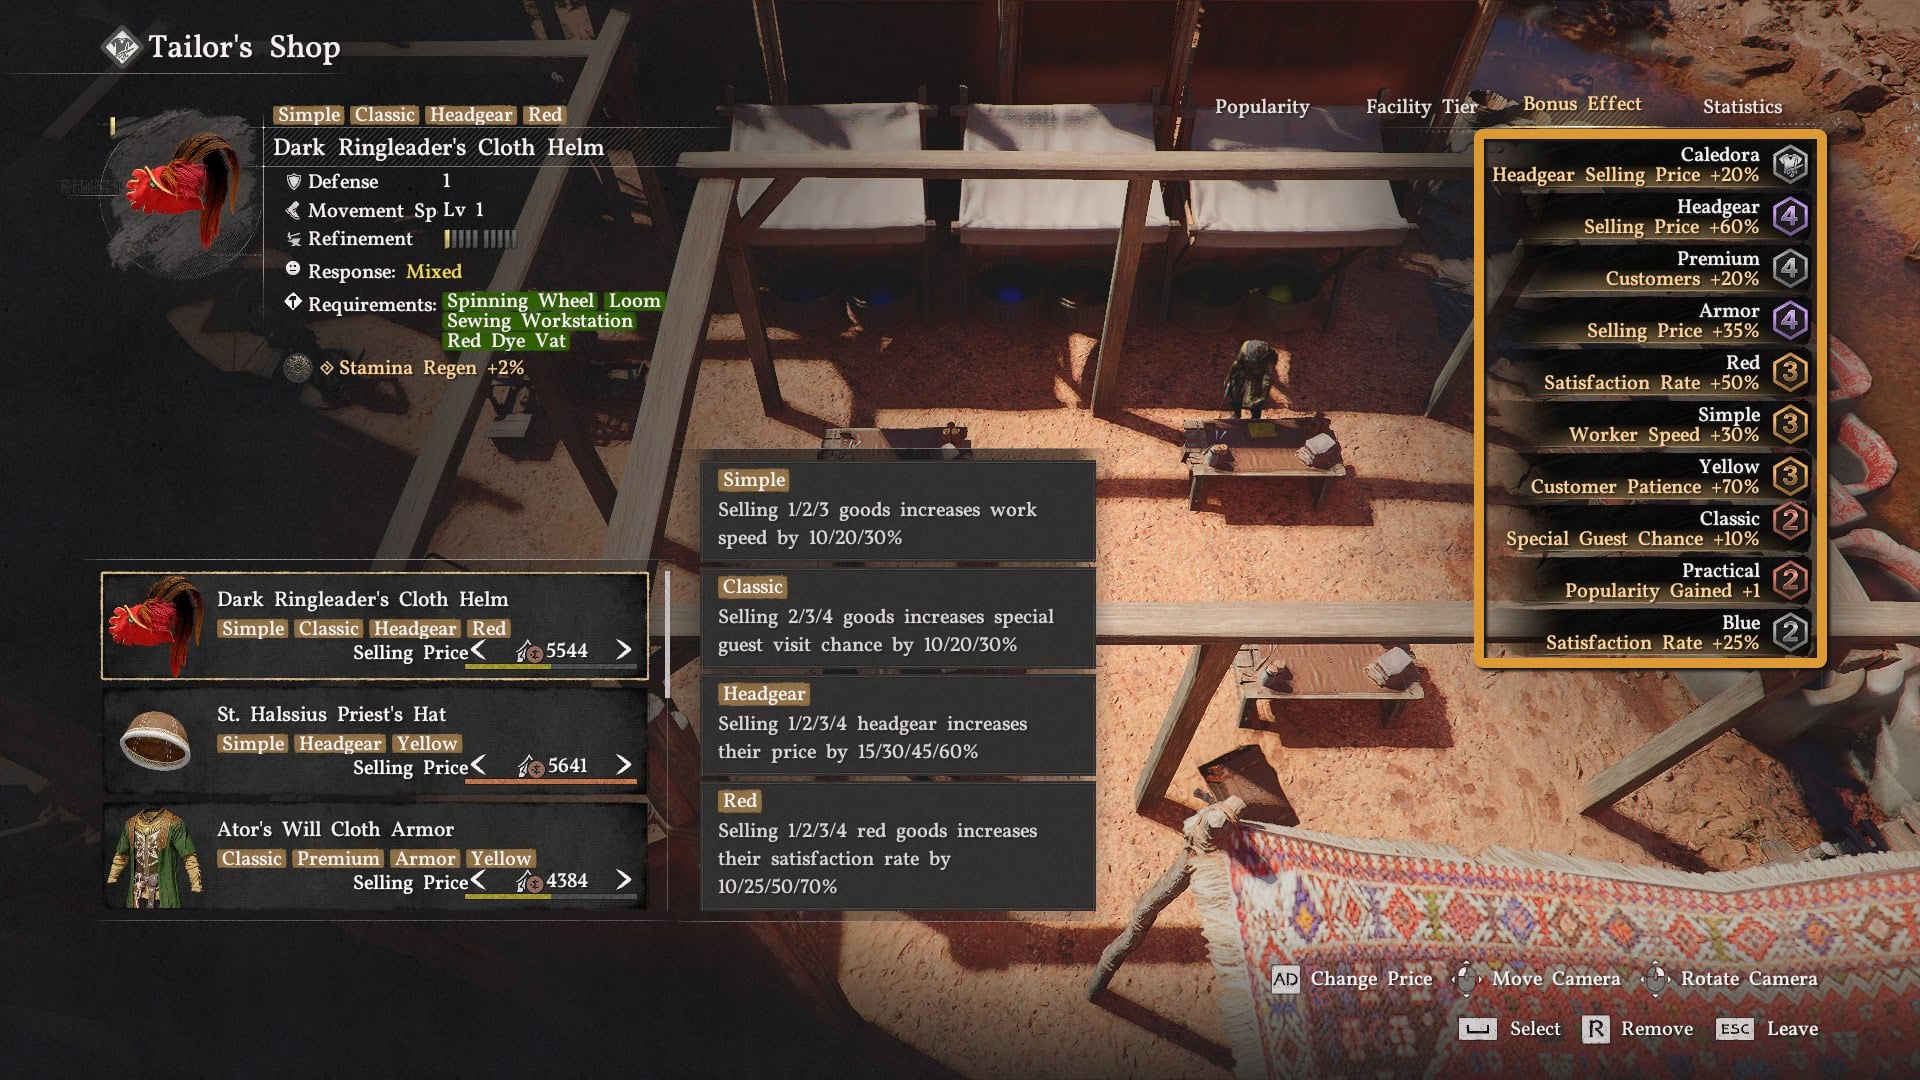
If you’re managing a Tailor’s Shop with a Headgear Unique Bonus Effect, these are the garments I recommend selling, along with the Response tier to set for each one:
- Dark Ringleader’s Cloth Helm – Mixed
- St. Halssius Priest’s Hat – Unsure
- Ator’s Will Cloth Armor – Mixed
- Delesyian Cloth Attire – Mixed
- Sea Reaver’s Combat Suit – Mixed
- Tariv Cloth Attire – Mixed
- Radein Cloth Cap – Favorable
- Drish Cloth Cap – Favorable
This setup gives you:
- Unique Bonus Effect: Headgear Selling Price +20%
- Max Level Headgear Bonus Effect: Selling Price +60%
- Max Level Amor Bonus Effect: Selling Price +35%
- Max Level Simple Bonus Effect: Worker Speed +30%
- Level 2 Premium Bonus Effect: Customers +20%
Very few Headgear garments have a strong array of Bonus Effects, so this set uses the Armor Bonus Effect to make up for it as much as possible. Additionally, you’ll get bonuses to Satisfaction Rate, Customer Patience, Special Guest Chance, and Popularity Gained from the Bonus Effects triggered by this set.
List of Rewards for Each Tailor’s Shop you can Lease
All Tailor Shops
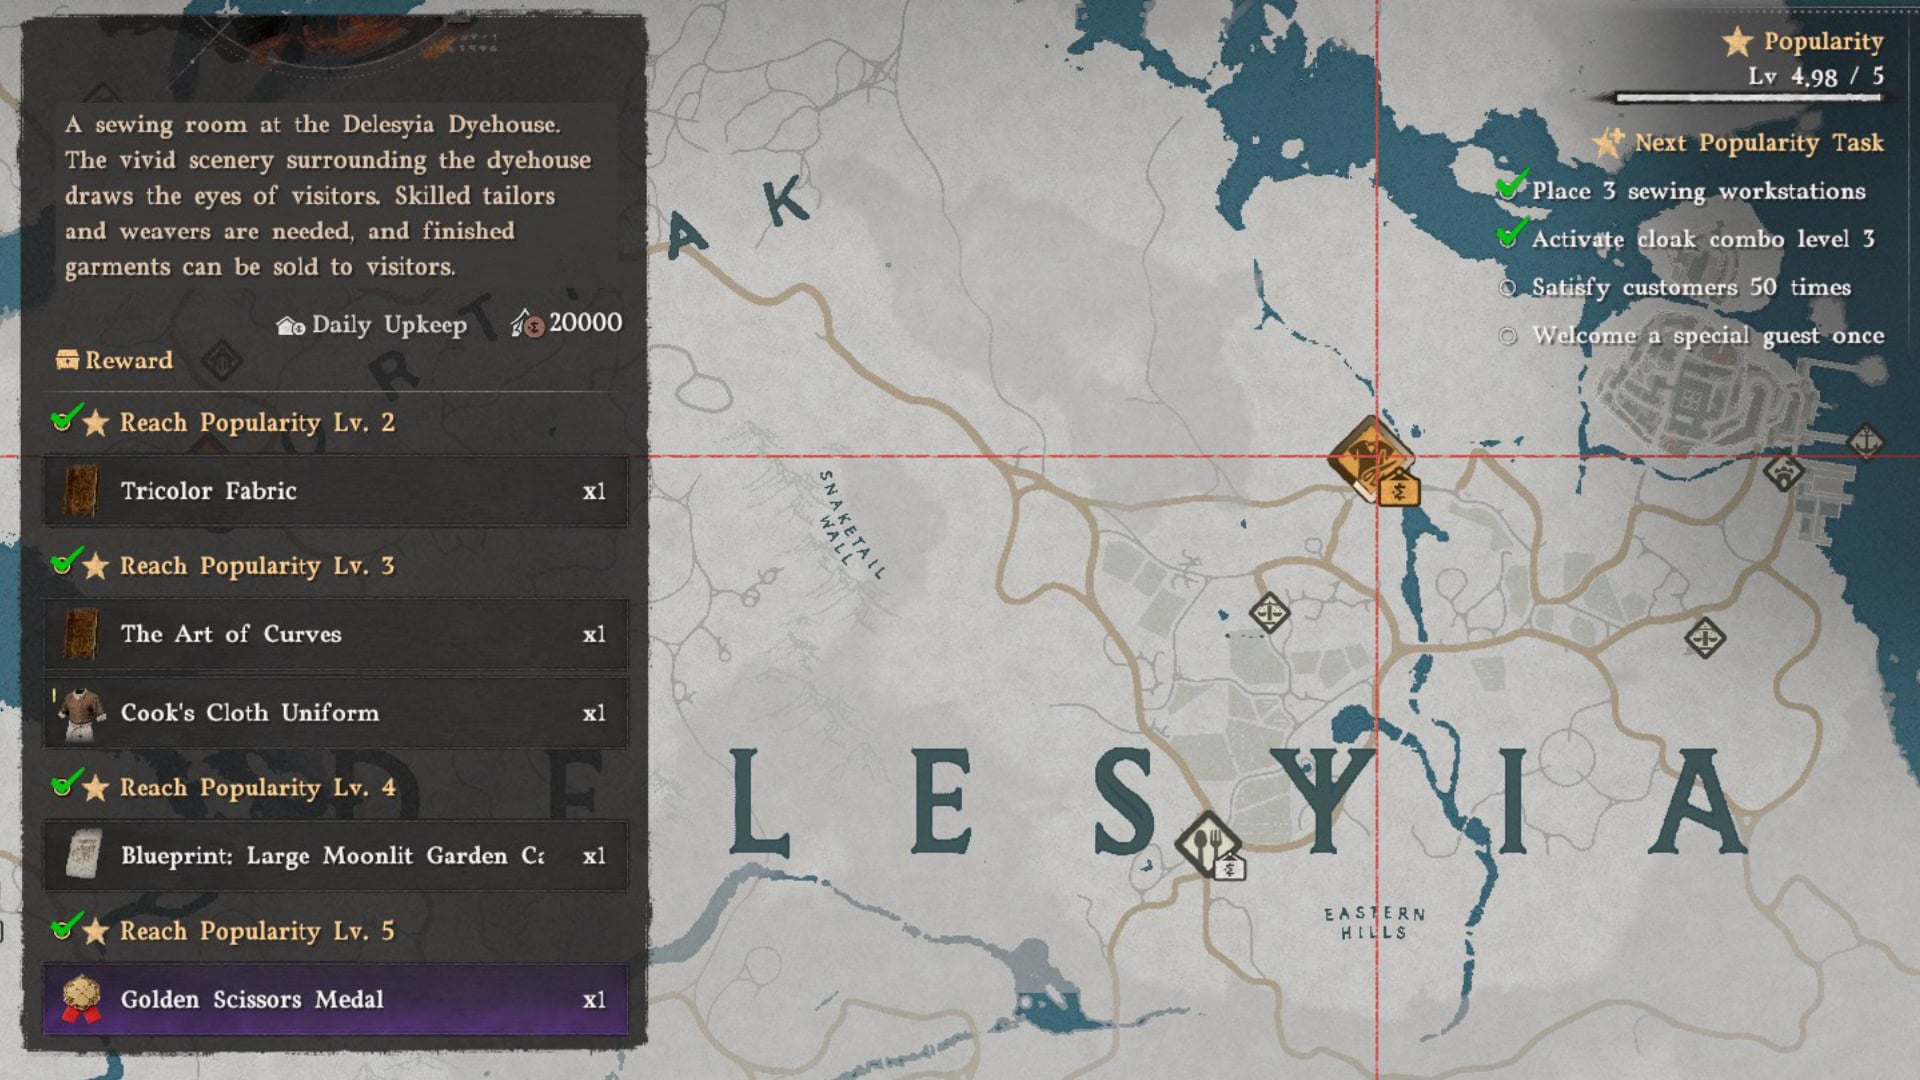
Popularity Lv. 2: Tricolor Fabric
Popularity Lv. 5: Golden Scissors Medal
Caledora Tailor’s Shop
Popularity Lv. 3: Pillars of Pywel, Blacksmith’s Leather Armor
Popularity Lv. 4: Blueprint: Sunset Plaid Carpet
Delesyia Dyehouse Tailor’s Shop
Popularity Lv. 3: The Art of Curves, Cook’s Cloth Uniform
Popularity Lv. 4: Blueprint: Large Moonlit Garden Carpet
Marshell Tailor’s Shop
Popularity Lv. 3: Good Windows, Better Homes, Architect’s Cloth Workwear
Popularity Lv. 4: Blueprint: Large Rosy Dragonscale Carpet
Frequently Asked Questions
To have the best possible income, choose the Marshell Tailor’s Shop due to its Unique Bonus Effect. Do all of them for the rewards.
Divide your Tailor’s Shop into workspaces for your Tailors and Weavers. Place Spinning Wheels with Looms in front of them. Do the same for Dye Vats and Sewing Workstations. Place your Workstations as close as possible to the customers.
It may be due to rain. Customers may leave when it rains, so place your waiting area under a roof.
Usually because customers or workers are getting stuck. Check your layout and make sure everyone has room to move.
Lower your selling prices until your garments get a Positive Response, and keep all your selling slots filled. Hire more workers at Popularity levels 2 and 4. The best Bonus Effects to target are Blue, Red, Premium, Simple, Practical, and Classic.
Every Tailor’s Shop has the task “Welcome a special guest once” at Popularity level 4. Sell Classic garments, since their Bonus Effect raises the chance of a special guest visit by up to 30%.
Once you reach Popularity level 5, raise prices to the Mixed or Unsure Response tier. Then sell garments that match your Tailor’s Shop Unique Bonus Effect, which is shown at the top of the Bonus Effect list.
Every Tailor’s Shop gives Tricolor Fabric at Popularity level 2 and Golden Scissors Medal at level 5.
We have complete guides for each facility you can lease and manage in Crimson Desert: Charting the Unknown DLC.